In previous post i have explain what is RODC and the benefits of it. If you not read it yet you can find it in here.
Before install a RODC in a domain environment it need to meet the following requirements,
- Forest function level should be windows 2003 server or higher
- Needs at least one writable domain controller running windows server 2008 or higher
If forest have any DC running windows server 2003 we need to adjust permissions on DNS application directory partition to allow them to replicate to RODC. It can be done by running adprep /RODCprep from windows 2012 server installation disk \support\adprep folder.
In my demo setup i do have a domain called contoso. Before start lets check the forest function level.
- To do that, log in to the DC as domain admin and open "Server Manager"
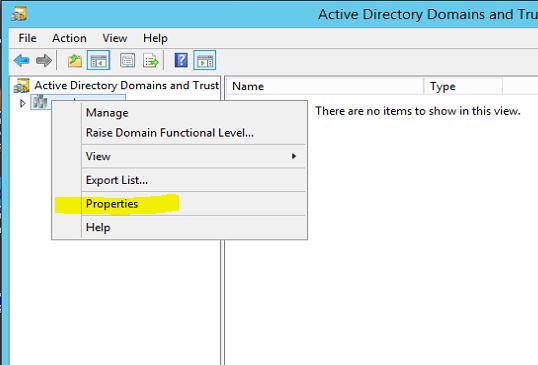
- Then from tools click on "Active Directory Domains and Trust"
- Right click on domain and select "Properties"
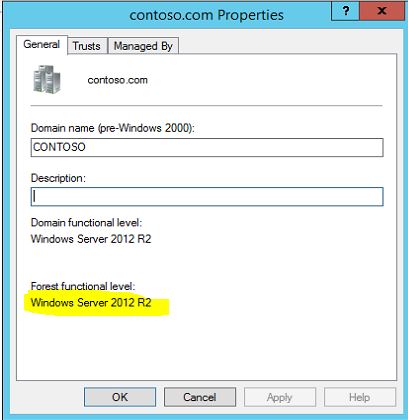
As we can see here its runs with windows server 2012 R2 so we do not need to prepare domain with adprep /RODCprep
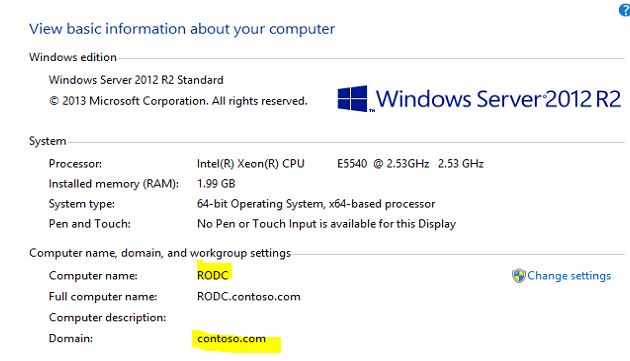
To install RODC i have a fresh installed windows 2012 R2 server and its already added to the domain. (Here i do not going to explain how to add it to domain as in previous in my posts i explain how to add server to a domain)
- To begin the setup first make sure you login as a domain administrator to the server.
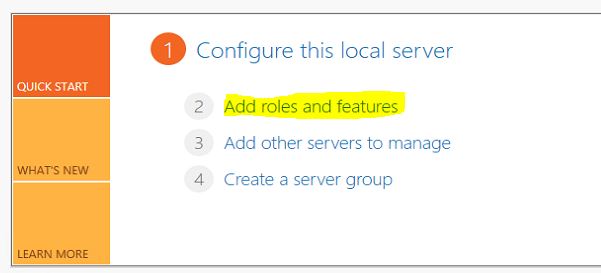
- Open "Server Manager" and from dashboard window click on "Add roles and features"
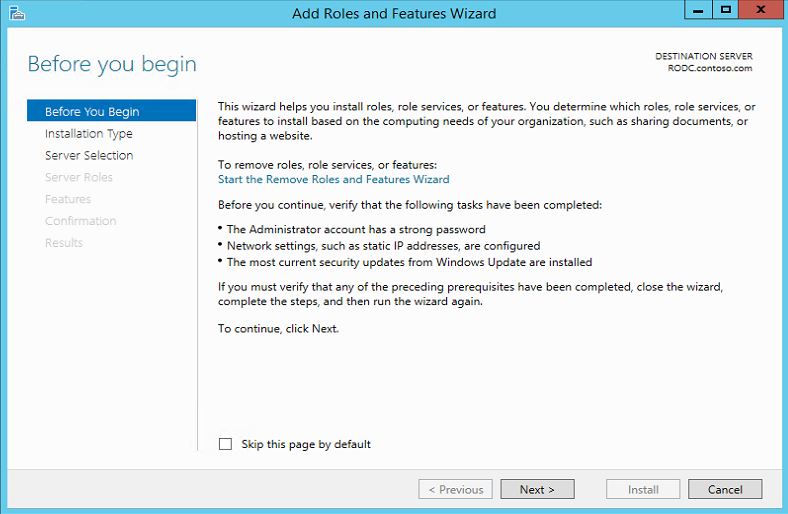
- It will open up the wizard and click on "next" to continue.
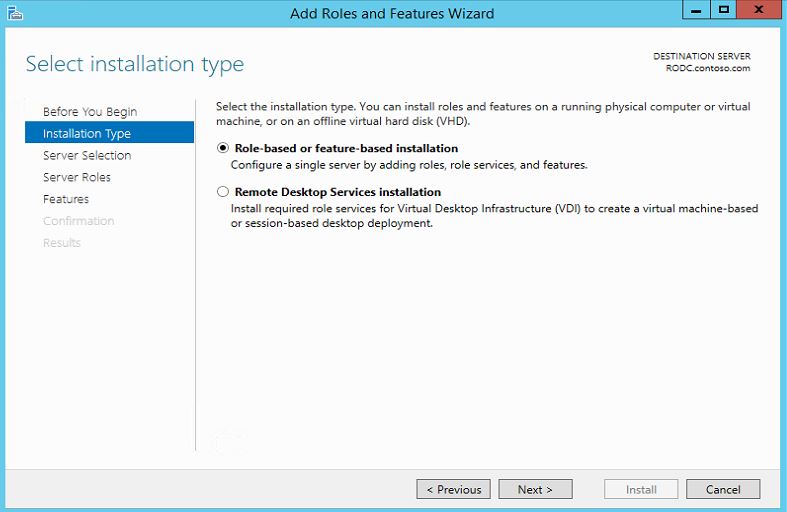
- In next window select "Role-based or feature-based installation" and click next
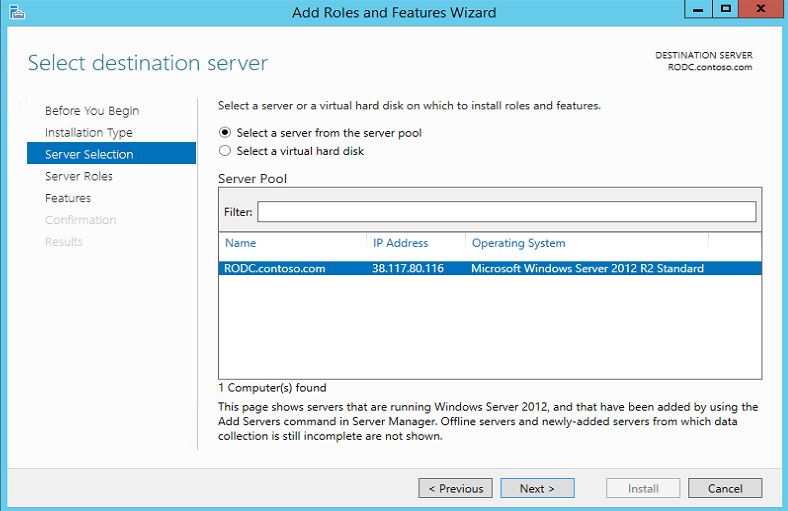
- In next window by default it select the current server and click next to continue
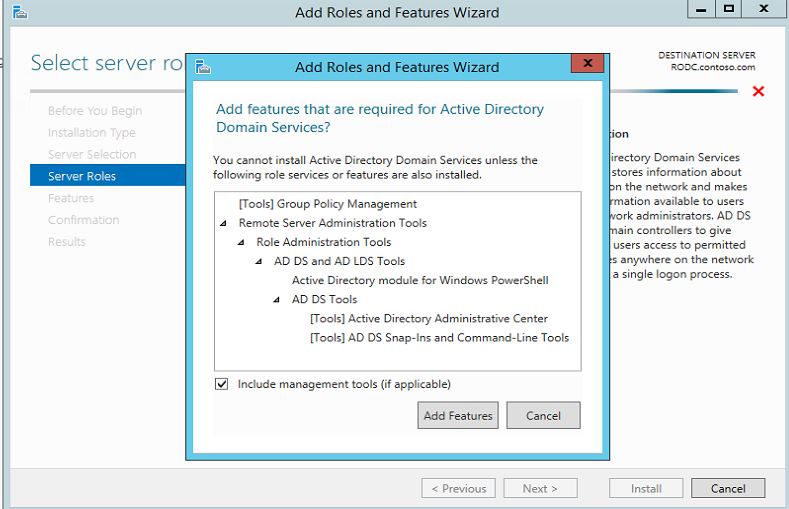
- In next window click on "Active Directory Domain Service" and it will pop up with the features. click on "add features" to continue and then "next"
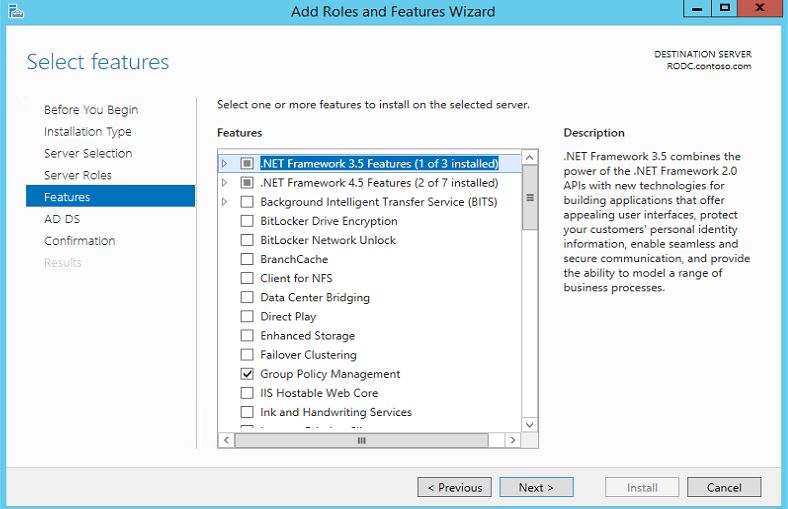
- In next window will let it run with default features. click on next to continue
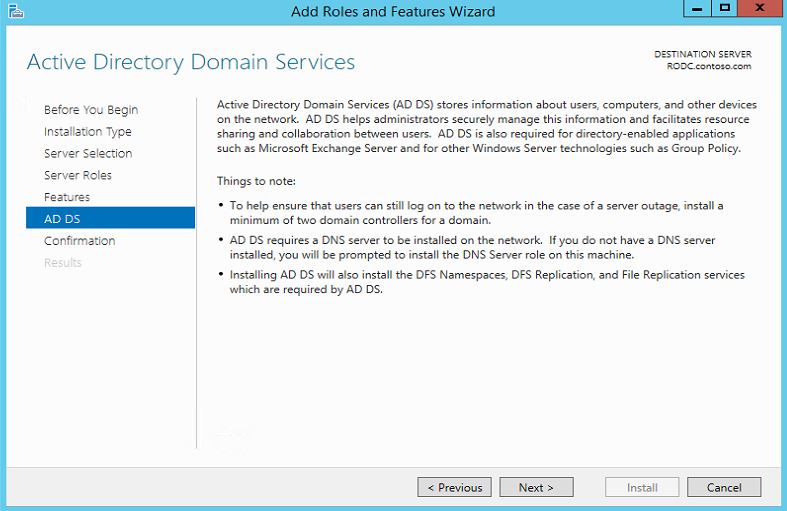
- In next window it will gives brief description about the AD DS and click next to continue
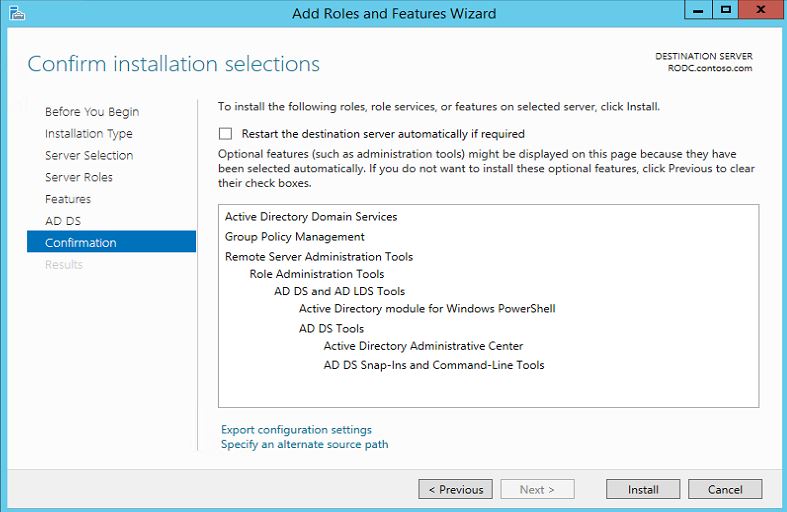
- Next window it will ask for confirmation and click ok "install" to begin the service installation
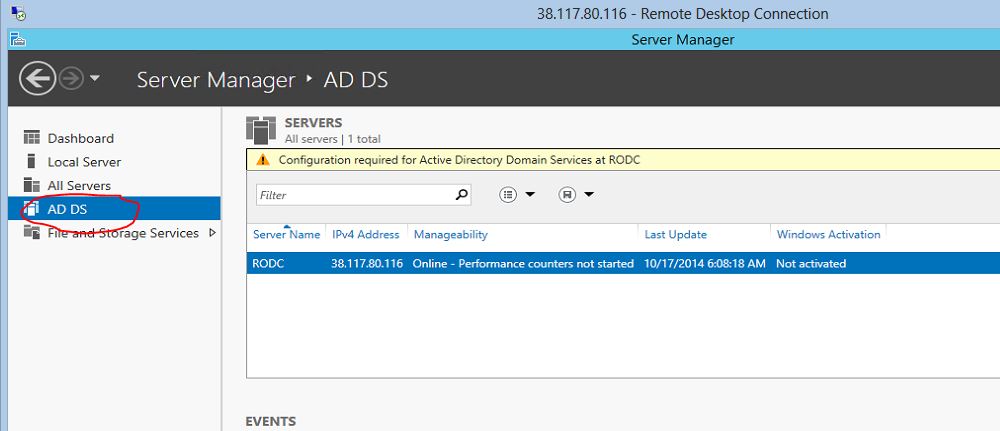
- Once installation done open "Server Manager" and click on "AD DS"
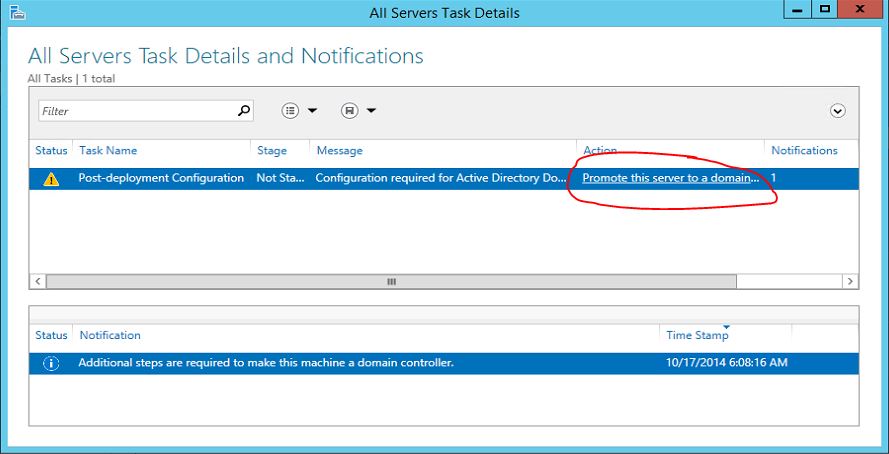
- Then in right hand side panel click "More" as in image
- Then it will open up the wizard and click on option "Promote this server to a domain…"
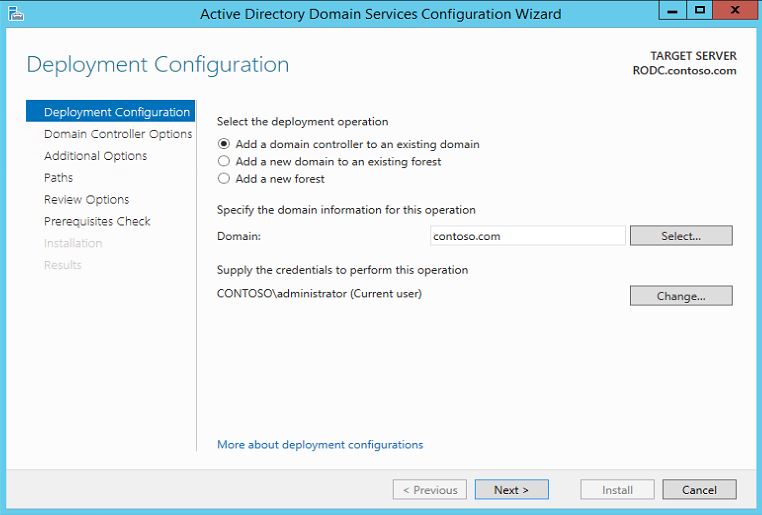
- It will open up the configuration wizard. in here we will keep the default selection and click on next to continue
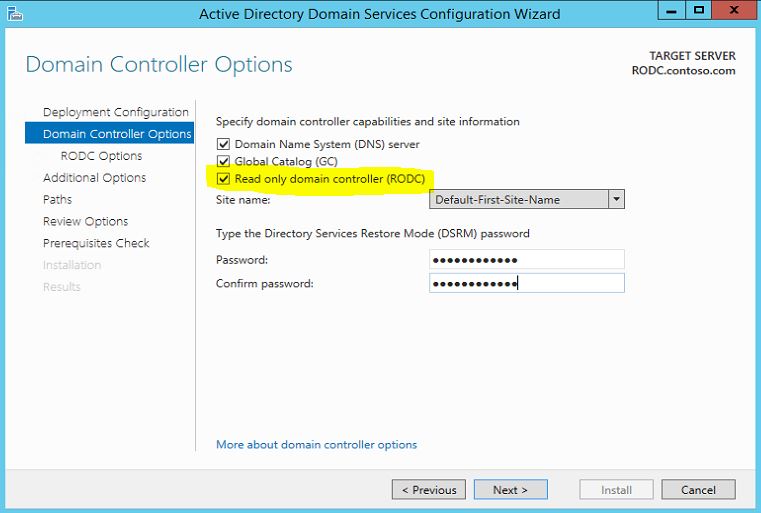
- In next window make sure to select option "Read only domain controller(RODC)" and then also type a password for restore. click on next to continue
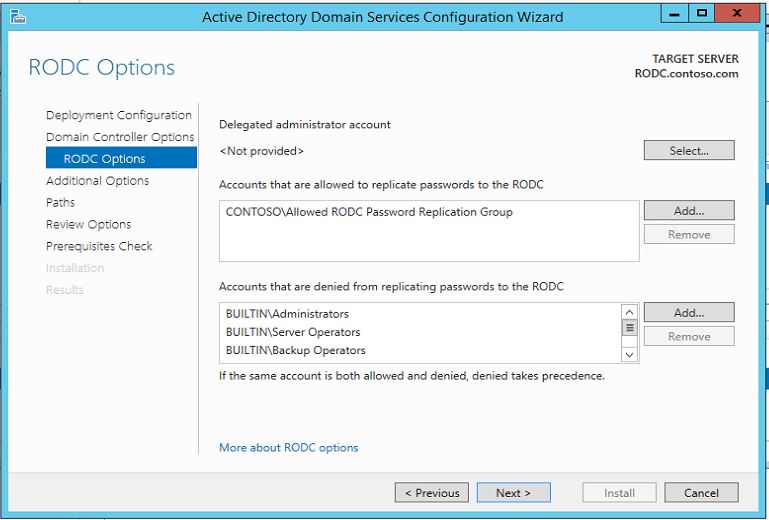
- In next window we can select what groups/users allowed for the password caching, what group/users denied for caching and also delegated admin accounts. in here for now we will keep the default selection.
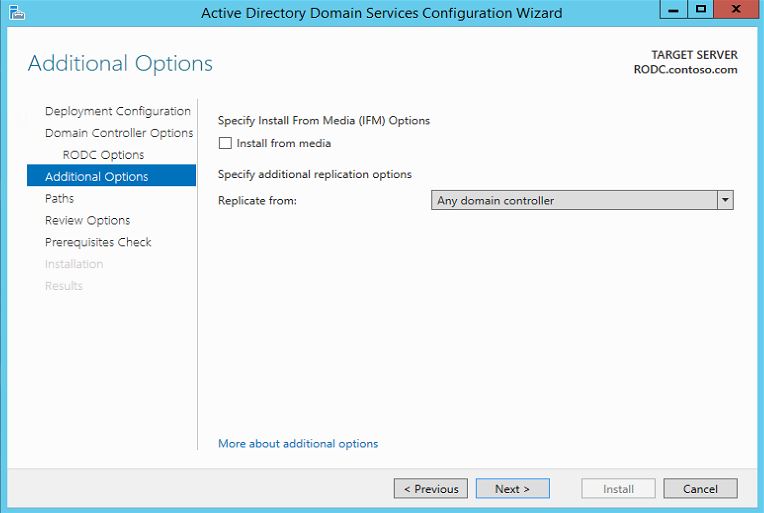
- in next window we can define from which DC we need replication done.
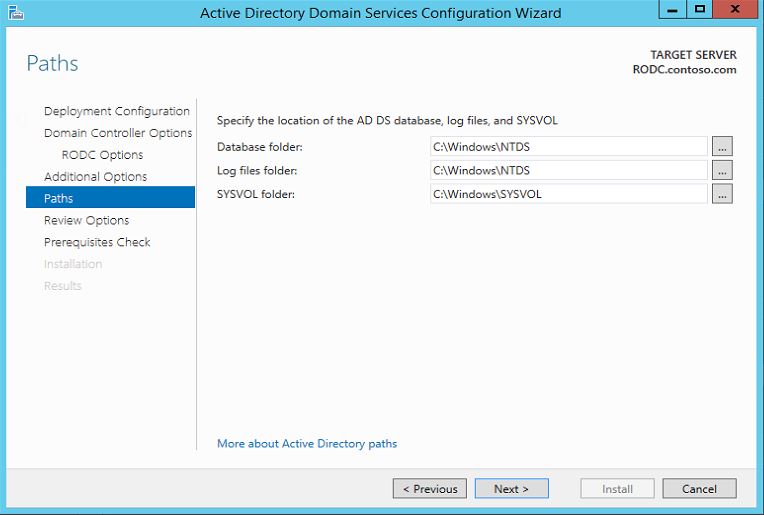
- In next window it gives option to change the folder paths. in here we keep default. click next to continue.
- In next window it gives option to review the installation selection and click next to continue.
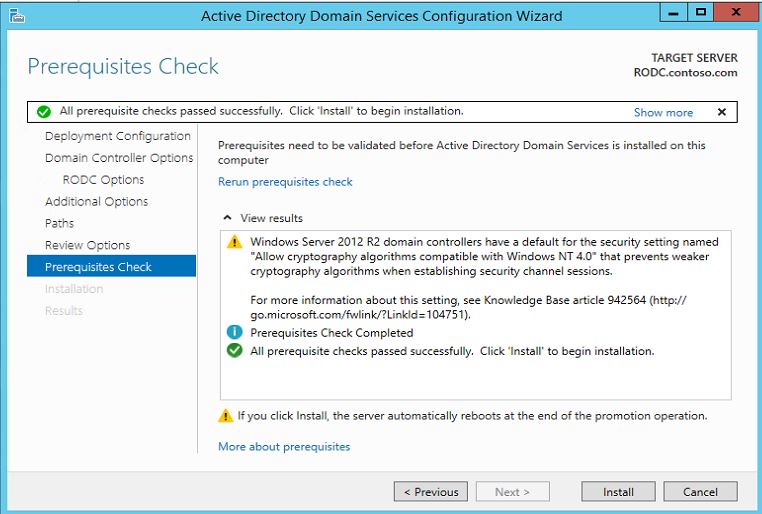
- In next window system will check if its meet all the prerequisites for the installation. click on Install to begin the installation
- Once installation done system will automatically reboot.
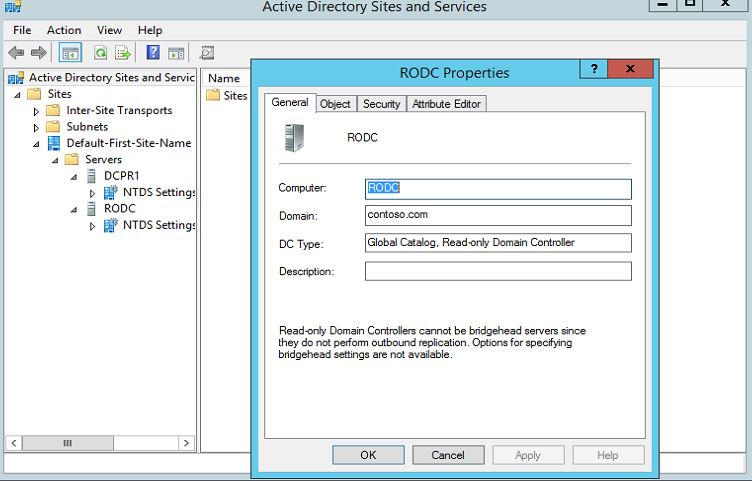
This completes the installation of RODC in domain. in next post we will look in to configuring RODC with different policies.





can i do some procuder for windows server 2008????
yes it valid for 2008 too.