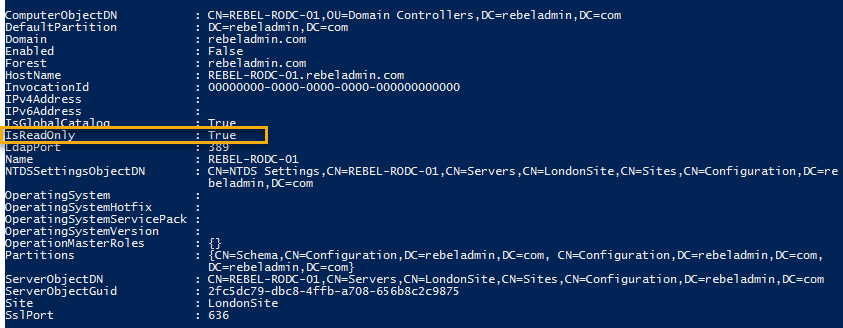
RODC are a great feature which is introduce with windows server 2008 in order to maintain a low risk domain controller in locations where it cannot guarantee physical security and the maintenance. Though out article we have discussed possible scenarios where we required a domain controller in a remote site. When considering a domain controller in remote site, the link between site is not the only thing we need to focus on. When we deploy a domain controller, by default it will be aware of any changes in active directory structure. Once an update trigger, it updates its own copy of the active directory database. This ntds.dit file is contain everything about active directory infrastructure, including identity data of the user objects. If its falls in to wrong hands, they can retrieve data related to identities and compromise the identity infrastructure. when consider about information security, the physical security is also important. That’s why the datacenters have al sort of security standards. So, when deploying a domain controller in remote site, physical security also a consideration as we do not need to have loose ends. If you have a requirement for domain controller in remote site and yet you cannot confirm its security the RODC is the answer. RODC do not store any password in its database. All the authentication request against an object will be process by the closest writable domain controller. So even someone manage to get copy of the database they will not be able to do much.
RODC deployment process involves following stages. In this process, we can use a pre-selected account and promote the RODC using it instead of using Domain Admin or Enterprise Administrator account.
1) Setup Computer Account for RODC domain controller
2) Attached that account to the RODC during the promo process
In order to create RODC computer account we can use Add-ADDSReadOnlyDomainControllerAccount cmdlet.
Add-ADDSReadOnlyDomainControllerAccount -DomainControllerAccountName REBEL-RODC-01 -DomainName rebeladmin.com -DelegatedAdministratorAccountName "rebeladmin\dfrancis" -SiteName LondonSite
Above command will create RODC domain controller account for REBEL-RODC-01. The domain name is defined using -DomainName and -DelegatedAdministratorAccountName defines which account to delegate the RODC installation. The new RODC will be place in LondonSite.
Now we can see the newly added object under the Active Directory Domain Controllers.
Now we have things ready for the new RODC and next step is to promote it.
Install-WindowsFeature –Name AD-Domain-Services -IncludeManagementTools
Above command will install the AD DS role first in the RODC. Once its completed we can promote it using,
Import-Module ADDSDeployment
Install-ADDSDomainController `
-Credential (Get-Credential) `
-CriticalReplicationOnly:$false `
-DatabasePath "C:\Windows\NTDS" `
-DomainName "rebeladmin.com" `
-LogPath "C:\Windows\NTDS" `
-ReplicationSourceDC "REBEL-PDC-01.rebeladmin.com" `
-SYSVOLPath "C:\Windows\SYSVOL" `
-UseExistingAccount:$true `
-Norebootoncompletion:$false
-Force:$true
Once this is executed it will prompt for the user account and we need to input user account info which was delegated for RODC deployment. The command is very similar to regular domain promotion.
Now we have the RODC and next steps to look in to password replication policies (PRPs).
The default policy is already in place and we can view the allowed and denied list using,
Get-ADDomainControllerPasswordReplicationPolicy -Identity REBEL-RODC-01 -Allowed
Above command will list down the allowed objects for password caching. By default, a security group called “Allowed RODC Password Replication Group” is allowed for the replication. This doesn’t contain any members by default. By adding object to this group will allow caching.
Get-ADDomainControllerPasswordReplicationPolicy -Identity REBEL-RODC-01 -Denied
Above command list down the denied objects for password caching. By default, following security groups are in the denied list.
• Denied RODC Password Replication Group
• Account Operators
• Server Operators
• Backup Operators
• Administrators
These are high privileged accounts in active directory infrastructure these should not be cached at all. By adding objects to Denied RODC Password Replication Group, we can simply block the replication.
Apart from the use of predefine security groups we can add objects to allow and denied list using Add-ADDomainControllerPasswordReplicationPolicy cmdlet.
Add-ADDomainControllerPasswordReplicationPolicy -Identity REBEL-RODC-01 -AllowedList "user1"
Above command will add user object user1 to the allowed list.
Add-ADDomainControllerPasswordReplicationPolicy -Identity REBEL-RODC-01 -DeniedList "user2"
The above command will add the user object “user2” to the denied list.
This marks the end of this blog post. If you have any questions feel free to contact me on rebeladm@live.com also follow me on twitter @rebeladm to get updates about new blog posts.


