In my previous post I explained how we can enroll Windows 10 devices into Microsoft Intune. You can access it using http://www.rebeladmin.com/2018/11/step-step-guide-enroll-windows-10-devices-microsoft-intune-using-autopilot/ . In this post I am going to demonstrate how to publish applications to windows 10 devices via Microsoft Intune (To devices which is enrolled successfully).
Tip
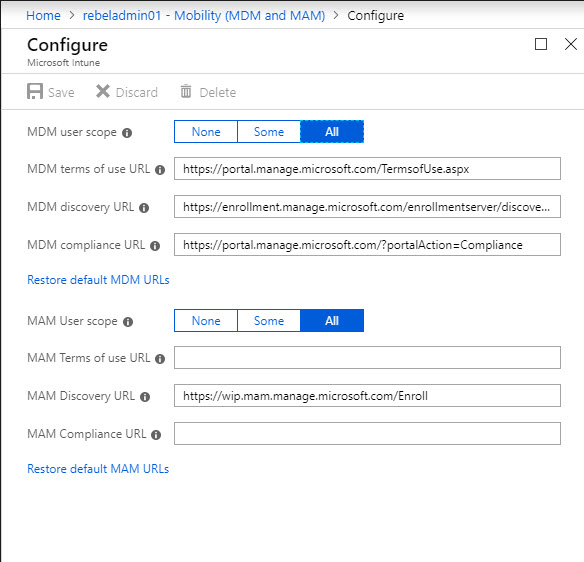
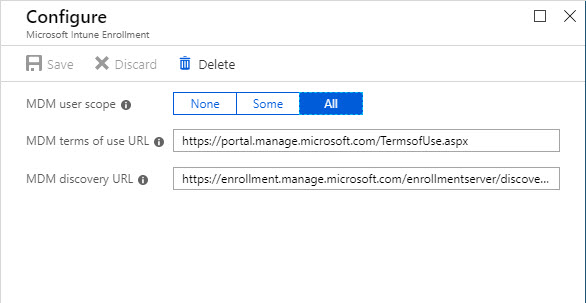
Before you enroll devices make sure you already have enabled MDM & MAM auto enrollment for all users/selected users. Otherwise device will not auto-enroll with Intune.
These settings are under Azure Active Directory | Mobility (MDM & MAM)
1. Log in to Azure Portal as Global Administrator
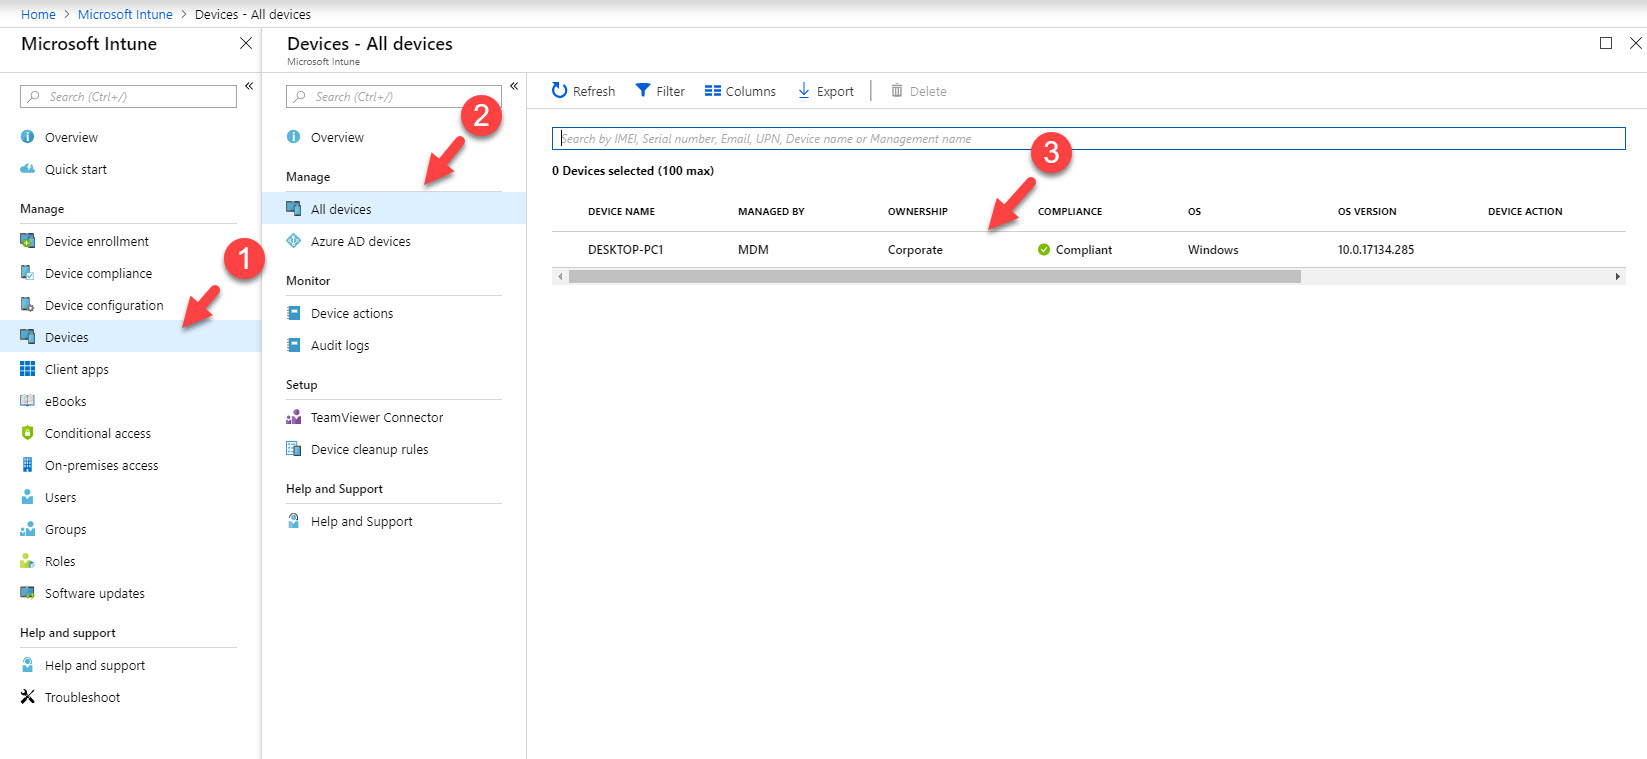
2. Then go to Intune | Devices | All Devices & Verify the status of enrolled devices
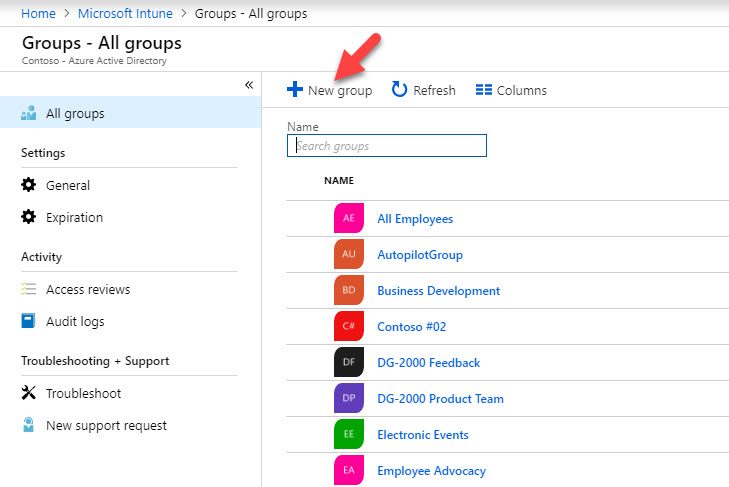
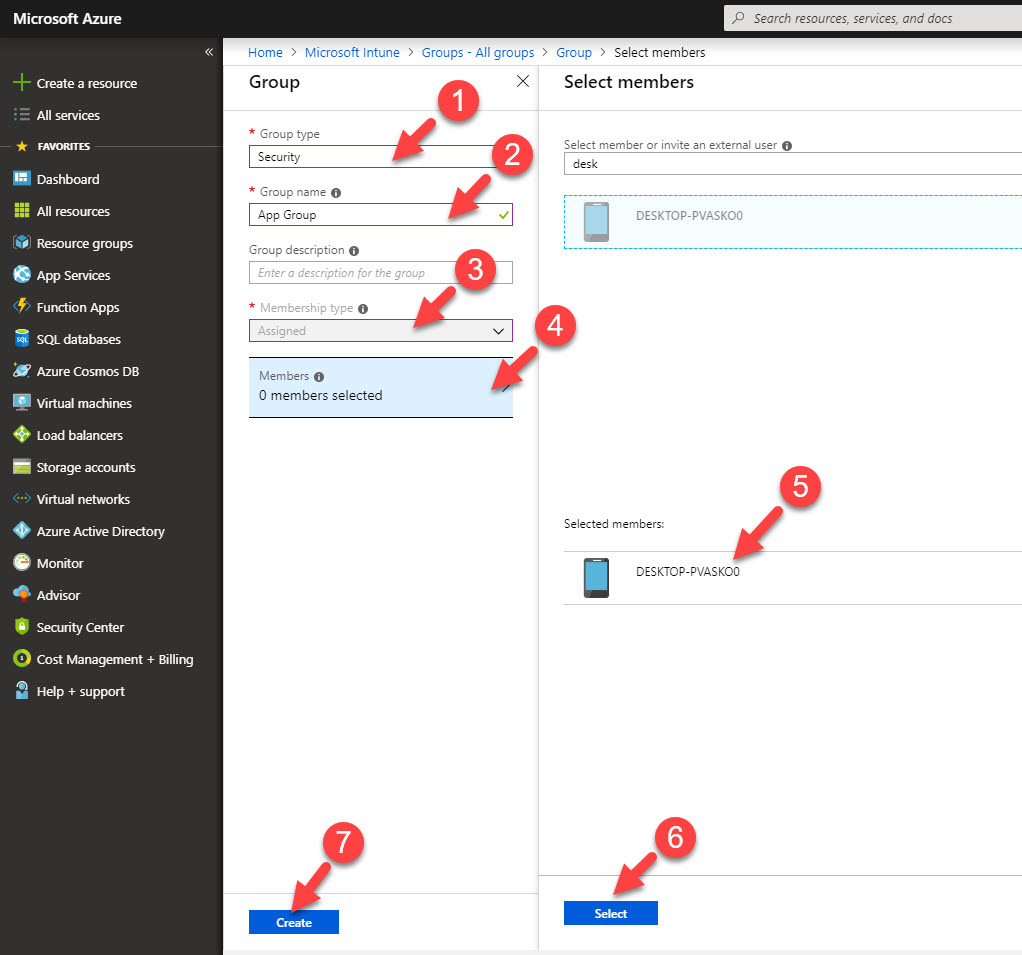
3. As next step, I am going to create device group. it will help us to publish applications in to target easily. To do that, go back to Intune home page and click on Groups | New Group
4. Then fill the relevant info and create a group.
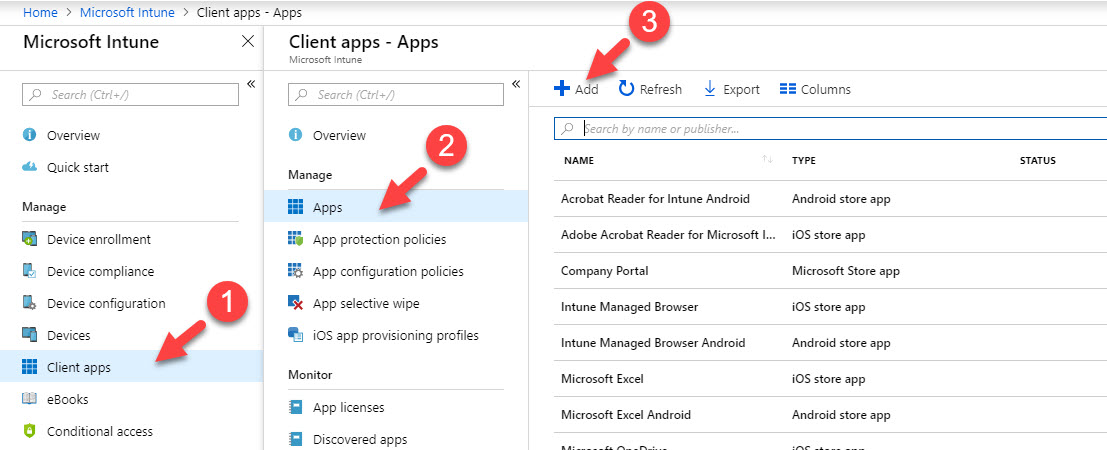
5. Go back to Intune home page again then click on Client Apps | Apps | + Add
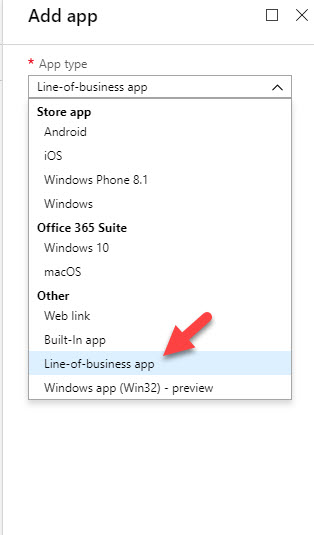
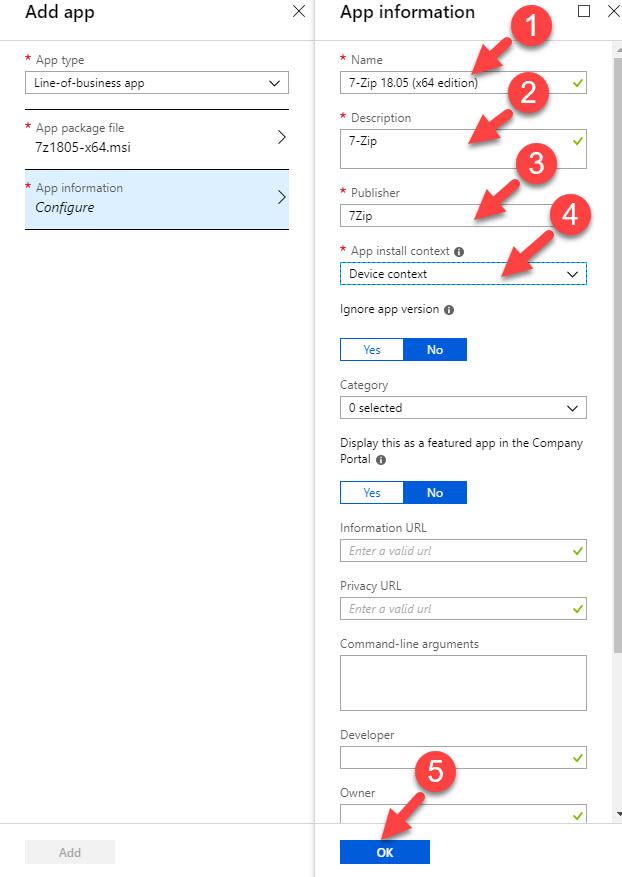
6. In new window select line-of-business app as the App type. This is the type you need to choose if you deploying any MSI based app. in my demo I am going to publish 7-zip application.
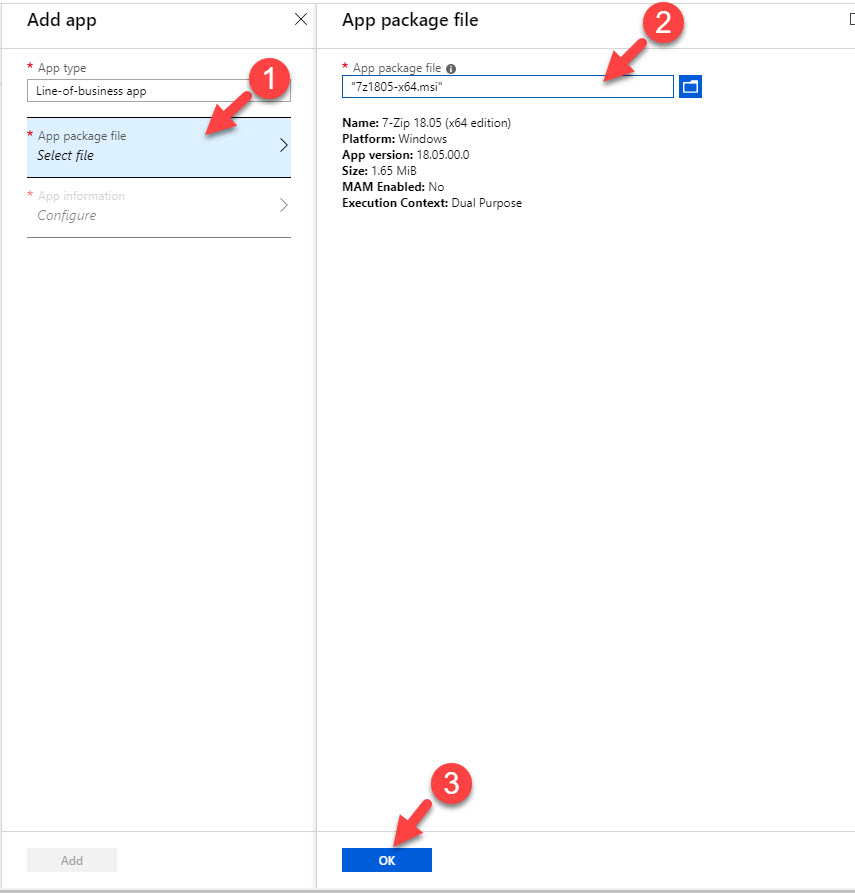
7. Then select the MSI file under app package file and click ok.
8. Under App information define publisher and app description. In here I am choosing app context as device (step 4). This mode is different from app to app. some allow you to choose and some doesn’t. if it device context, it will target devices in the assignment group. if its user, it will target users. Once selections are done click OK
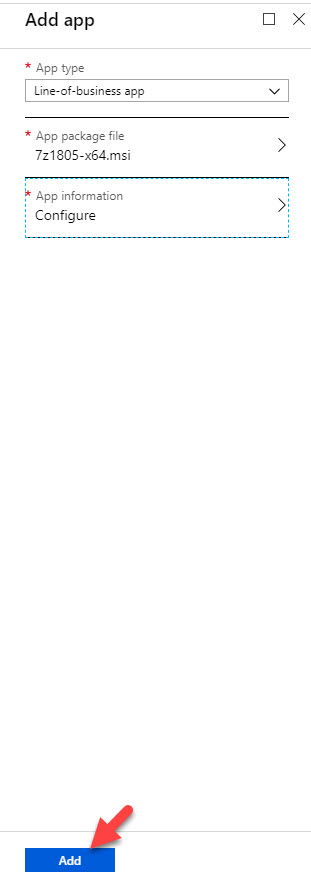
9. To complete the process, click on Add
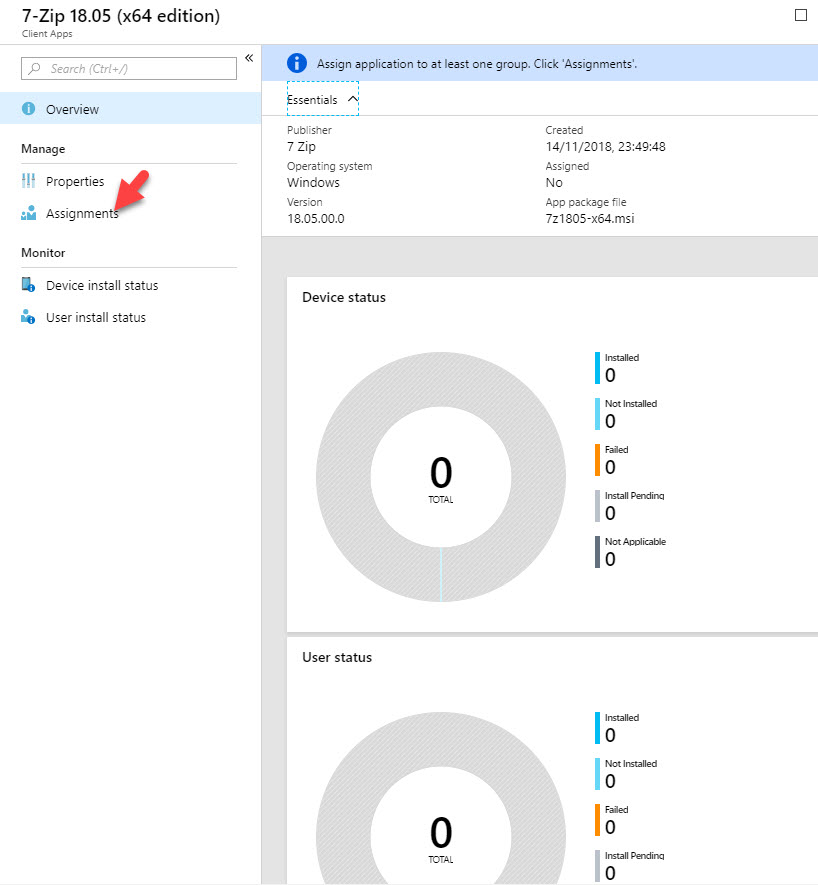
10. It will take some time to upload the app. once it is done, click on Assignments.
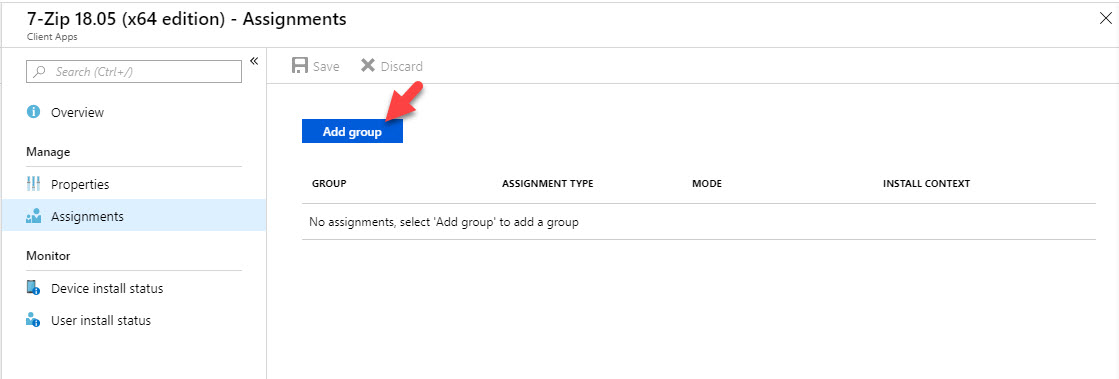
11. In next window, click on Add Group
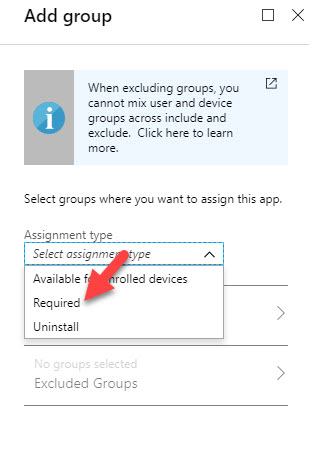
12. Then click on Required under assignment type. This will install the app in target without user input.
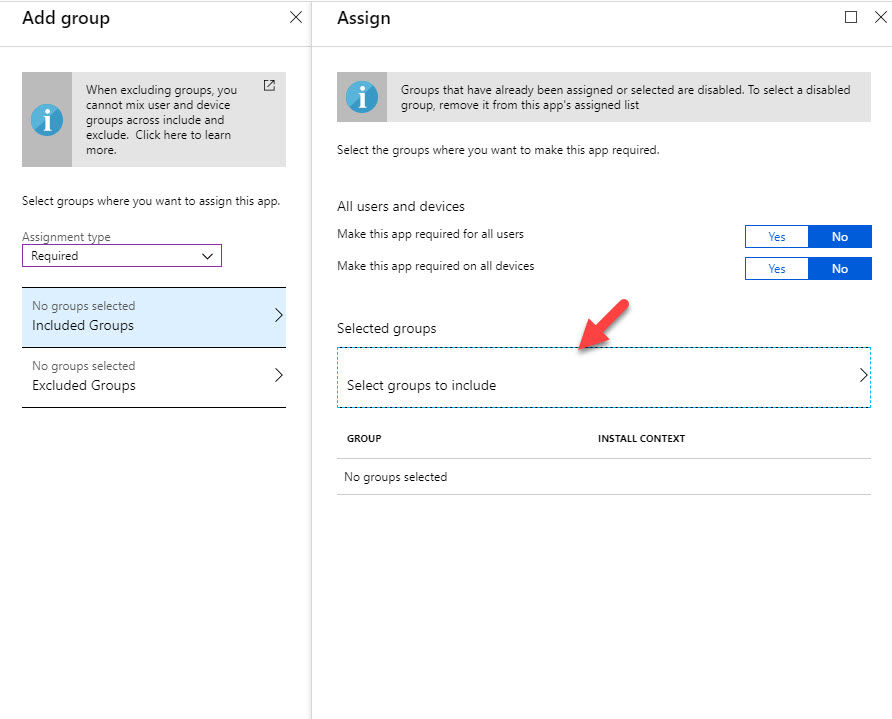
13. In next window, select the new group we created in earlier step.
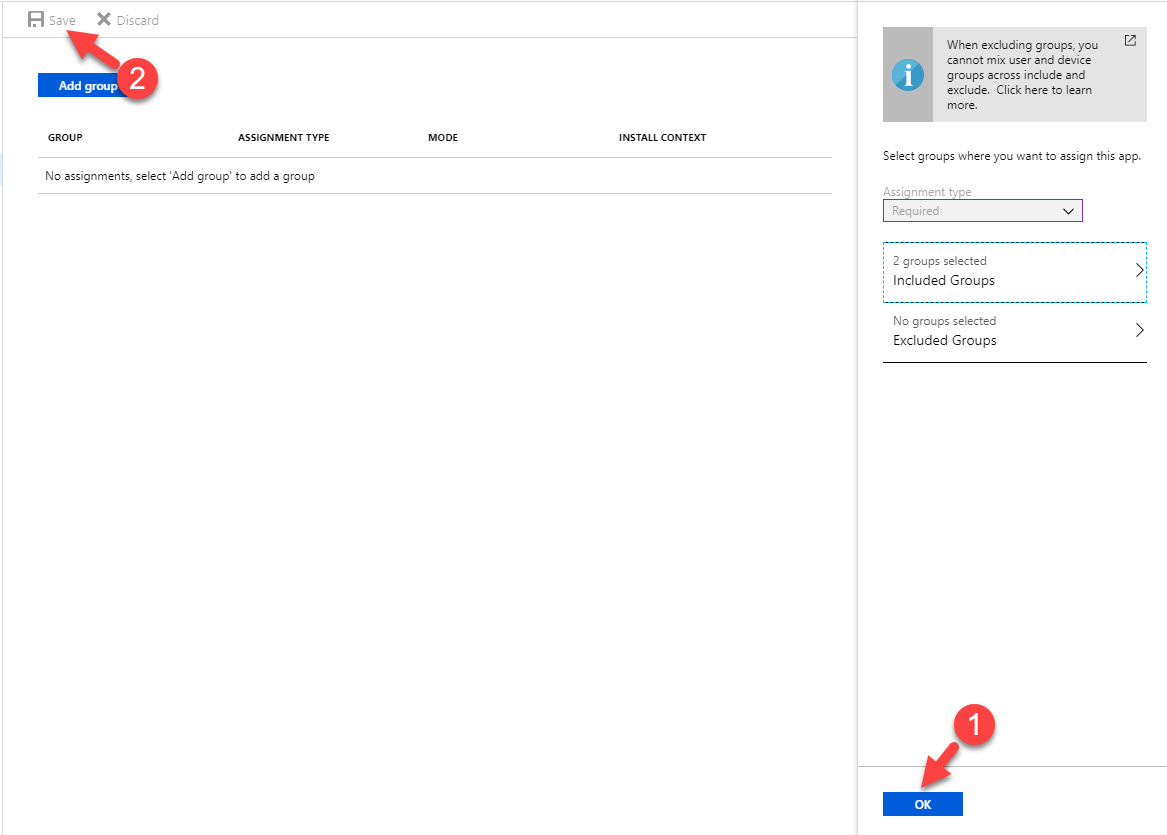
14. Click Ok & then Save to complete the assignment process.
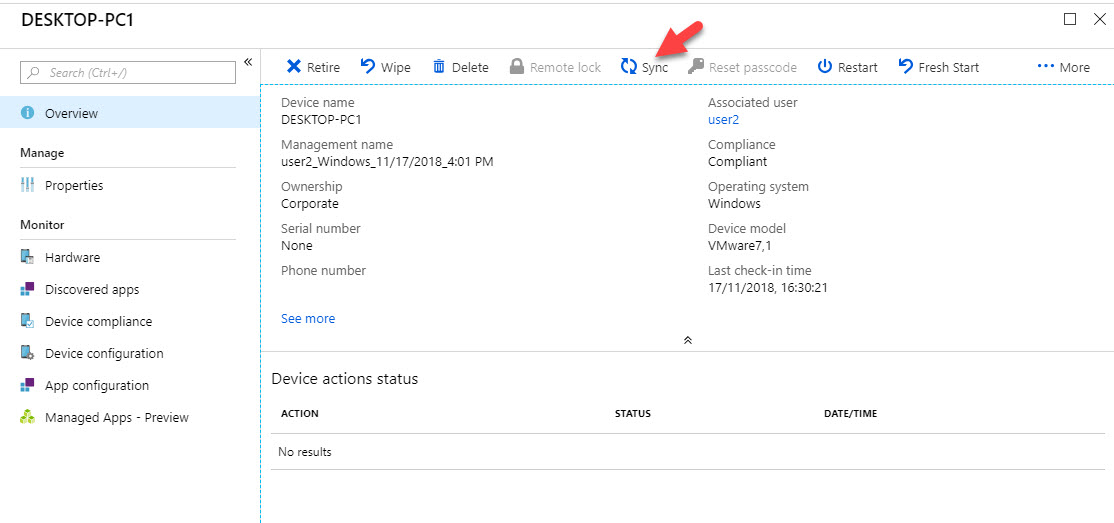
15. Go back to Intune | Devices | All Devices and click on the device we targeting.
16. Then click on Sync so it will force the policy sync.
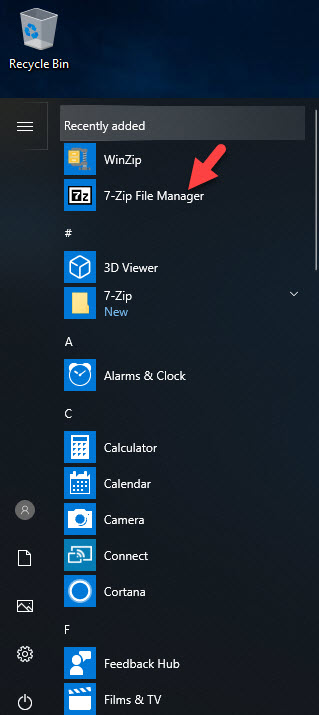
17. After few minutes I can see the app is installed in the device as expected.
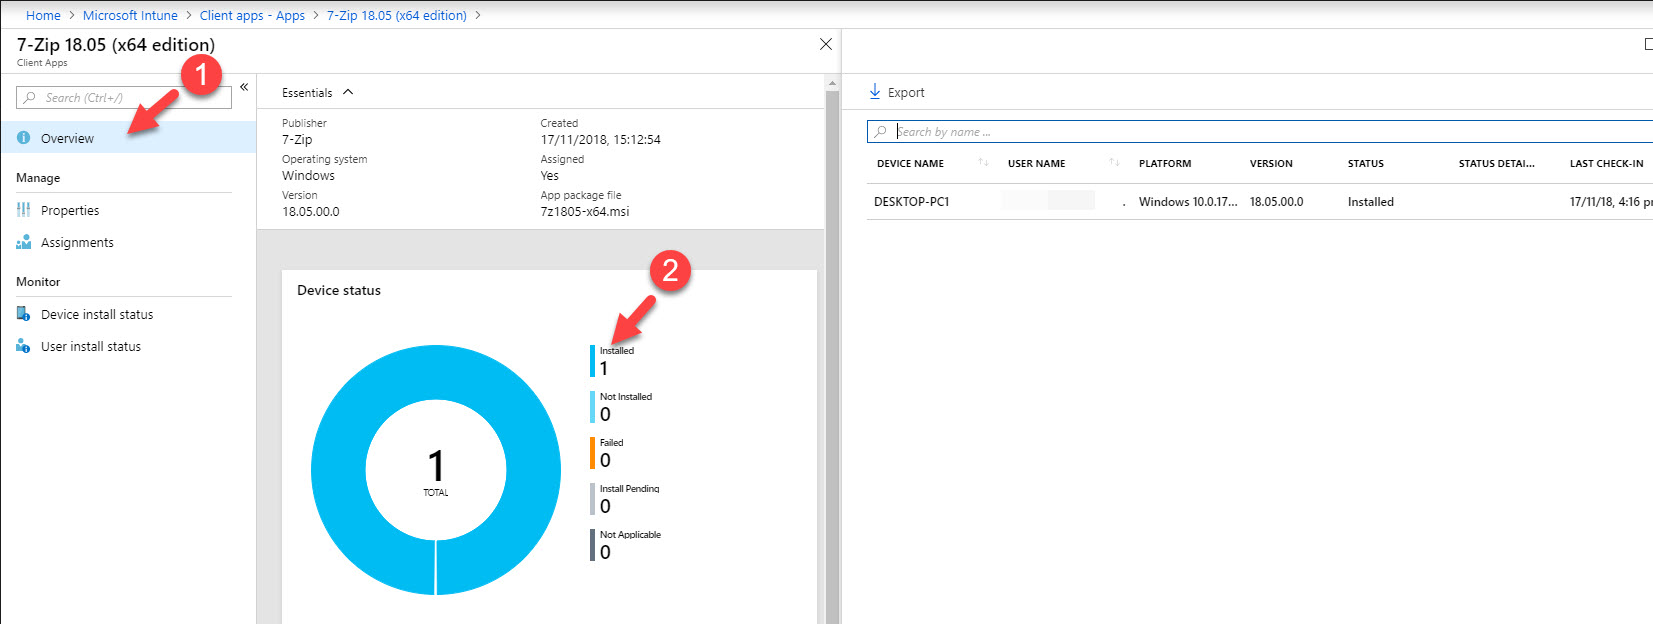
18. Also, when I go to Intune | Client Apps | Apps and to New App we added, I can see the status of application deployment.
As we can see, application deployment worked as expected! . This marks the end of this blog post. If you have any further questions feel free to contact me on rebeladm@live.com also follow me on twitter @rebeladm to get updates about new blog posts.


