There are occasions where we need to move Azure Virtual Machines from one resource group to another. In this post, I am going to demonstrate how we can do that. Before start, there are a few things we should look in to.
• Not every resource can move from one resource group to another. More info about it can find under https://docs.microsoft.com/en-gb/azure/azure-resource-manager/move-support-resources
• If you are looking to move from one region to another, there is a separate process for that. I already wrote an article about it. You can access it using, http://www.rebeladmin.com/2019/11/step-step-guide-move-azure-vm-one-region-another/
• When you move resources, make sure to migrate all dependencies with it.
• When a virtual machine is moved from one resource group to another, the system creates a new resource ID. If you use this value on scripts or other services, those will need to update after the move.
• The same method also can use to move resources from one subscription to another.
In this demo, I am going to create a new VM in one resource group and then move it to another.
For the configuration process, I will be using PowerShell. Therefore, please make sure you have an Azure PowerShell module installed. More info about it can find under https://docs.microsoft.com/en-us/powershell/azure/install-az-ps?view=azps-2.6.0
1. Launch PowerShell console and connect to Azure using Connect-AzAccount
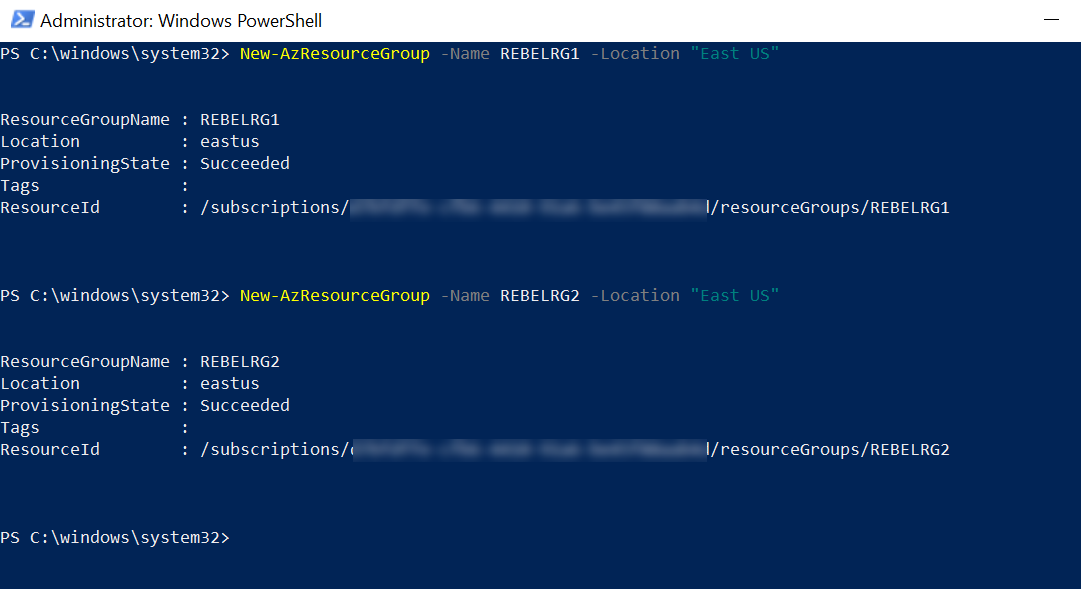
2. Then create two new resource group using,
New-AzResourceGroup -Name REBELRG1 -Location "East US"
New-AzResourceGroup -Name REBELRG2 -Location "East US"
In the above, REBELRG1 & REBELRG2 are the resource group names and East US is the resource group location.
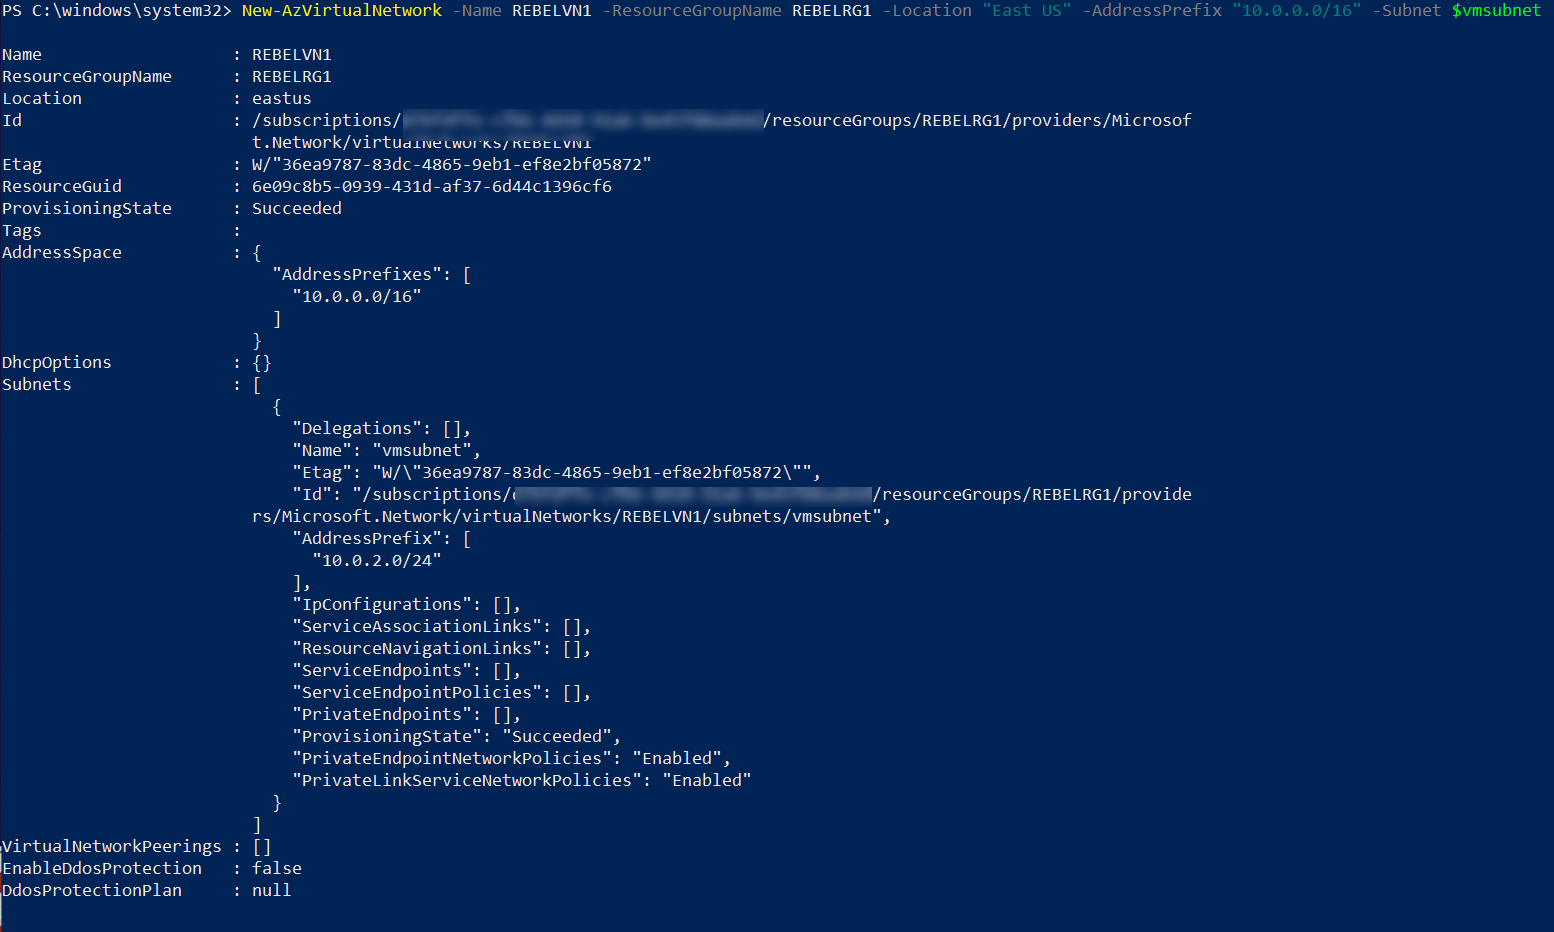
3. The next step is to create a new virtual network under REBELRG1 resource group.
$vmsubnet = New-AzVirtualNetworkSubnetConfig -Name vmsubnet -AddressPrefix "10.0.2.0/24"
New-AzVirtualNetwork -Name REBELVN1 -ResourceGroupName REBELRG1 -Location "East US" -AddressPrefix "10.0.0.0/16" -Subnet $vmsubnet
In the above, REBELVN1 is the new virtual network name. It has 10.0.0.0/16 address space. It also has a new subnet 10.0.2.0/24 (vmsubnet) for virtual machines.
4. As the next step of the configuration, I am going to create a new virtual machine under REBELRG1 resource group.
$mylogin = Get-Credential
New-AzVm -ResourceGroupName REBELRG1 -Name "REBELTVM01" -Location "East US" -VirtualNetworkName "REBELVN1" -SubnetName "vmsubnet" -addressprefix 10.0.2.0/24 -PublicIpAddressName "REBELVM01IP1" -OpenPorts 3389 -Image win2019datacenter -Size Standard_D2s_v3 -Credential $mylogin
In the above, I am creating a virtual machine called REBELTVM01. It is running windows server 2019 data center edition. I have specified it using -Image parameter. It also using Standard_D2s_v3 vm size.
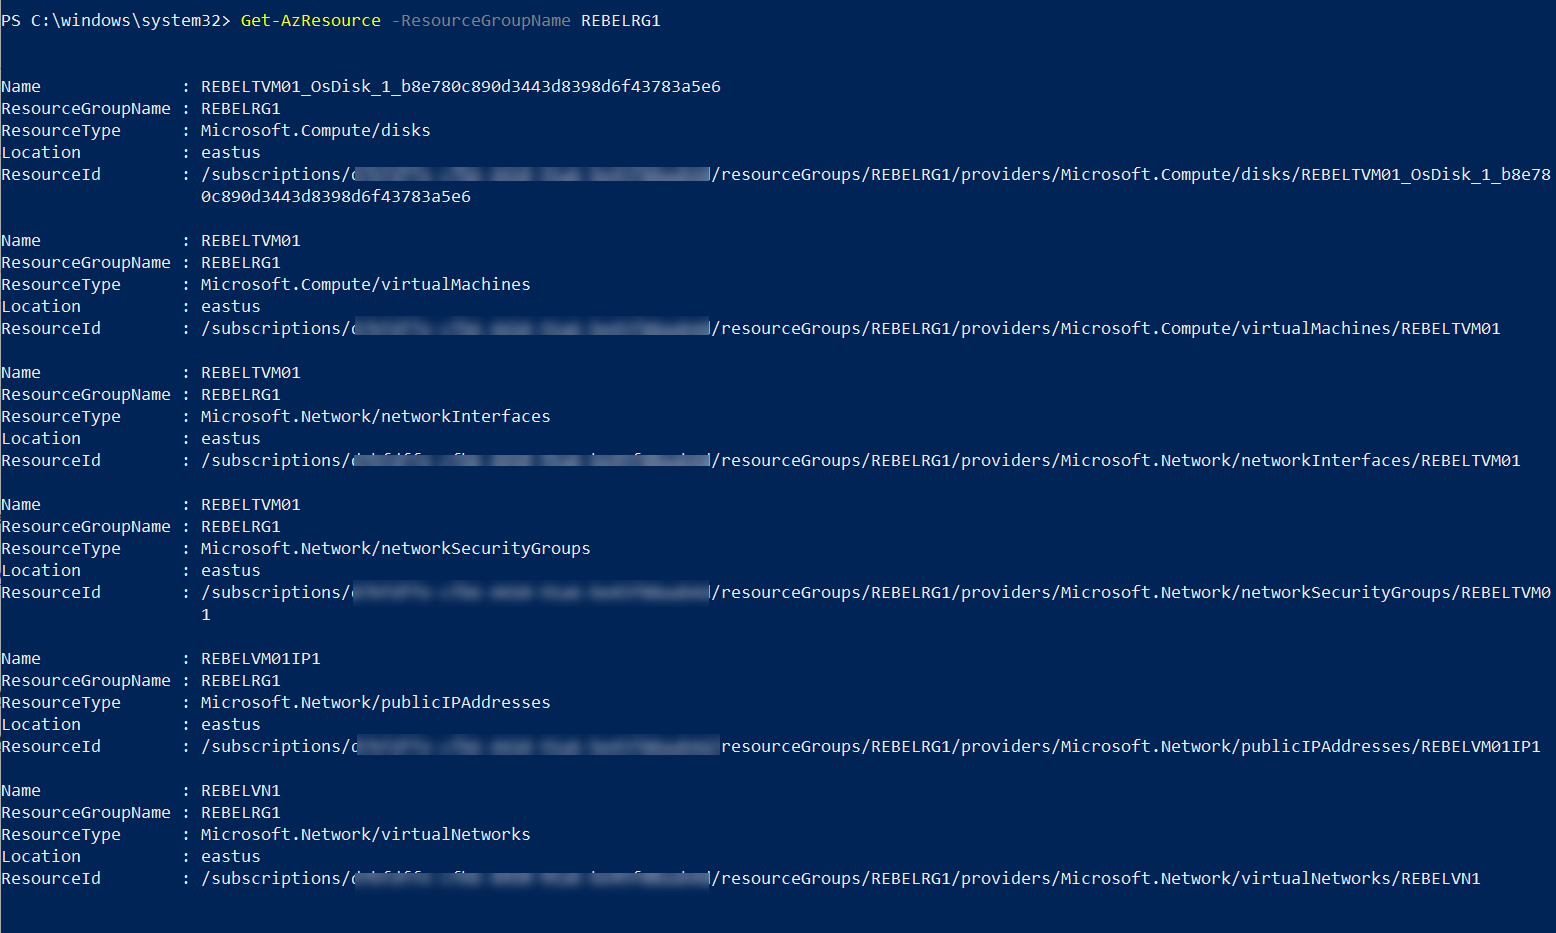
5. Once the server is ready, let's go ahead and verify the list of resources under REBELRG1 resource group. We can do this using,
Get-AzResource -ResourceGroupName REBELRG1
6. To move resources, first, we need to get a list of resources IDs.
Get-AzResource -ResourceGroupName REBELRG1 | Format-list -Property ResourceId
7. Then we can move resources to REBELRG2 resource group using,
Move-AzResource -DestinationResourceGroupName REBELRG2 -ResourceId id1,id2,id3
In the above, id1,id2,id3 should replace by the actual resource ids.
[su_note]Depend on the number of resources and type, the operation can time out. In such a situation, you will need to rerun the command a couple of times. [/su_note]
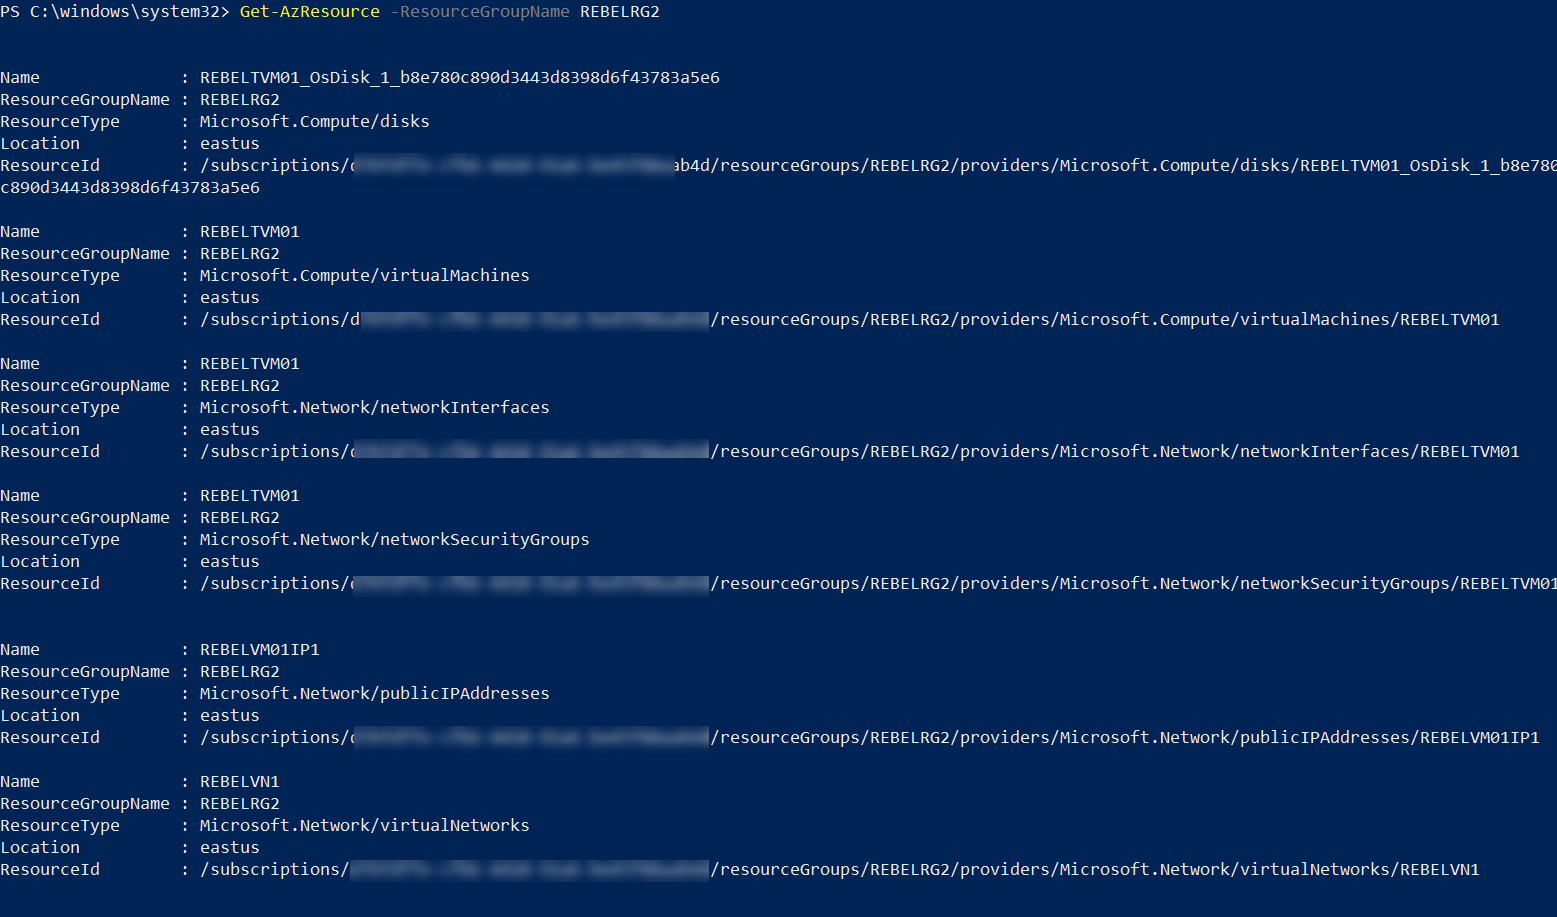
8. Once the move operation is completed, we can go ahead and verify the resource list under REBELRG2 resource group.
Get-AzResource -ResourceGroupName REBELRG2
As we can see, all the resources are moved successfully from REBELRG1 resource group to REBELRG2 resource group.
This marks the end of this blog post. If you have any further questions about this feel free to contact me on rebeladm@live.com. Also, follow me on twitter @rebeladm to get updates about new blog posts.


