Azure servicesMicrosoft Technologies

Step-by-Step guide to enable Enterprise State Roaming with Azure Active Directory

If you work with Active Directory you may already know what is roaming profiles is. Roaming profiles allows to sync application and user settings to a file share. When same user login from another computer in to same domain, those settings will sync back from file share. It allows users to have same user experience and data in different corporate devices. Azure Active Directory users may also login from multiple Azure domain joined devices. Enterprise state roaming allows to sync user settings and application settings securely across corporate azure domain joined devices. 

Secured Sync – When this feature enables it will activate free limited Azure Rights Management subscription. It will use to encrypt and decrypt data which is sync to cloud. This will ensure the security of data used by Enterprise State Roaming feature. 

Data Storage – Data storage location for Enterprise State Roaming feature will be align with your Azure Active Directory subscription region. It will not sync between different regions. 

Better Control – This feature can be enable for entire directory or only for selected users. Sync data for each device can review using portal. With help of Azure Support, administrators also can forcefully remove sync data for a device. 

Data Retention – If user account been deleted from directory, profile data will be deleted after 90 days. Administrators also can request (from azure support) to delete specific data from a user profile. If data not been access for 1 year it will consider it as stale data and remove forcefully. It will also happen if Enterprise State Roaming feature is disable in later time. 

Let’s see how we can enable this feature. In order to enable this feature, you must have Azure AD Premium or Enterprise Mobility + Security (EMS) license. Azure AD join devices must be running with Windows 10 (Version 1511, Build 10586 or greater)

1) Log in to Azure Portal as a Global Administrator
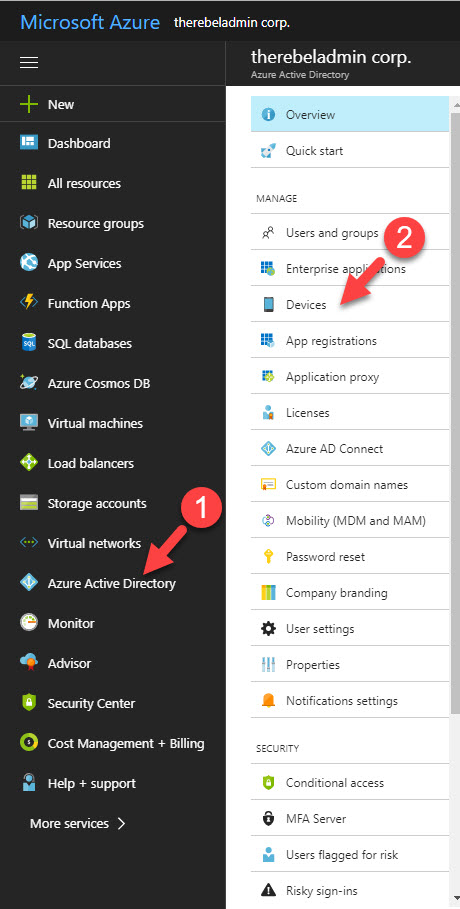
2) Go to Azure Active Directory | Devices  
 
ent1
 
3) Then click on Device Settings 
 
ent2
 
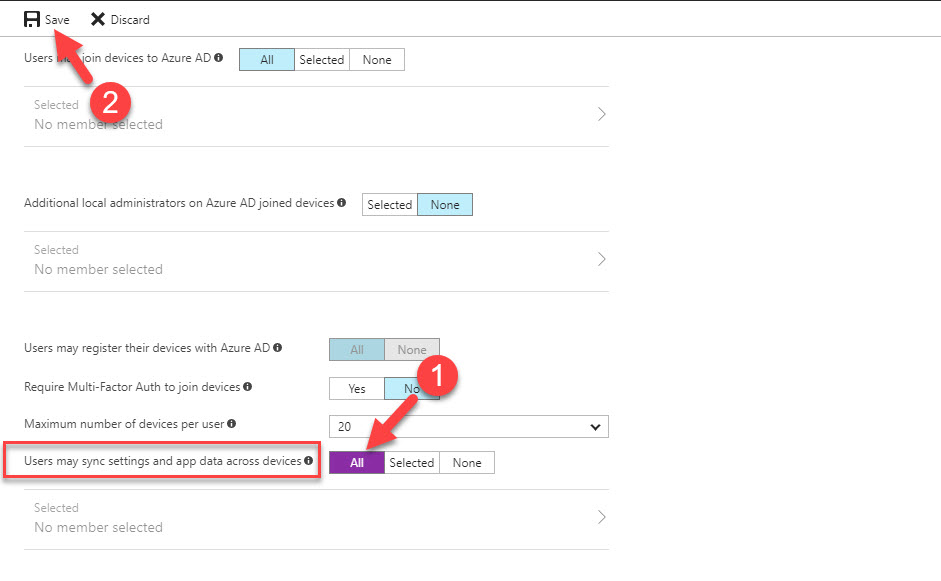
4) Under device settings there is option says Users may sync settings and app data across devices. In there you can select All or Selected. If you use selected option, you will need to define the users. in my demo, I am going to enable Enterprise State Roaming for entire directory. Once selection is made click on Save
 
ent3
After the feature is enabled we can review the sync status using Azure Active Directory Admin Center. To do this, 
 
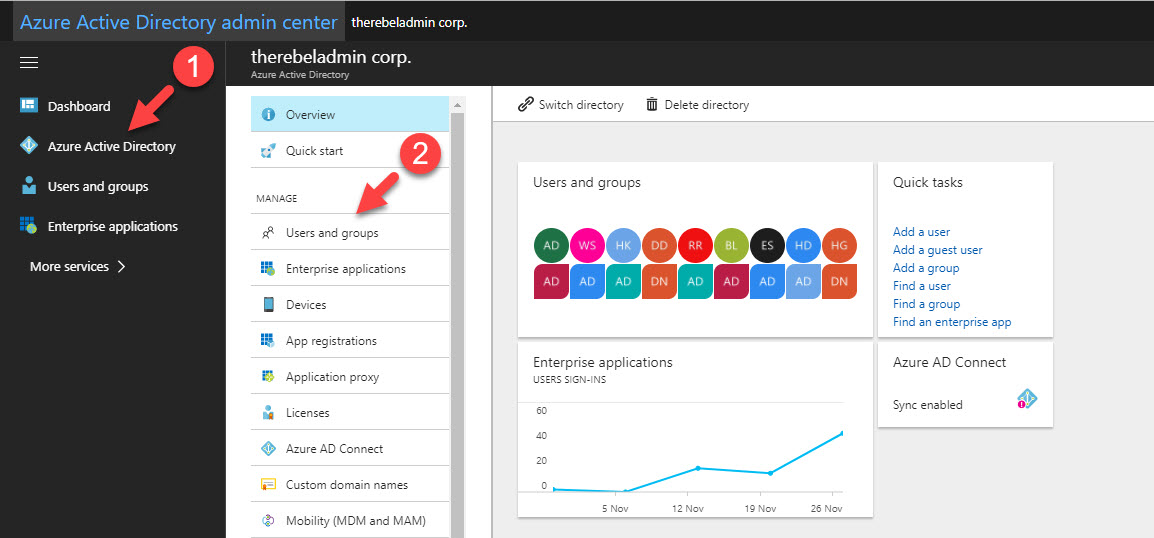
1) Log in to Azure Active Directory Admin Center using https://aad.portal.azure.com
2) Go to Azure Active Directory | Users and Groups 
 
ent4
 
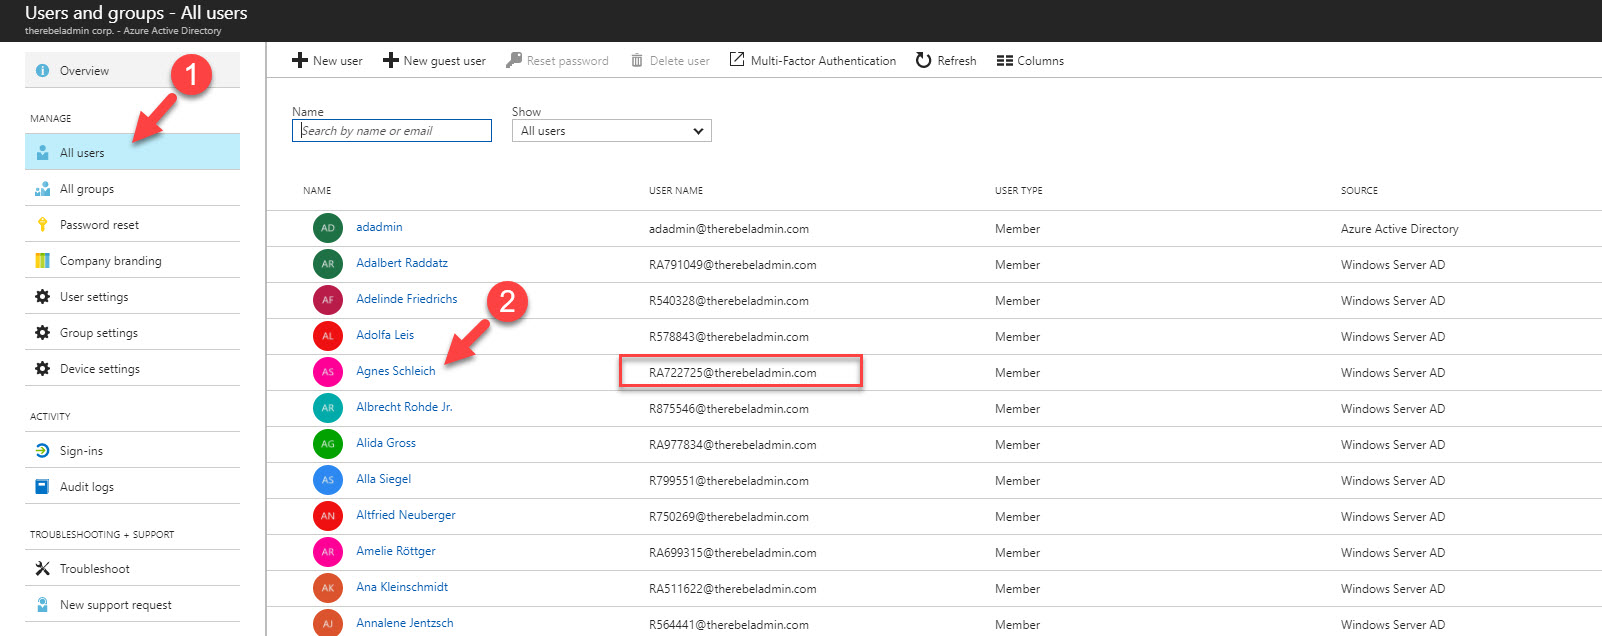
3) In next window, Click on All users and then click on the relevant user. In my demo it is user RA722725@therebeladmin.com
 
ent5
 
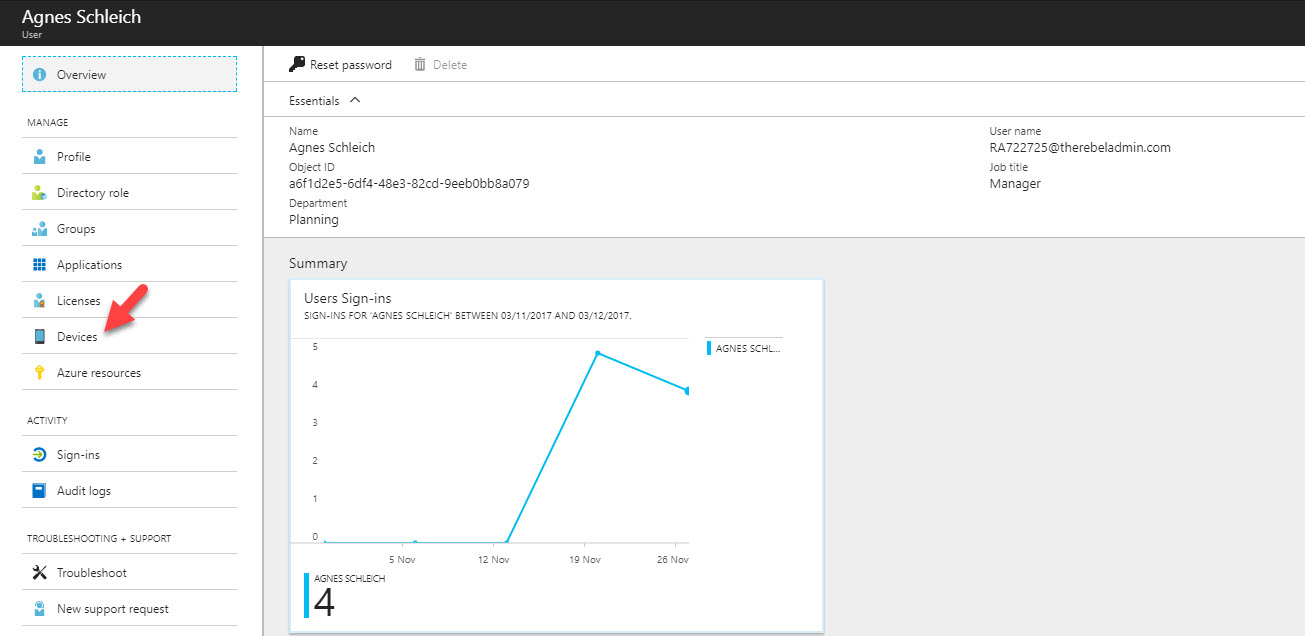
4) Then click on Device in new window. 
 
ent6
 
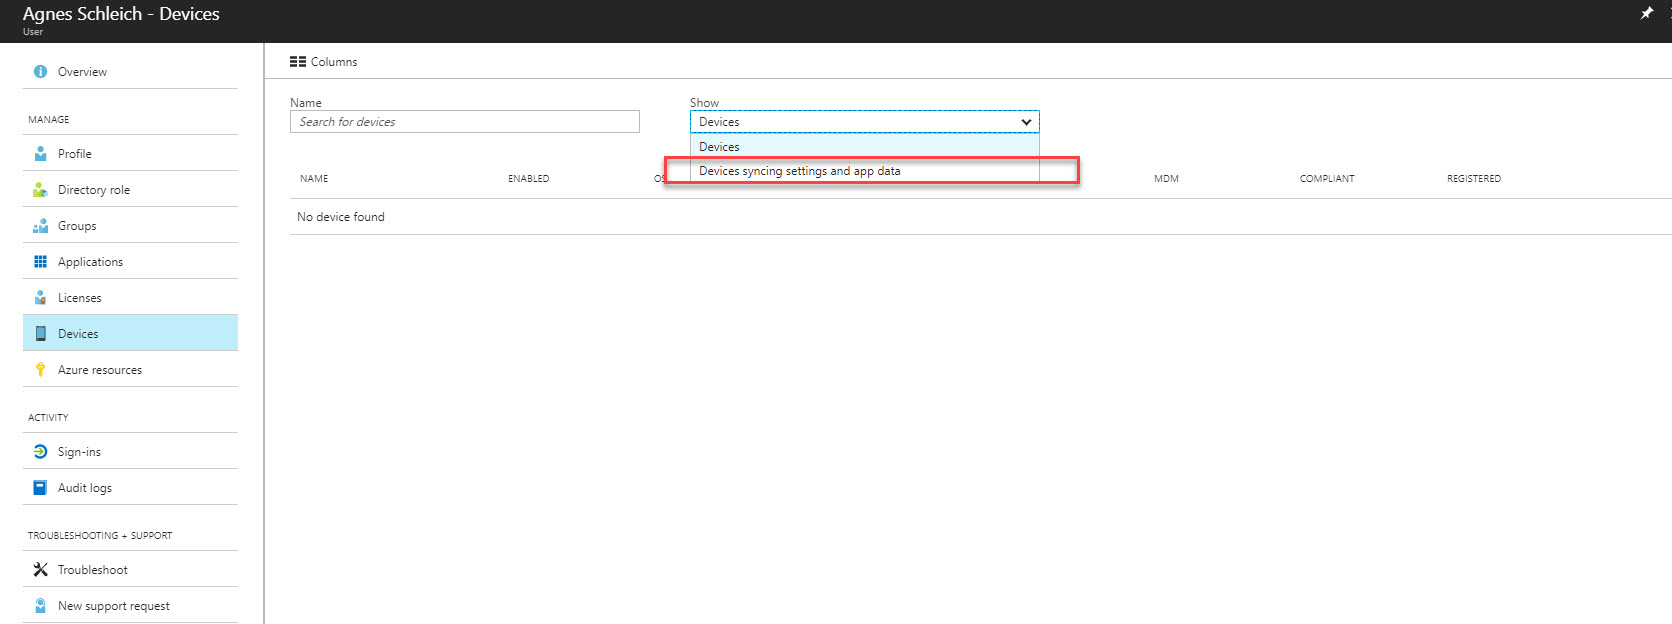
5) Then in right hand window select Device sync settings and app data option from show drop down menu.
 
ent7
 
6) In list it shows the devices, that user logged in and the last sync time. 
 
ent8
 
Now we have everything ready for testing. Before we start there is few things to remind. This is only sync user and app settings. Not user data. Also, sync is not happening at login/log off event. It happens once user is log in. so if you do not see sync data right away after login, allow sometime and keep eye on last sync time value. 
 
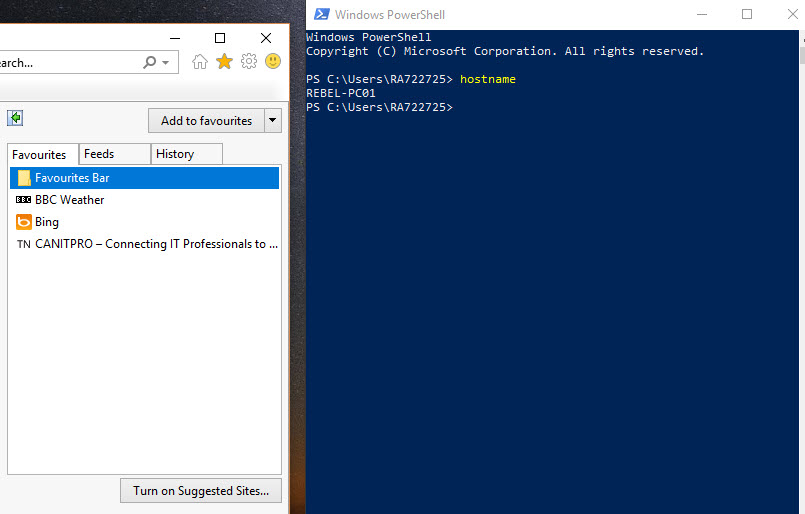
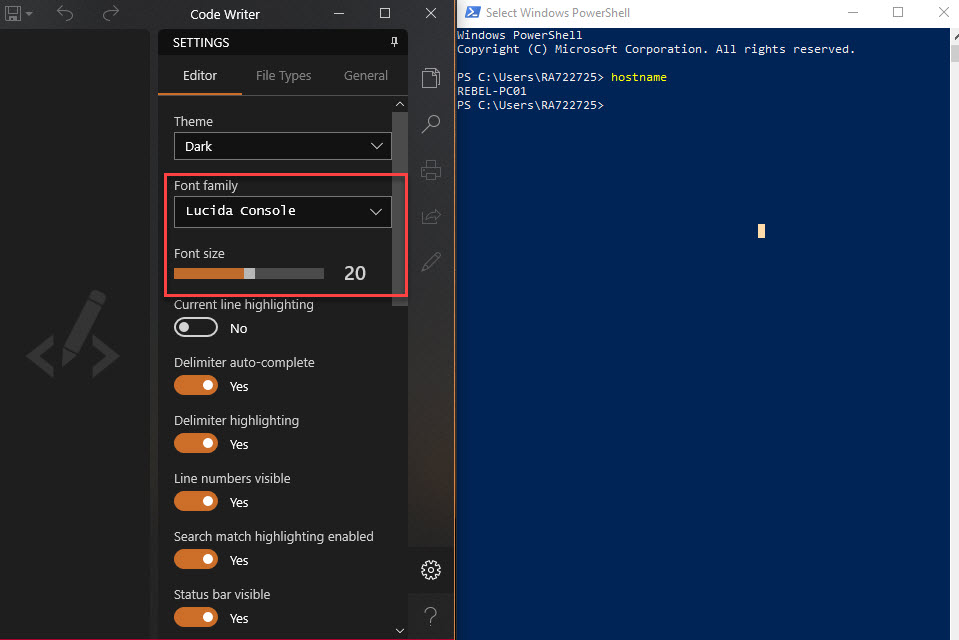
In my demo, I am login to a pc called REBEL-PC01 as RA722725@therebeladmin.com. In that pc, I have done certain settings changes. 
 
Under IE, I added few links to favorites. 
 
ent9
 
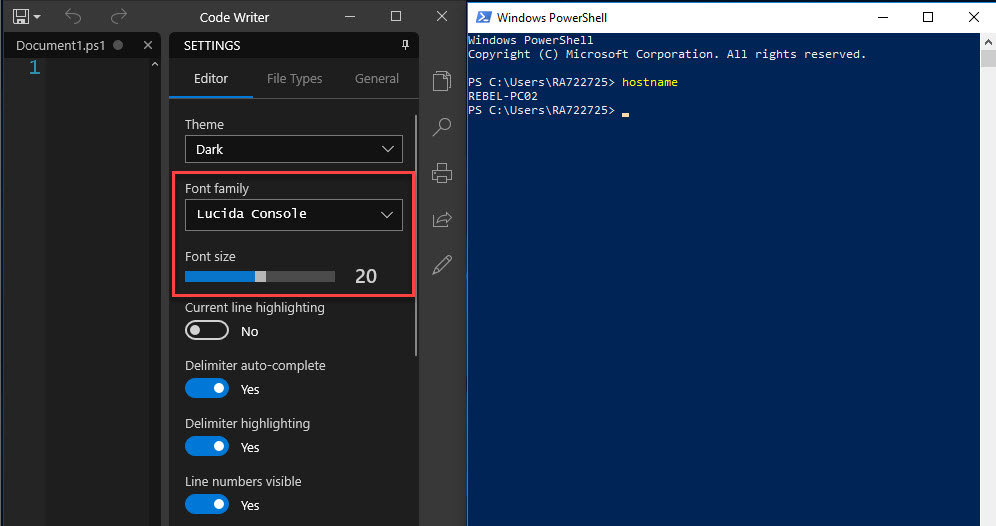
I also change setting on code writer App and change font and default text size to 20.  
 
ent10
 
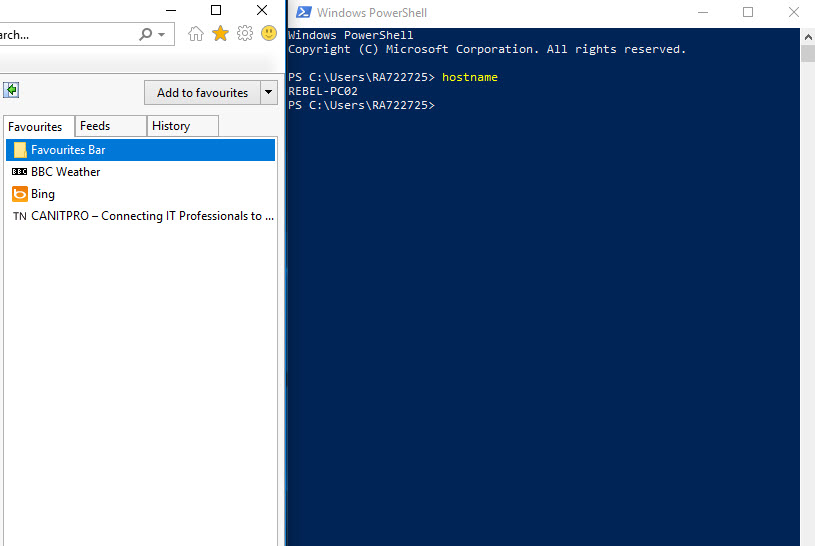
After initial sync, I login in to another pc called REBEL-PC02 as RA722725@therebeladmin.com. In there I expect to see the changes I made. (The sync cycles can take up to 30 minutes. So far I didn’t find way to override this setting) 
 
As expected I can see same IE favorites list. 
 
ent11
 
Also, code writer app settings are there. 
 
ent12
 
As we can see it helps to streamline user experience across corporate devices. This marks the end of this blog post. If you have any questions feel free to contact me on rebeladm@live.com also follow me on twitter @rebeladm to get updates about new blog posts.  

Related posts
Azure services

Microsoft Entra Permissions Management – Part 01 – Azure Subscription Onboarding

Today’s rapidly changing digital landscape creates new identity and access challenges. Microsoft…
Read more
Cyber SecurityMicrosoft Entra IDMicrosoft Technologies

Microsoft Entra lifecycle workflows Part 02 - How to synchronize value for employeeHireDate attribute from on-premises Active Directory ?

In my previous blog post, I explained how we can automate JML (Joiners/Movers/Leavers) process by…
Read more
Azure servicesMicrosoft Entra IDMicrosoft Technologies

Step-by-Step Guide : Automate JML(Joiners/Movers/Leavers) process with Microsoft Entra lifecycle workflows

JML (Joiners/Movers/Leavers) process of an organization has a major impact on its security and…
Read more
Newsletter
Become a Trendsetter

Sign up and get the best of RebelAdmin, tailored for you.

Leave a Reply

Your email address will not be published. Required fields are marked *