In an organization, we add users to roles, groups, and applications to allow them to do certain tasks. Some of these tasks may not be carried out frequently. Is there a better way to handle these types of access, how we can ensure a user only have the relevant permissions when they required?
Azure AD Access packages allow administrators to manage access permissions to groups, applications and SharePoint sites in a more efficient way. Internal and external users will have relevant permissions to do their tasks only when they required. It will reduce the manual review of the user account permissions. The relevant policies will ensure who can request access, how the access requests are handled and when the access permissions will be revoked.
Azure AD access packages can use to,
• Manage membership of Azure AD groups
• Manage membership of Office 365 groups
• Manage membership of SharePoint sites
• Mange membership of Azure AD applications
In this post, I am going to demonstrate how we can manage access permissions using Azure AD Access Package.
In my demo environment, I have a user called Debra Berger. She is going to work on a new recruiting campaign. As part of her job, she has to access LinkedIn application. At the moment only members of sg-Finance & sg-Sales and Marketing groups have access to it. Debra Berger is not a member of both groups. She only needs this app for the new campaign. So, let’s go ahead and create an access package for this.
To do this,
1. Log in to Azure Portal as Global Administrator https://portal.azure.com/
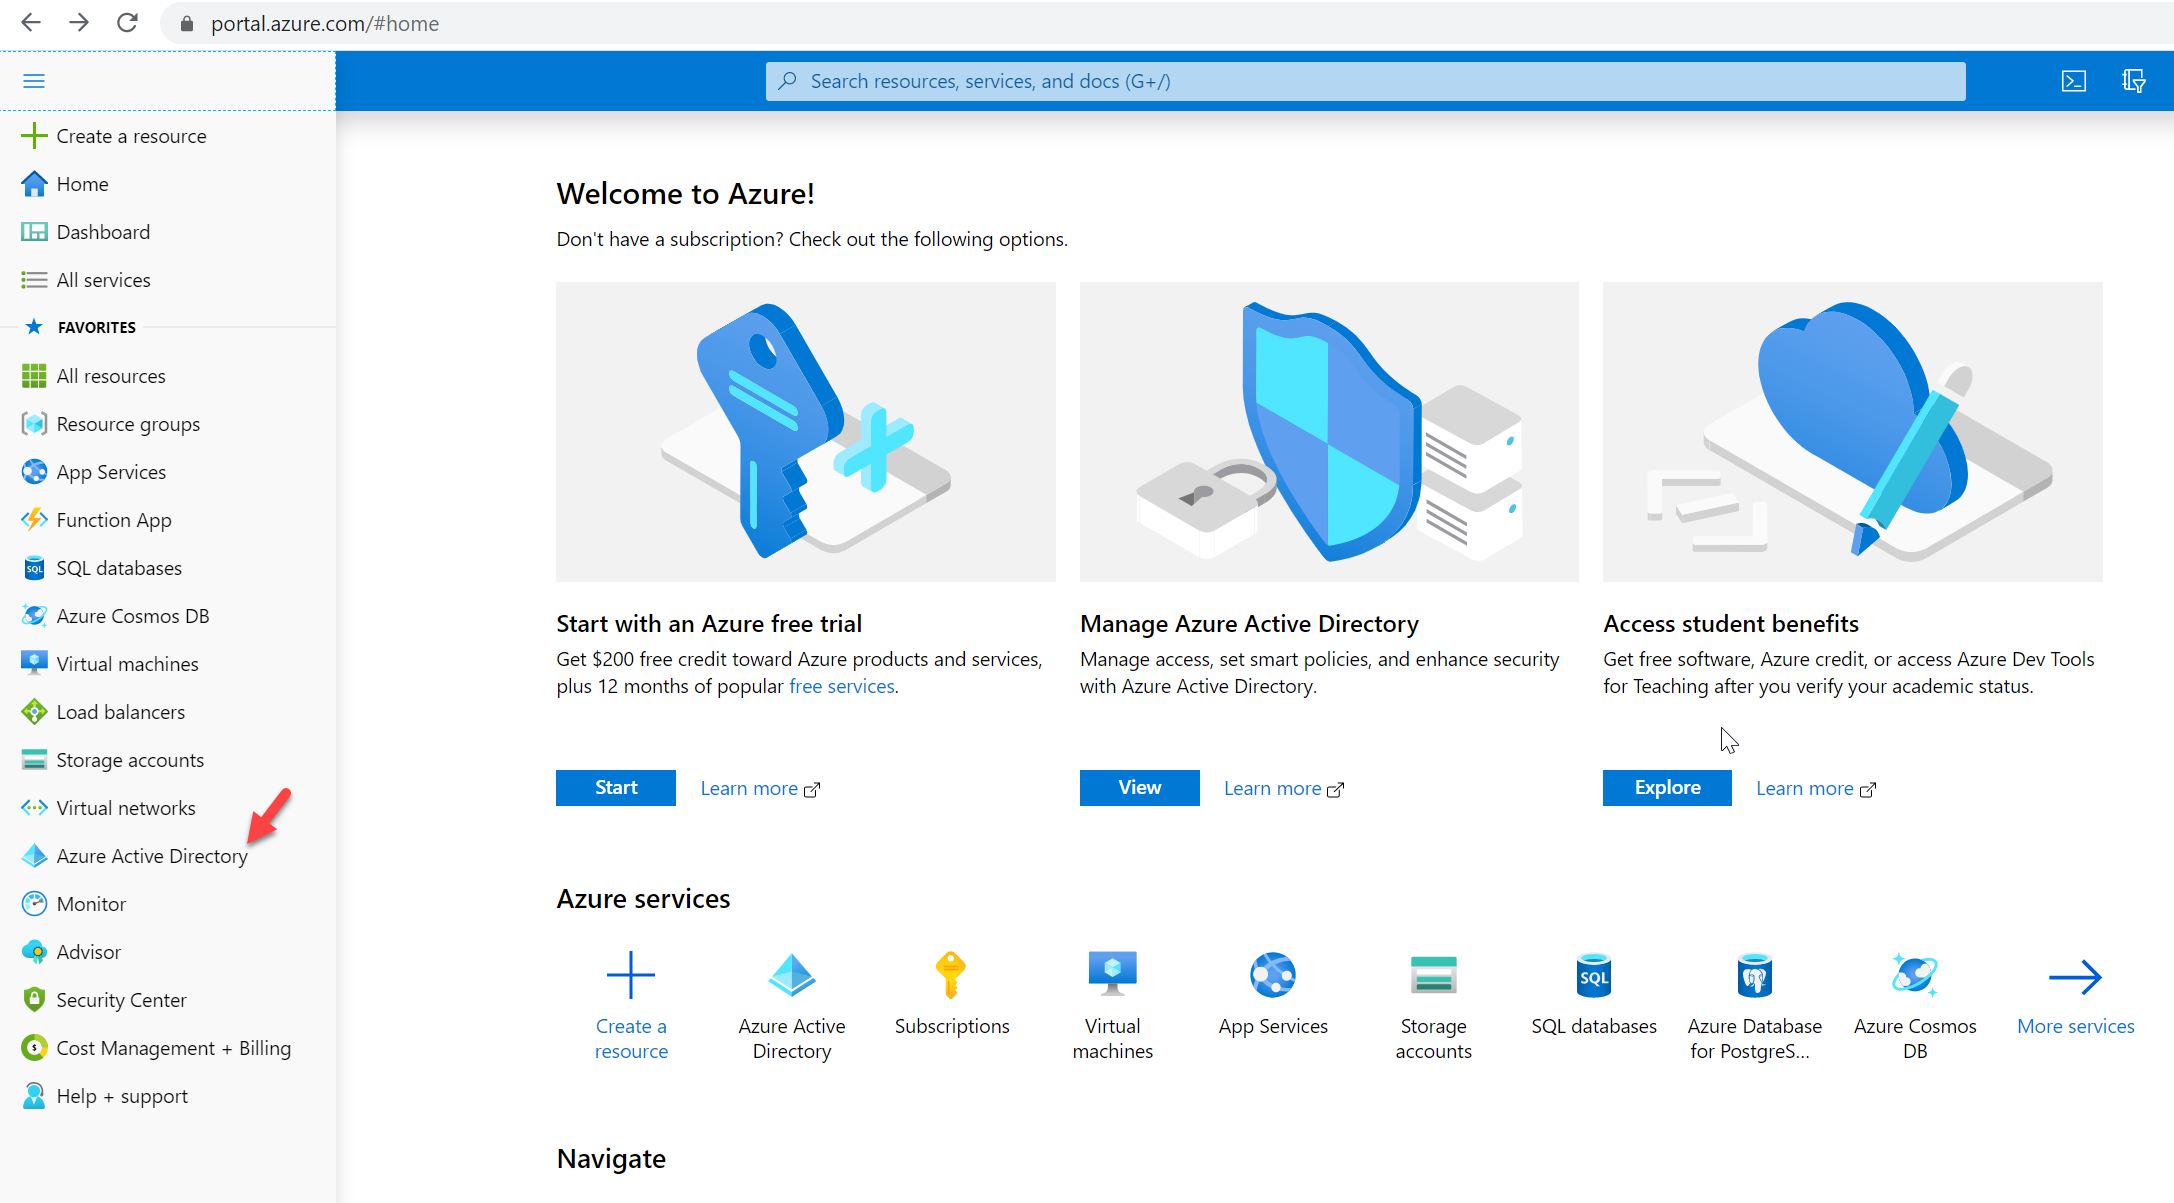
2. Go to Menu and click on Azure Active Directory
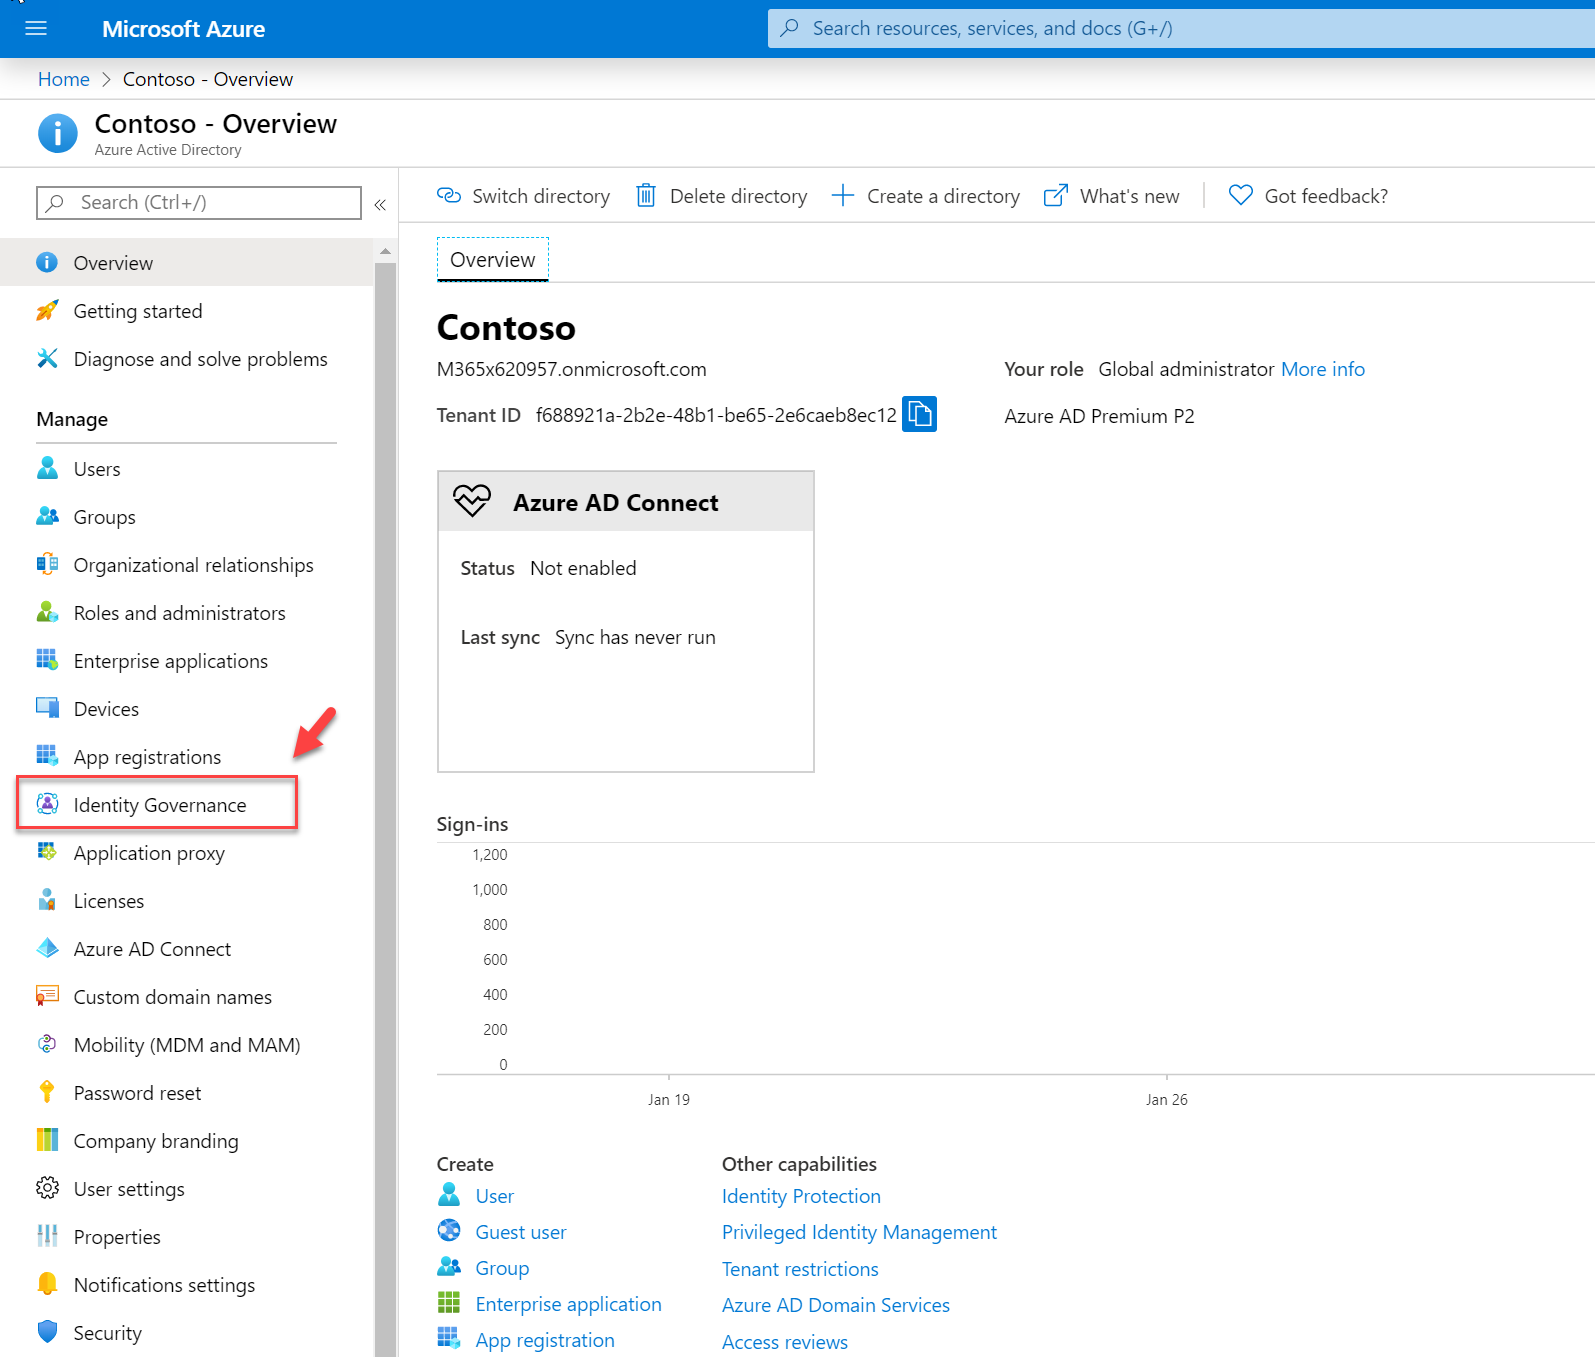
3. Then click on Identity Governance
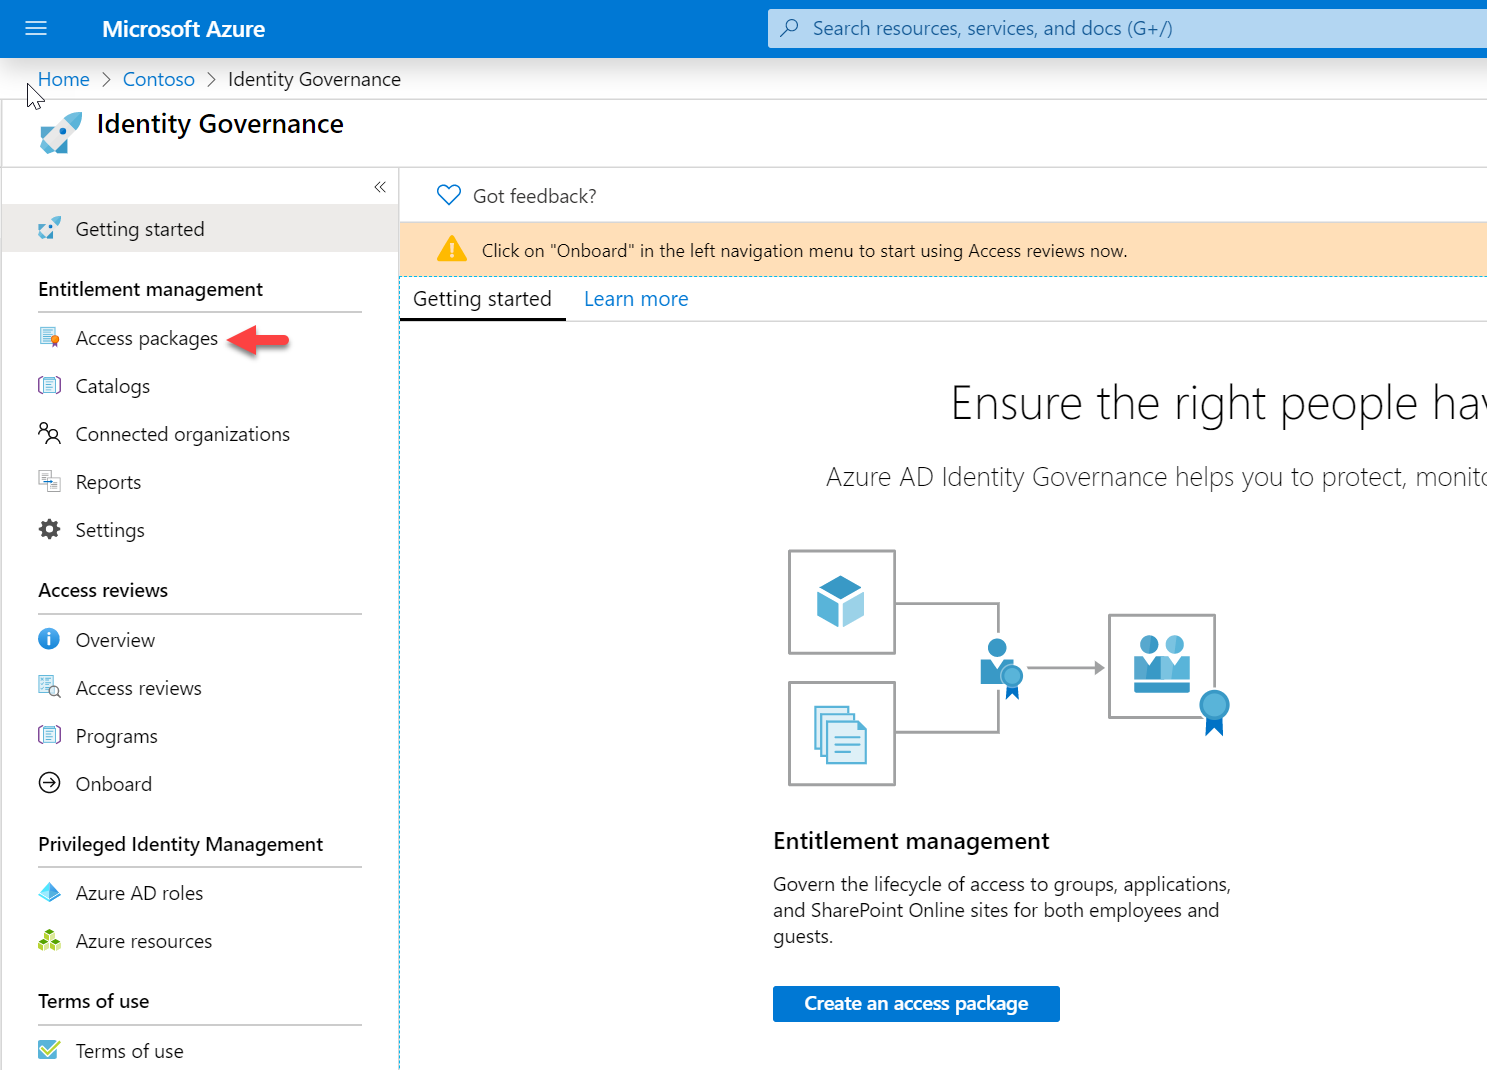
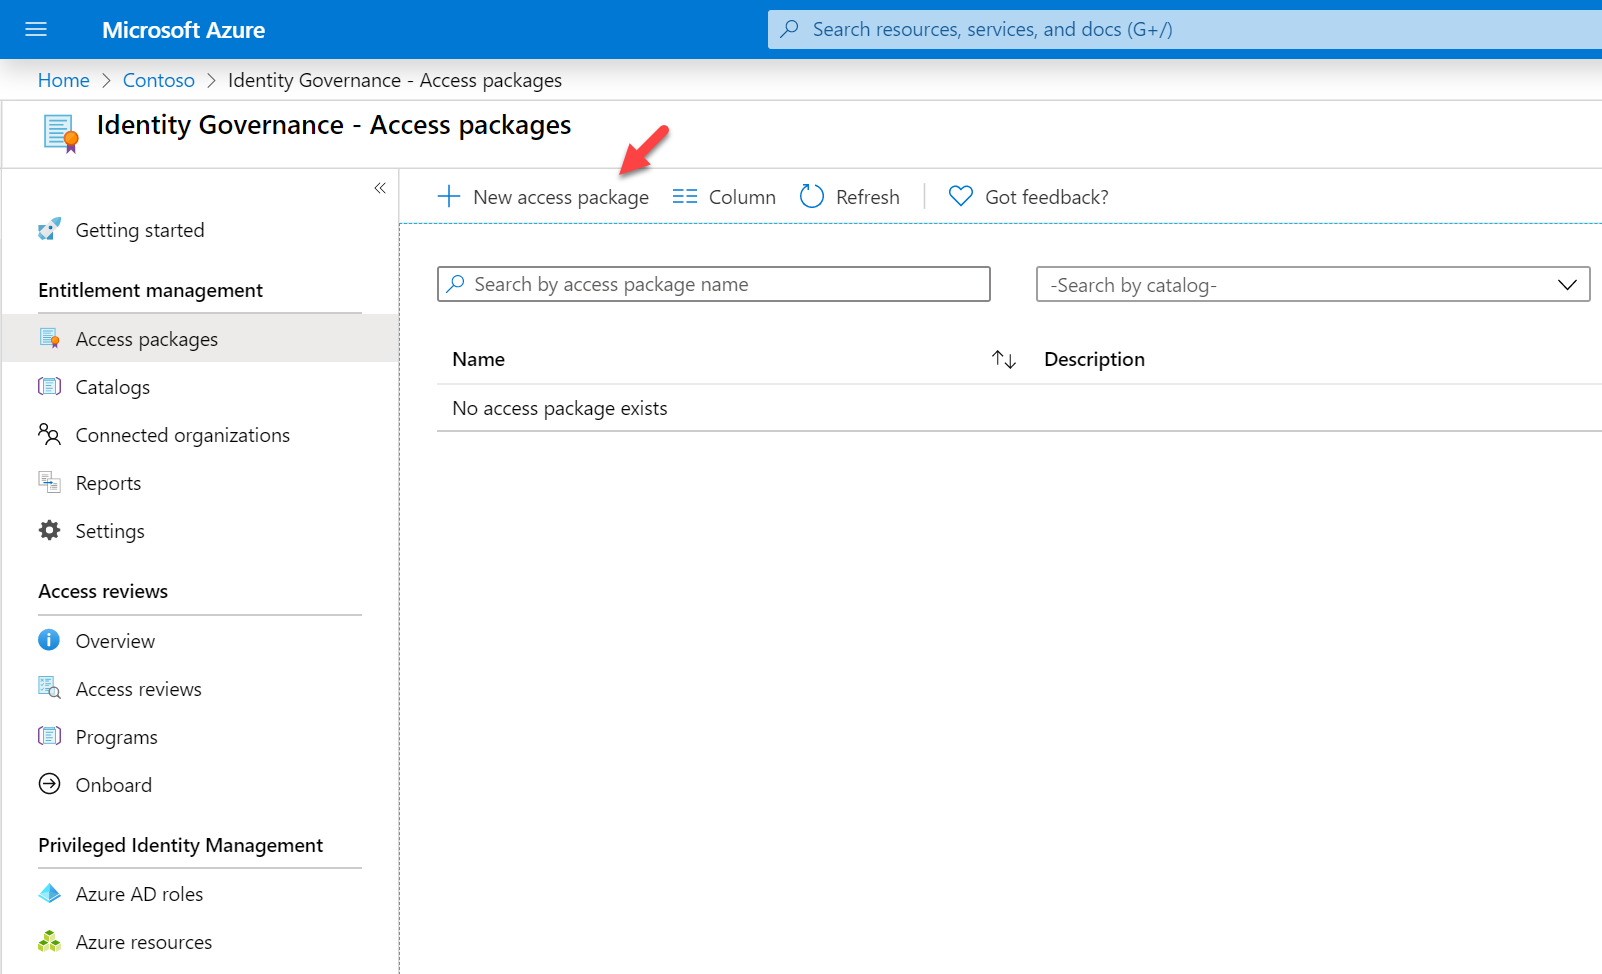
4. Click on Access packages
5. Then click on New access package
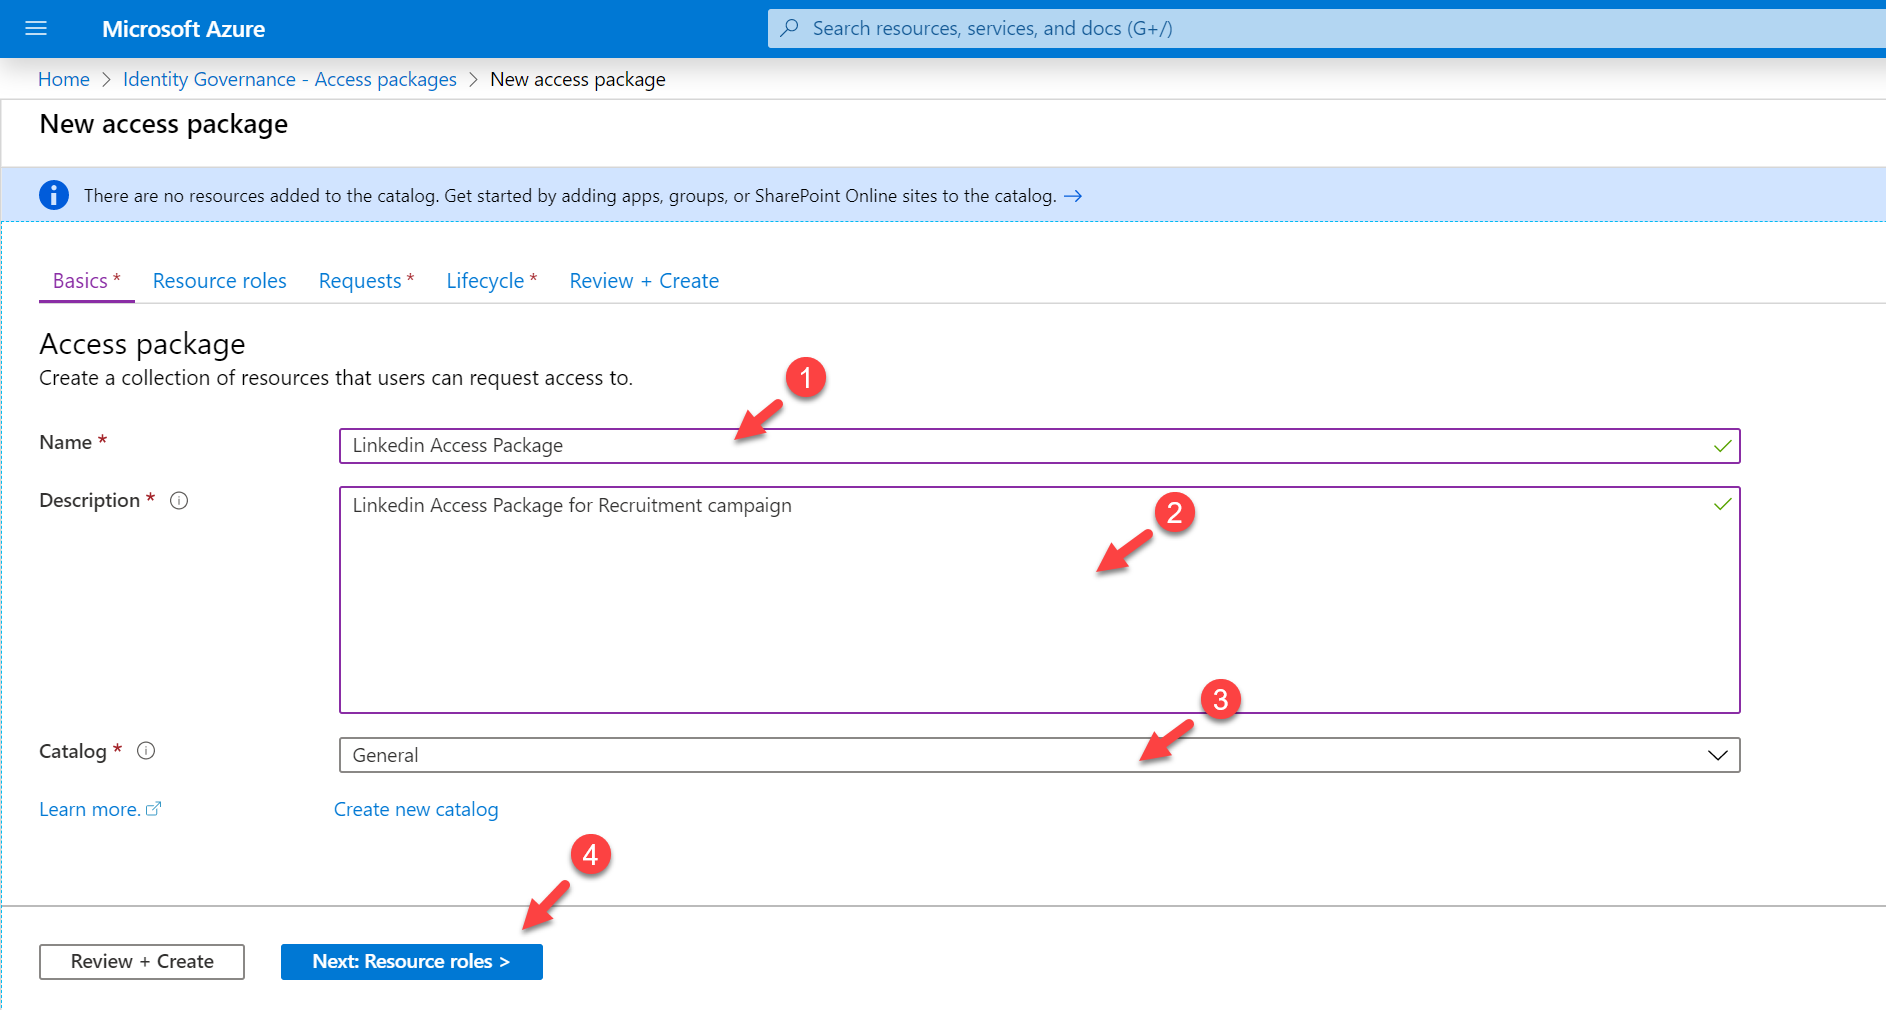
6. It will open a new wizard to create access packages. Provide name, description, and catalog for the new access package. By default, the catalog is set to General, if required you can create your own. Once settings are in click on Next: Resource roles >
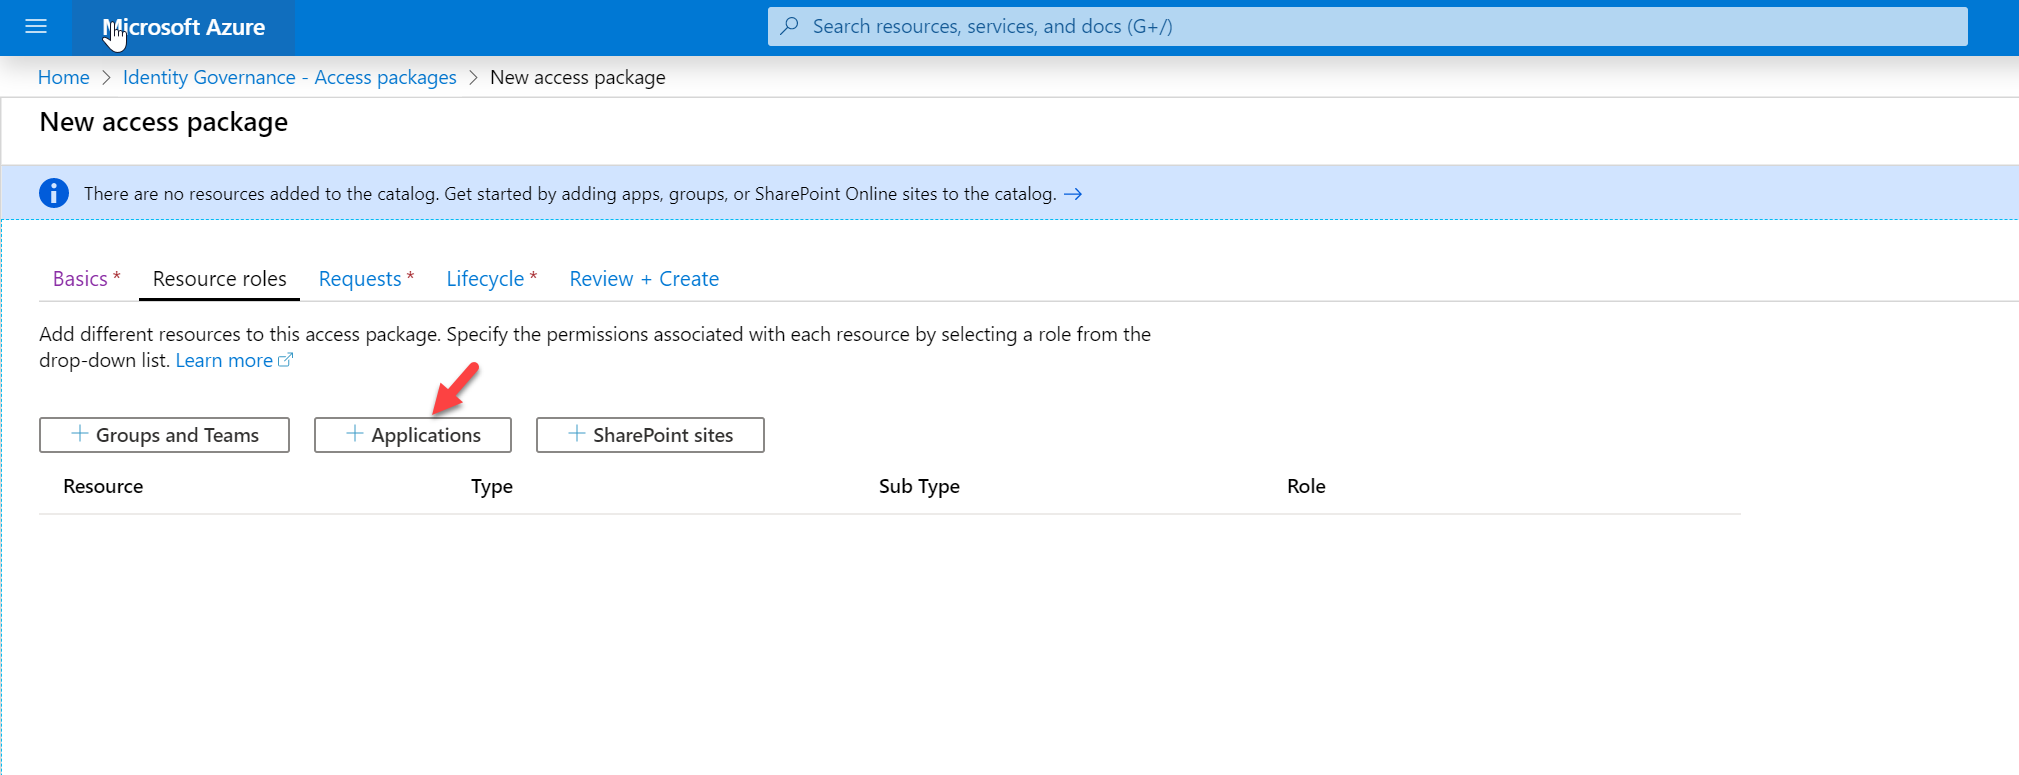
7. In the next window, click on Applications.
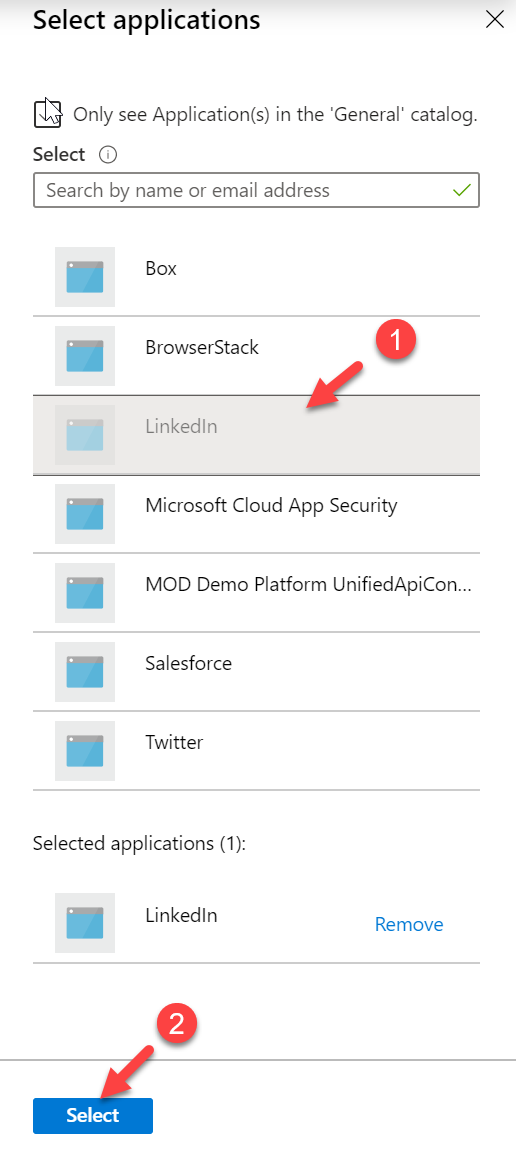
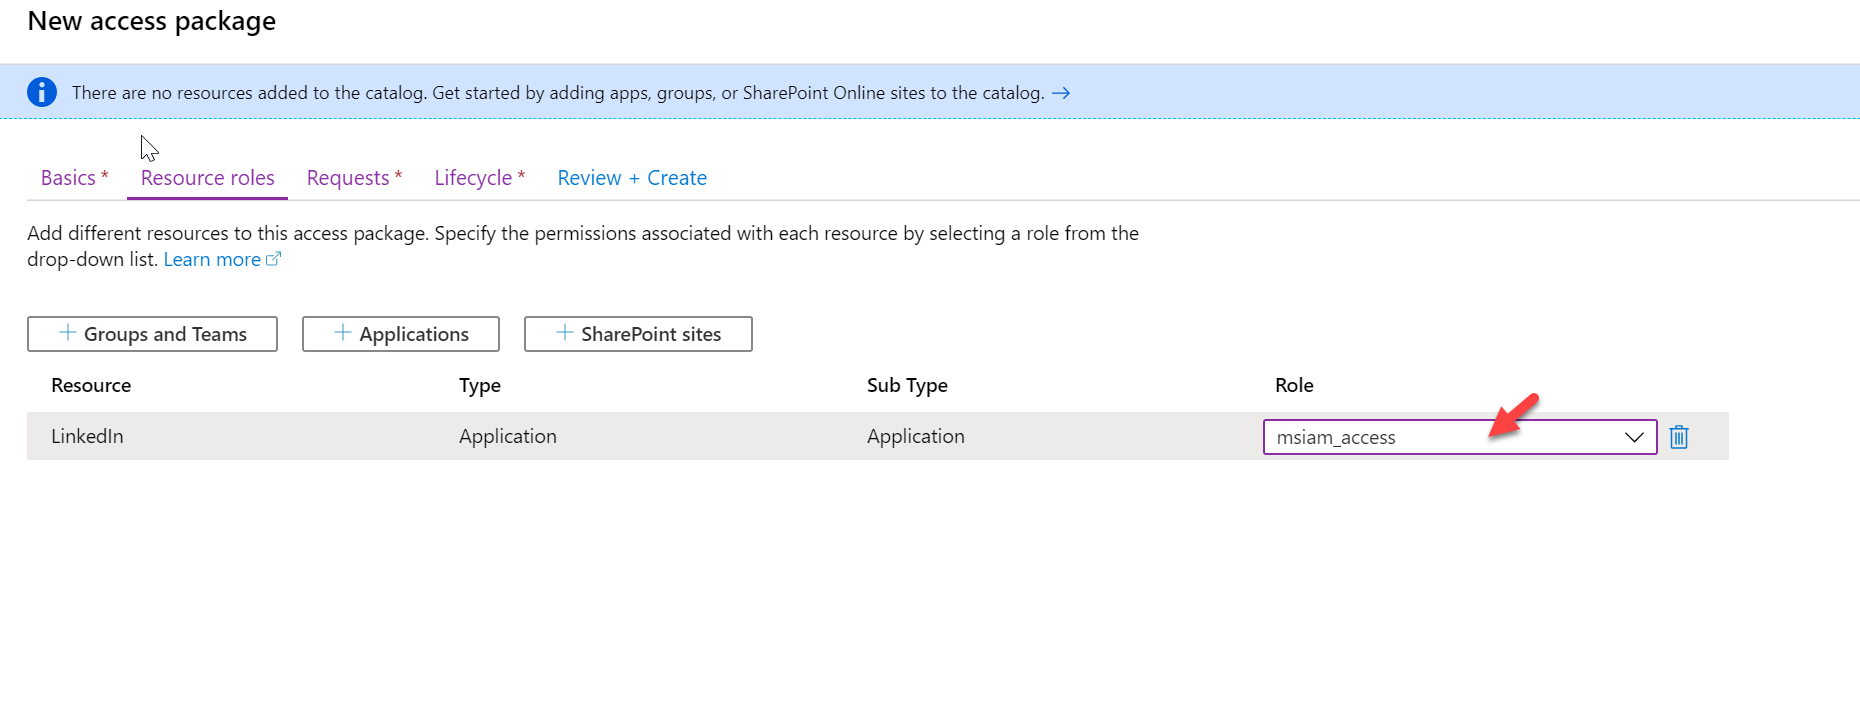
8. Then from the application list select LinkedIn
Once the application in the configuration window, select the relevant role.
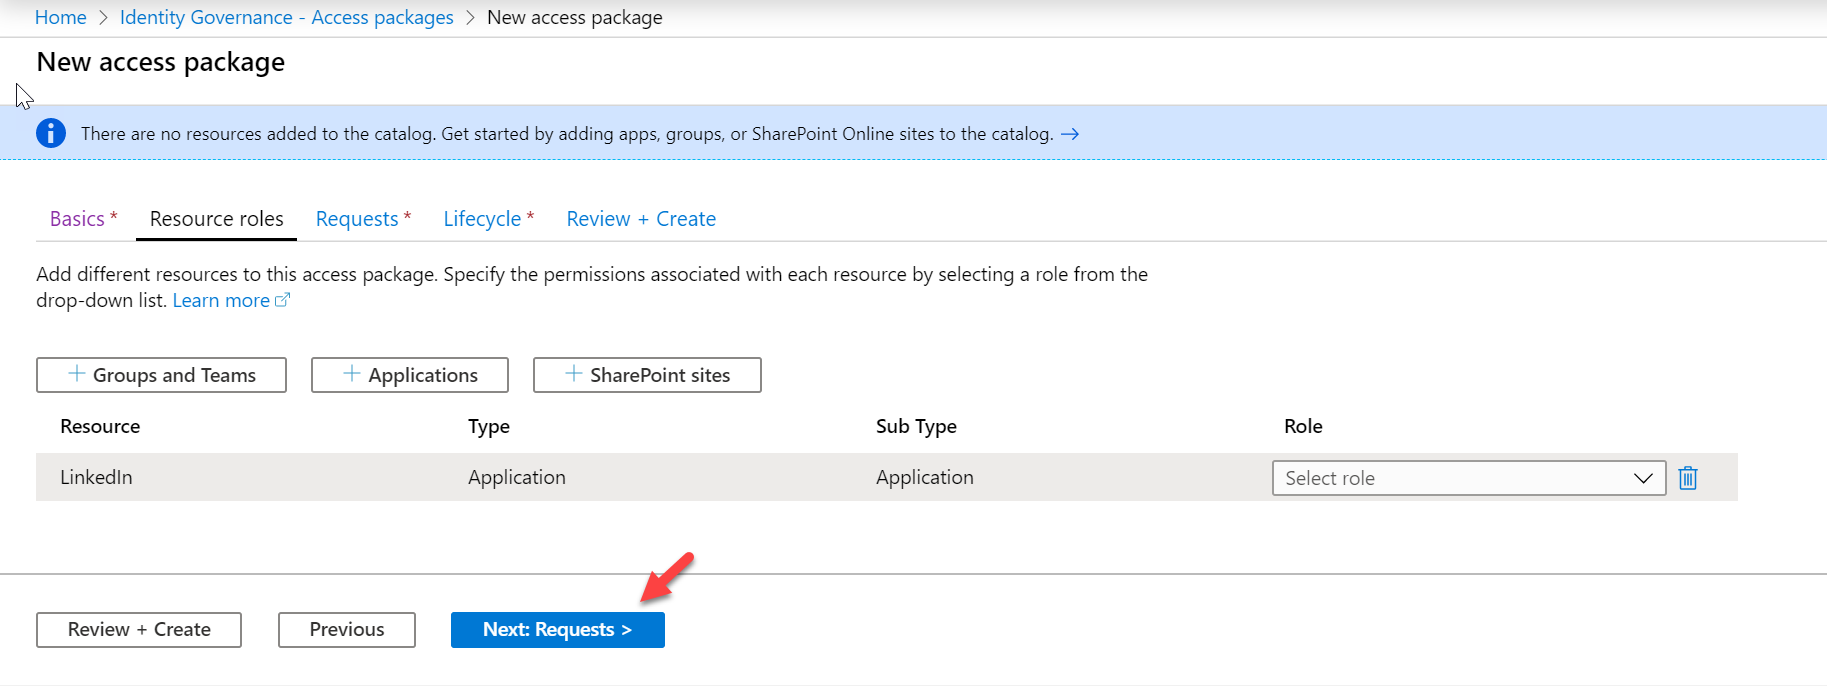
9. Then click on Next: Requests >
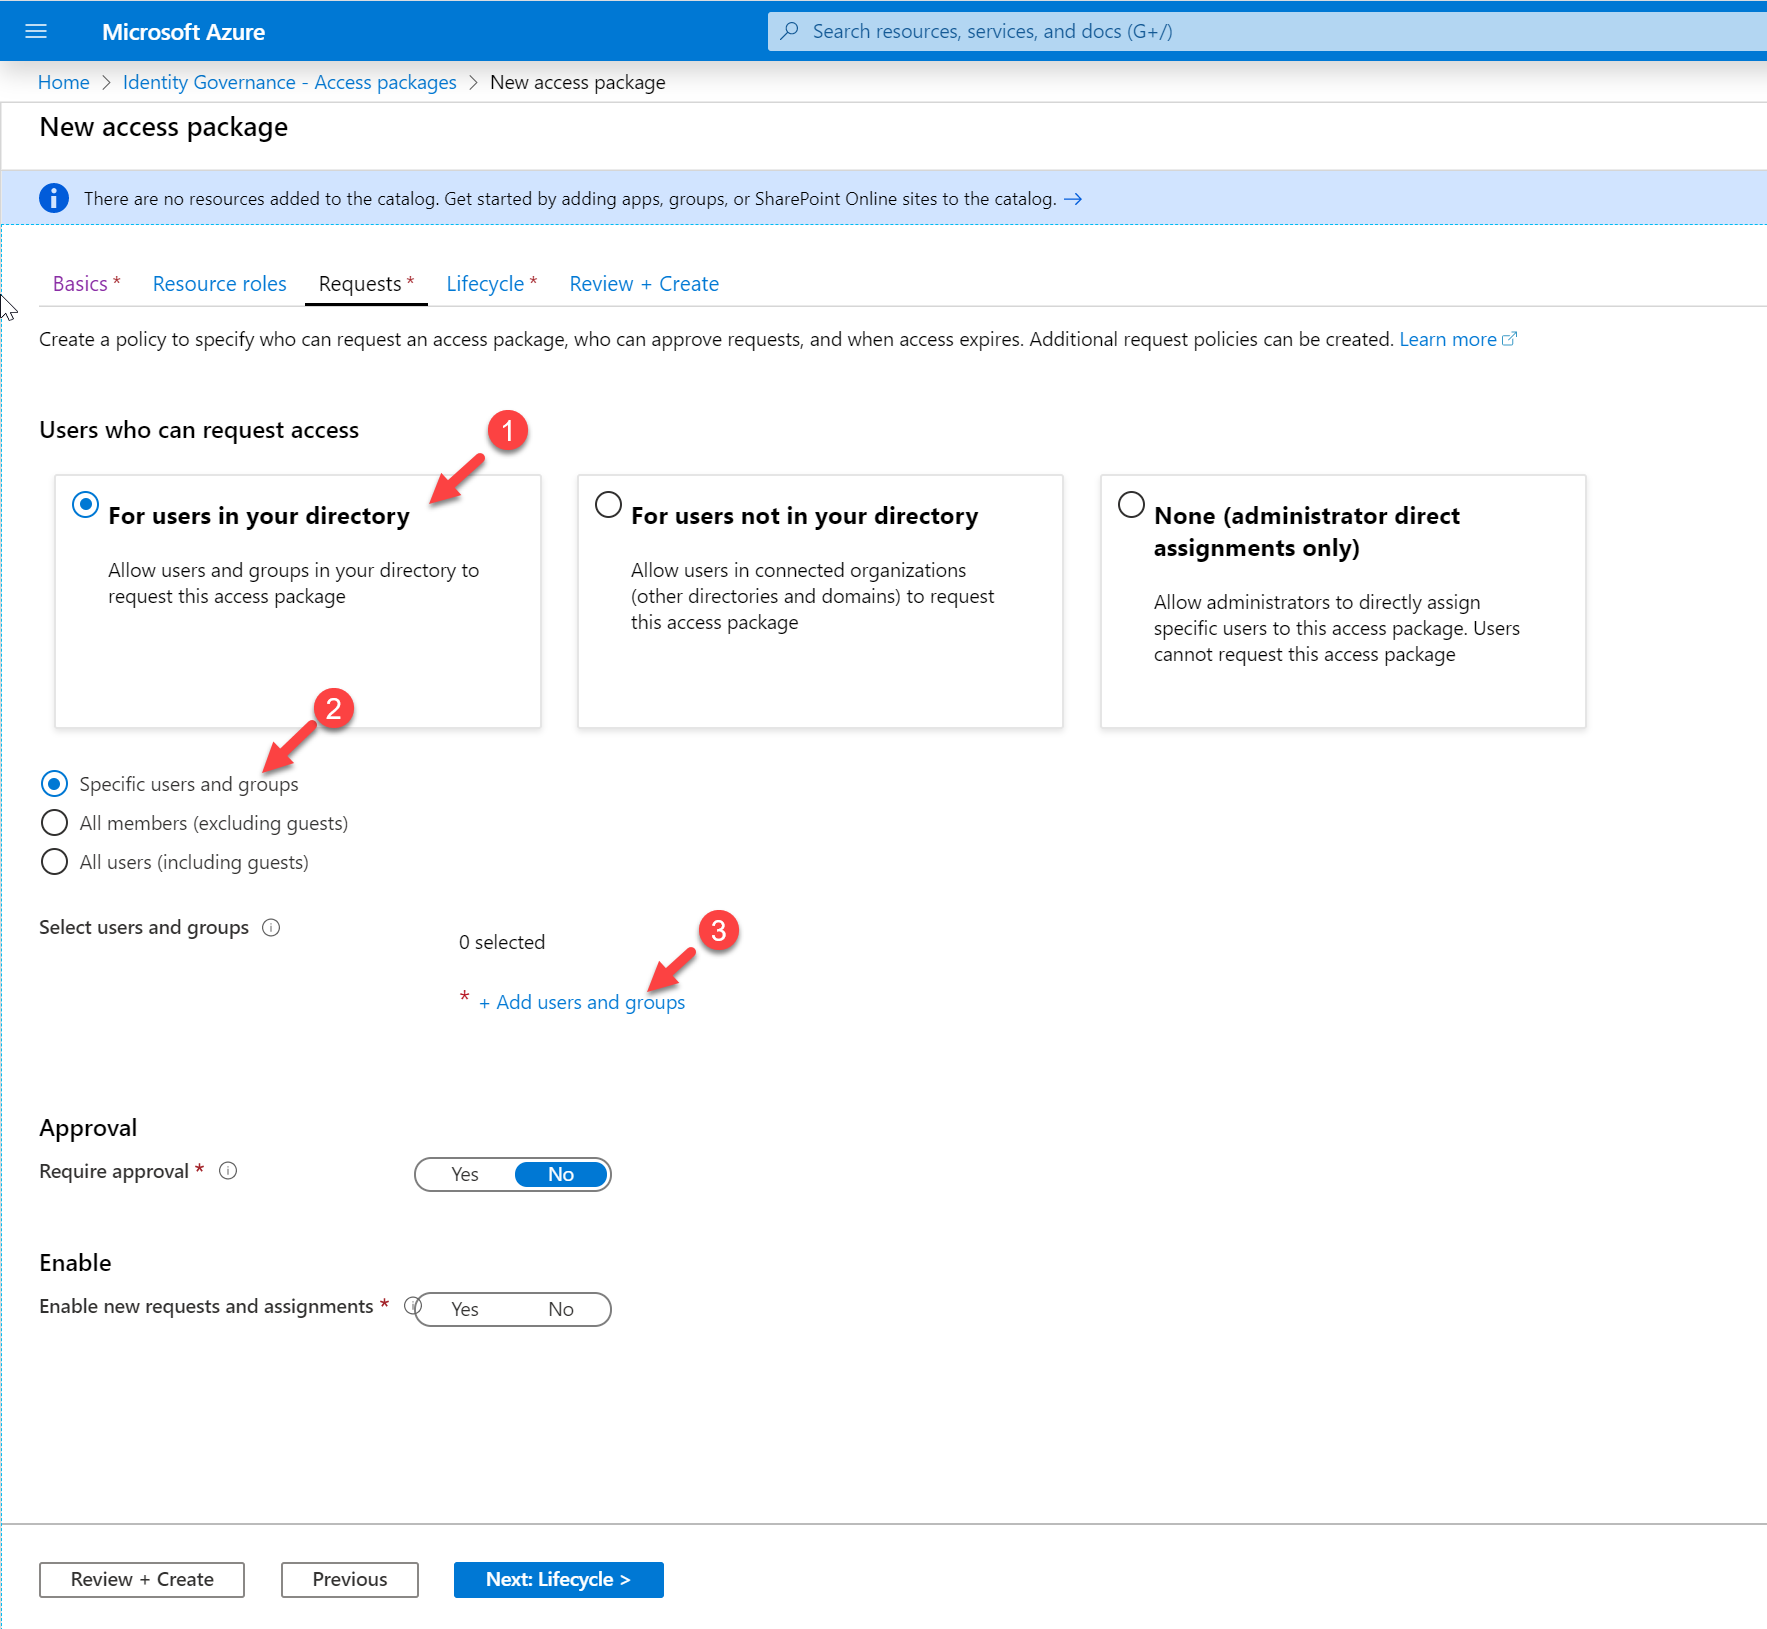
10. In the requests page, choose option For users in your directory as we are going to allow users from the current Azure AD directory.
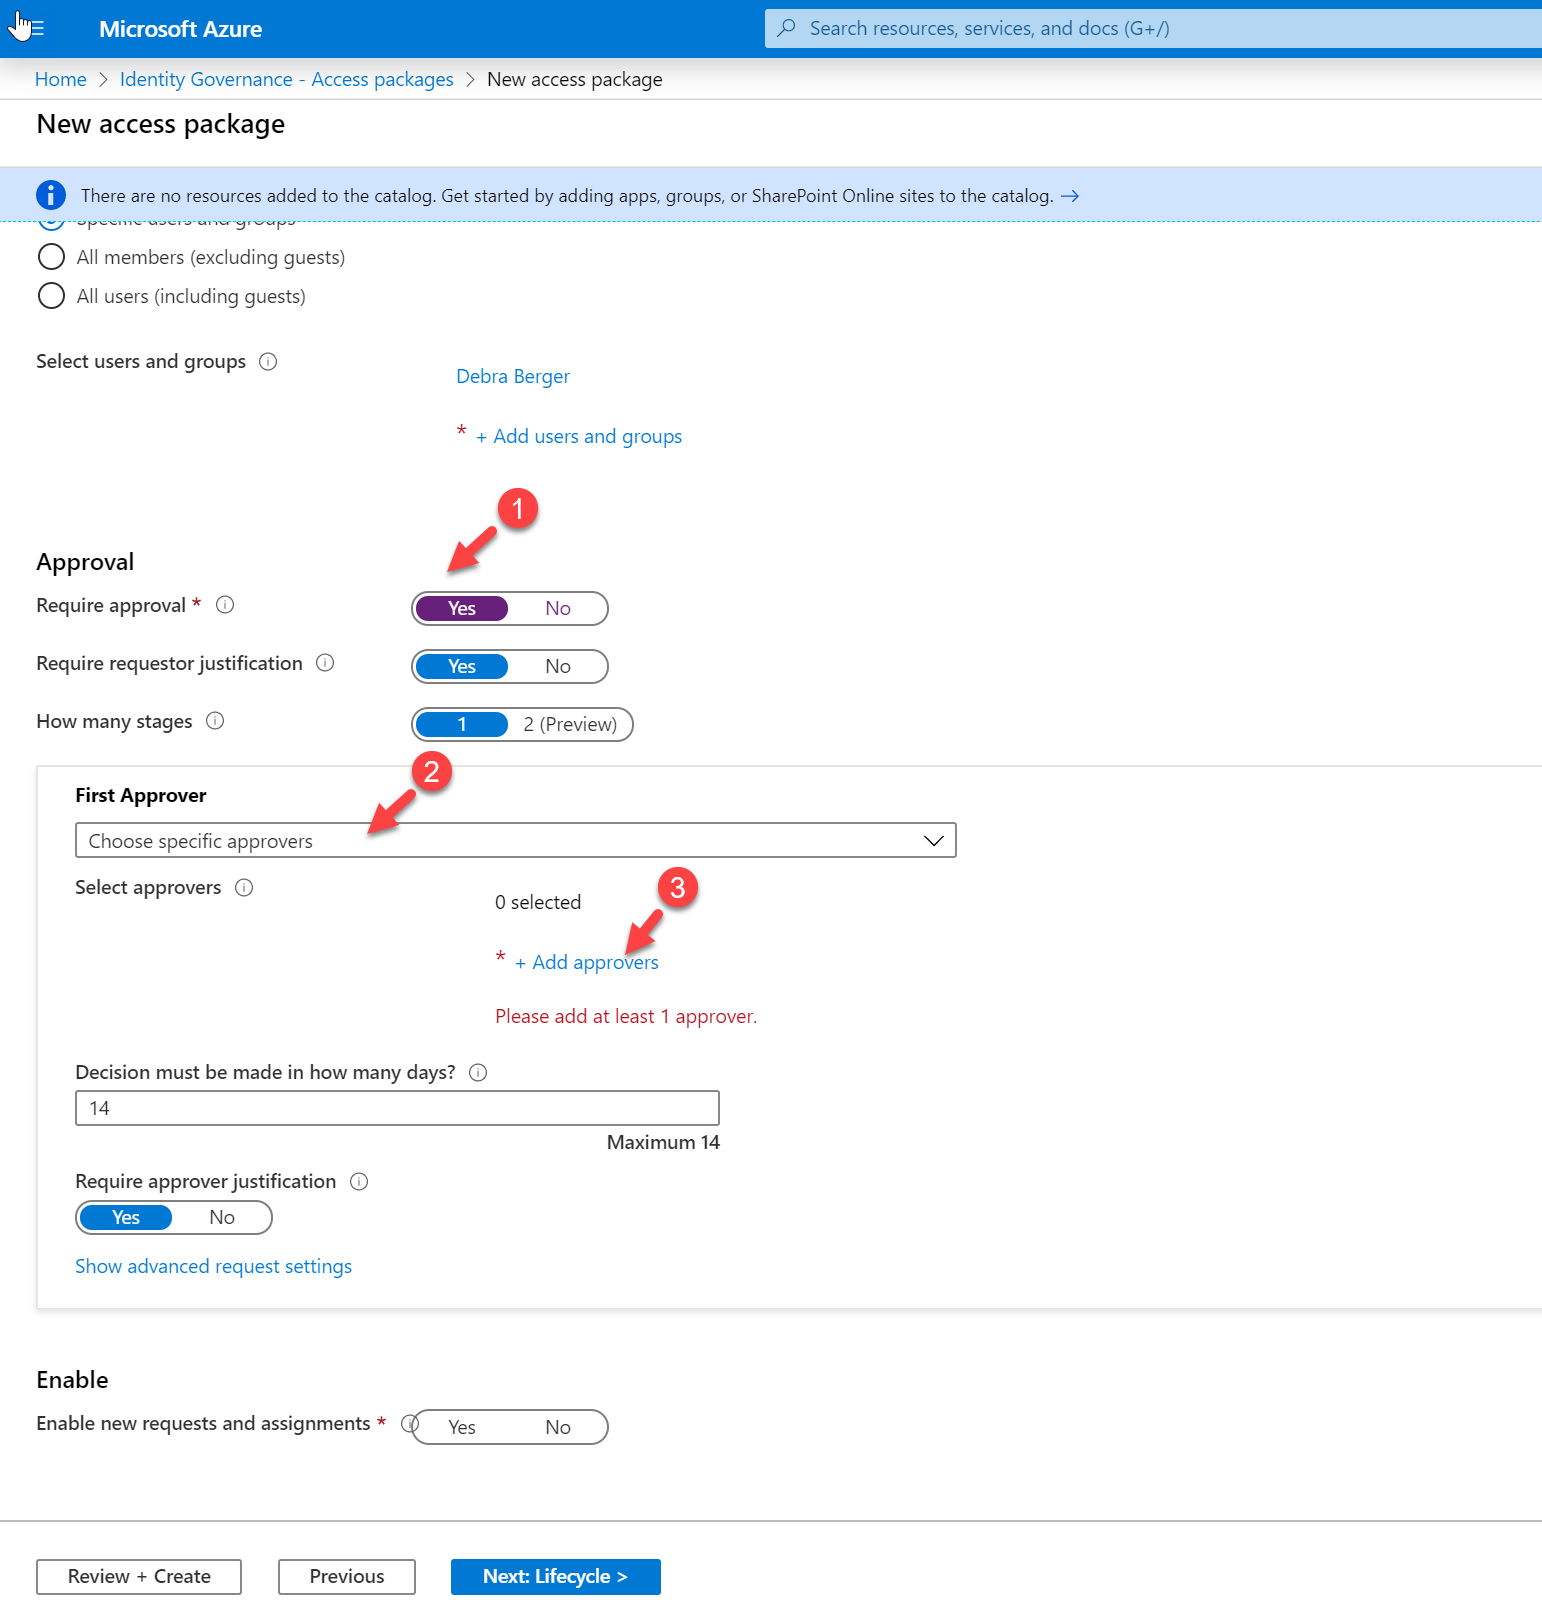
Then choose the option, Specific users and groups. Then click on + Add users and groups
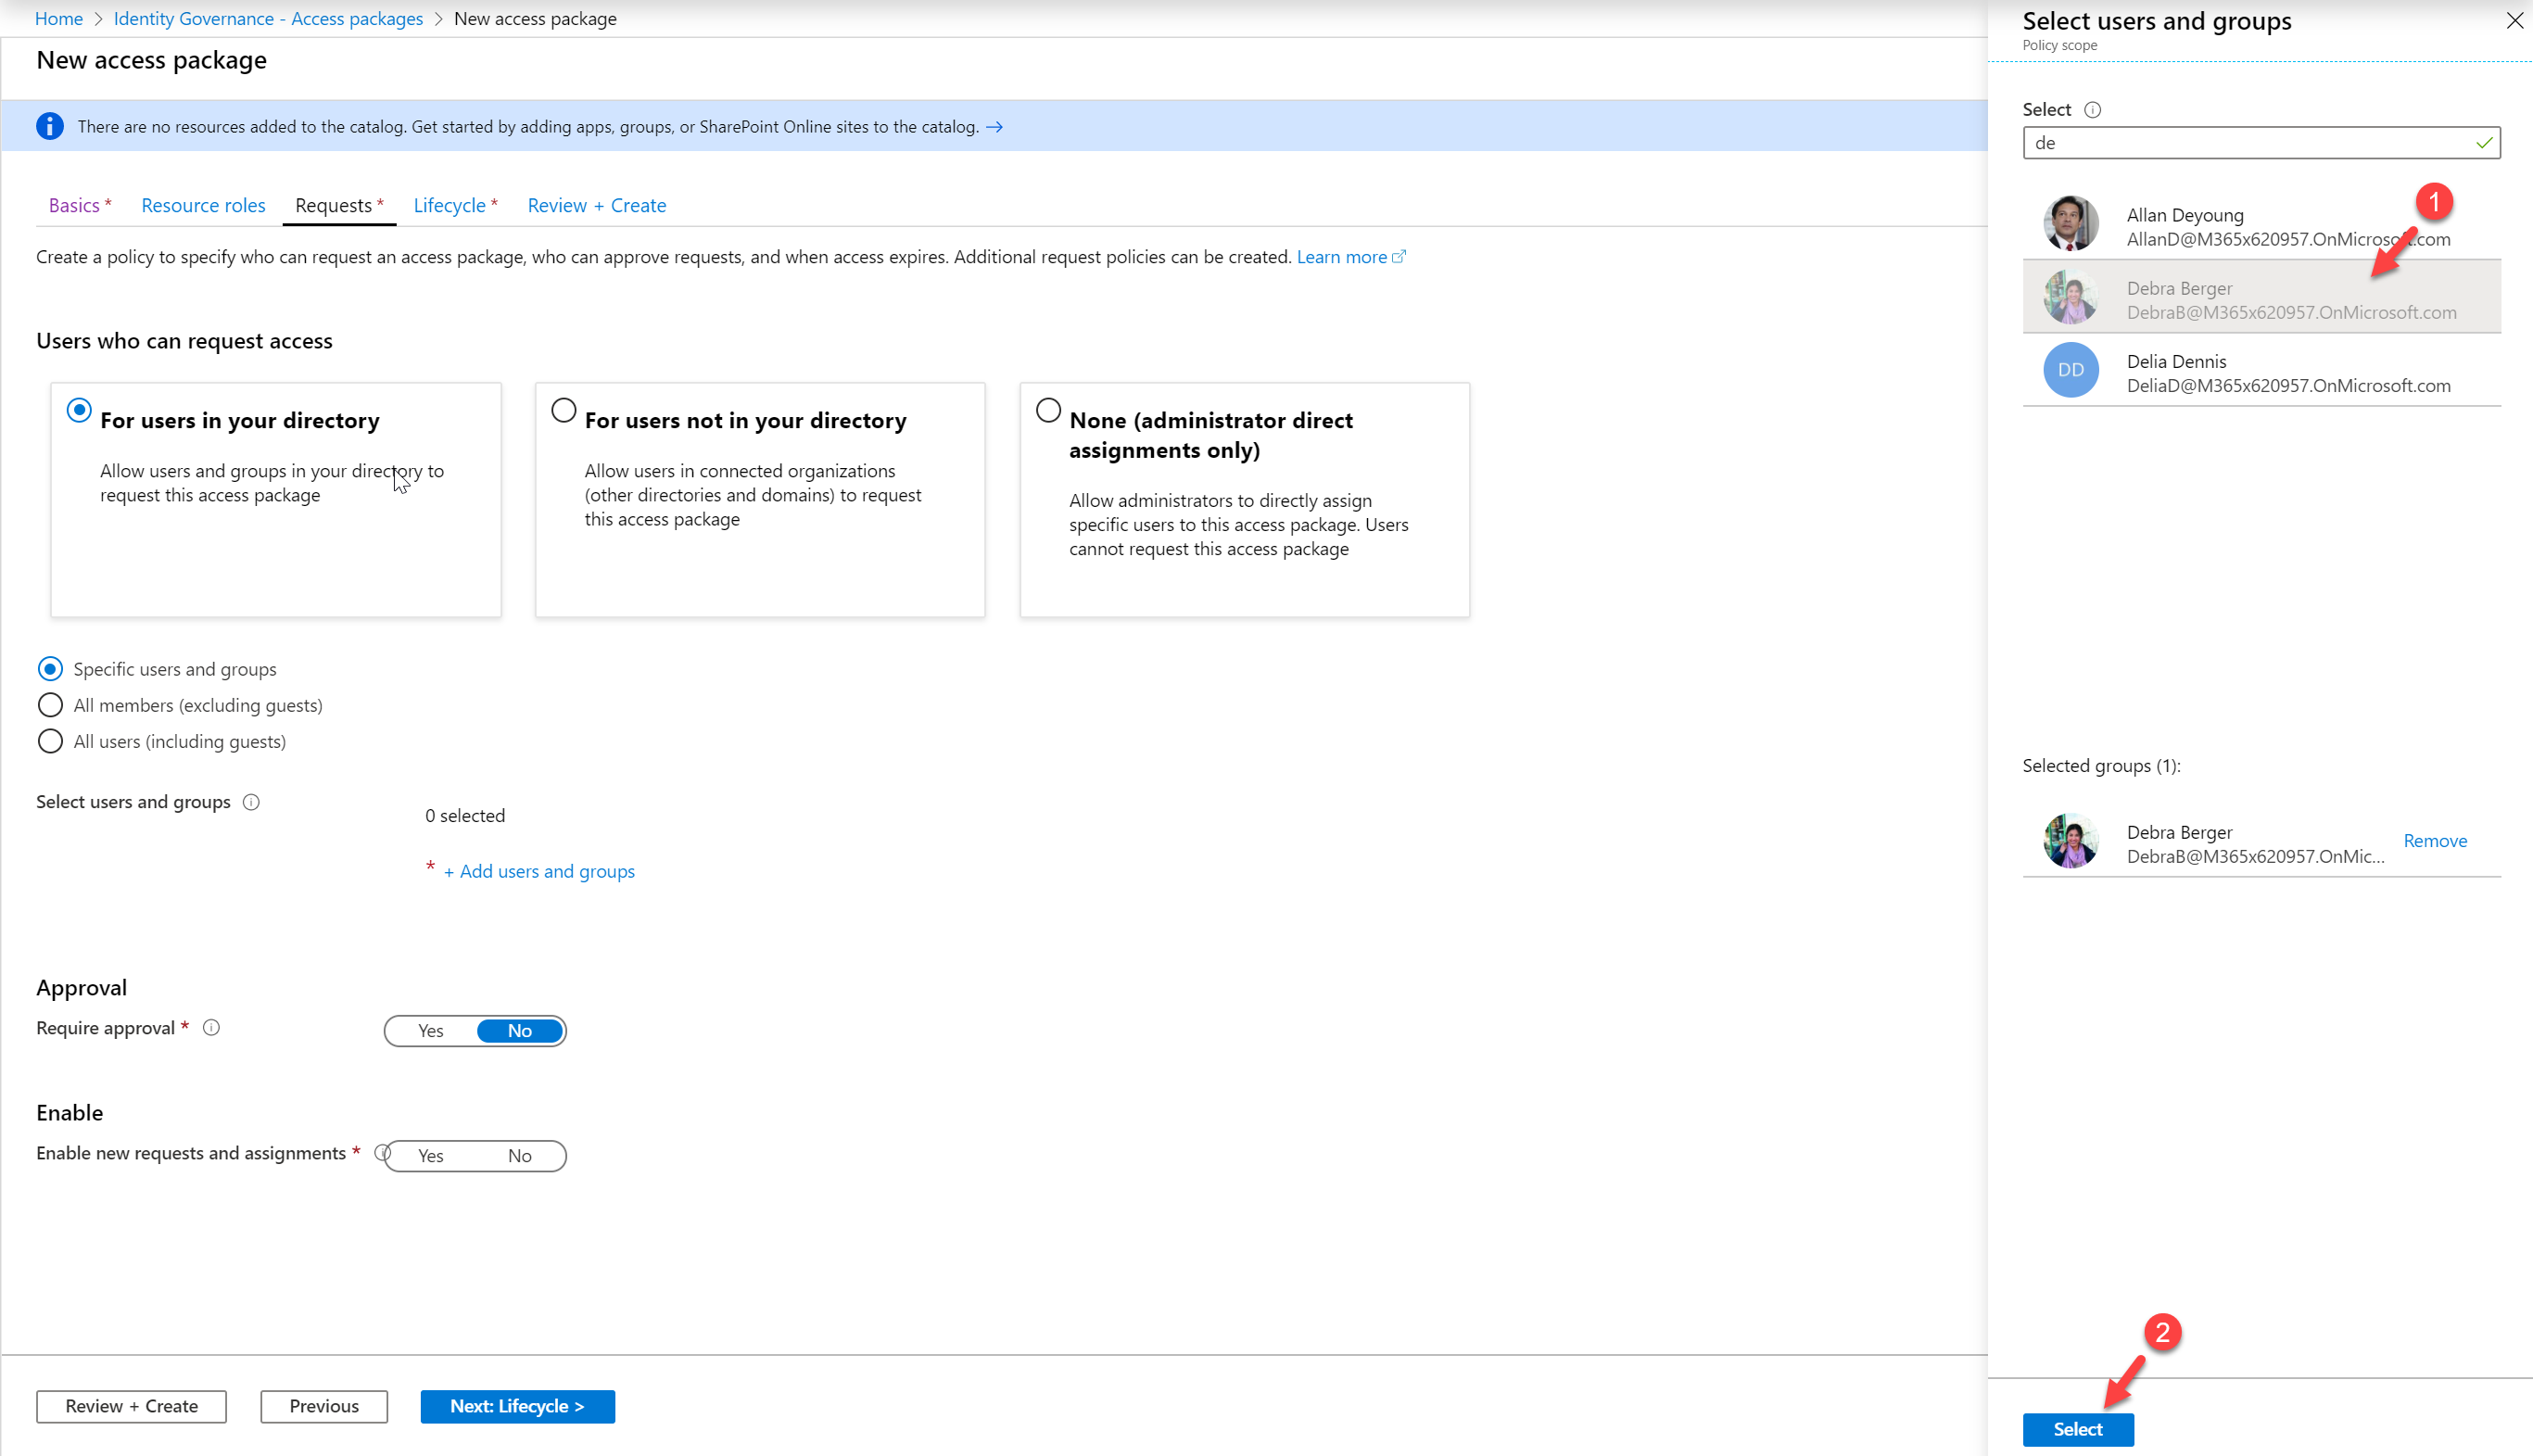
Select the user Debra from the list.
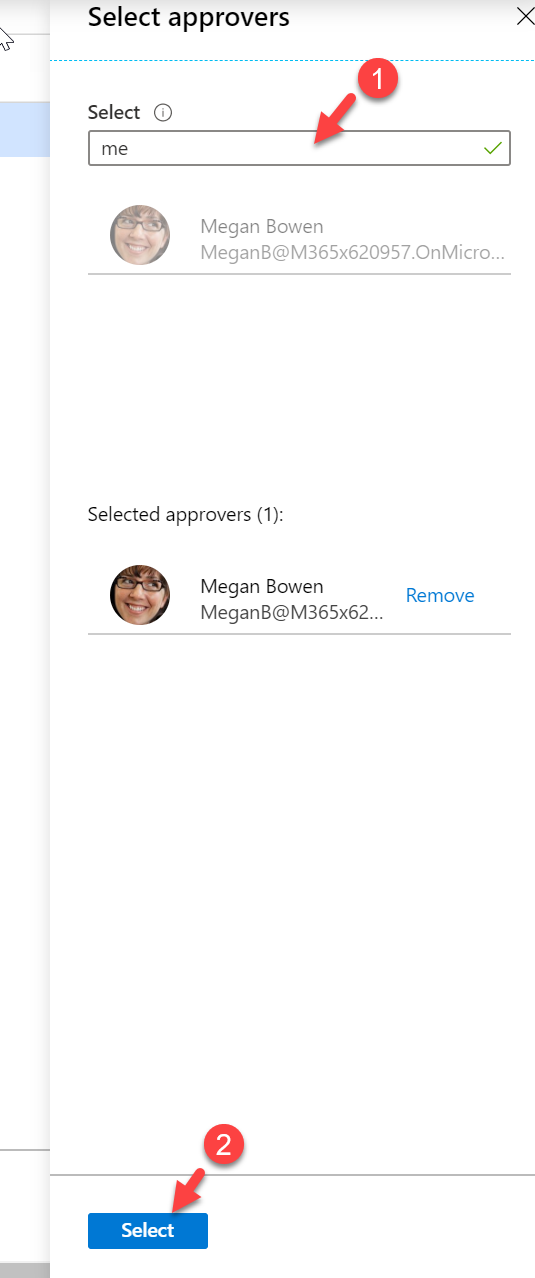
I also like to manually approve the access request. To do that, click on Yes under Require approval option. Then under the First approver, select option Choose specific approvers. To specify the approvers, click on + Add approvers
Then from the list, select the approvers. In my demo, I choose Megan Bowen as an approver.
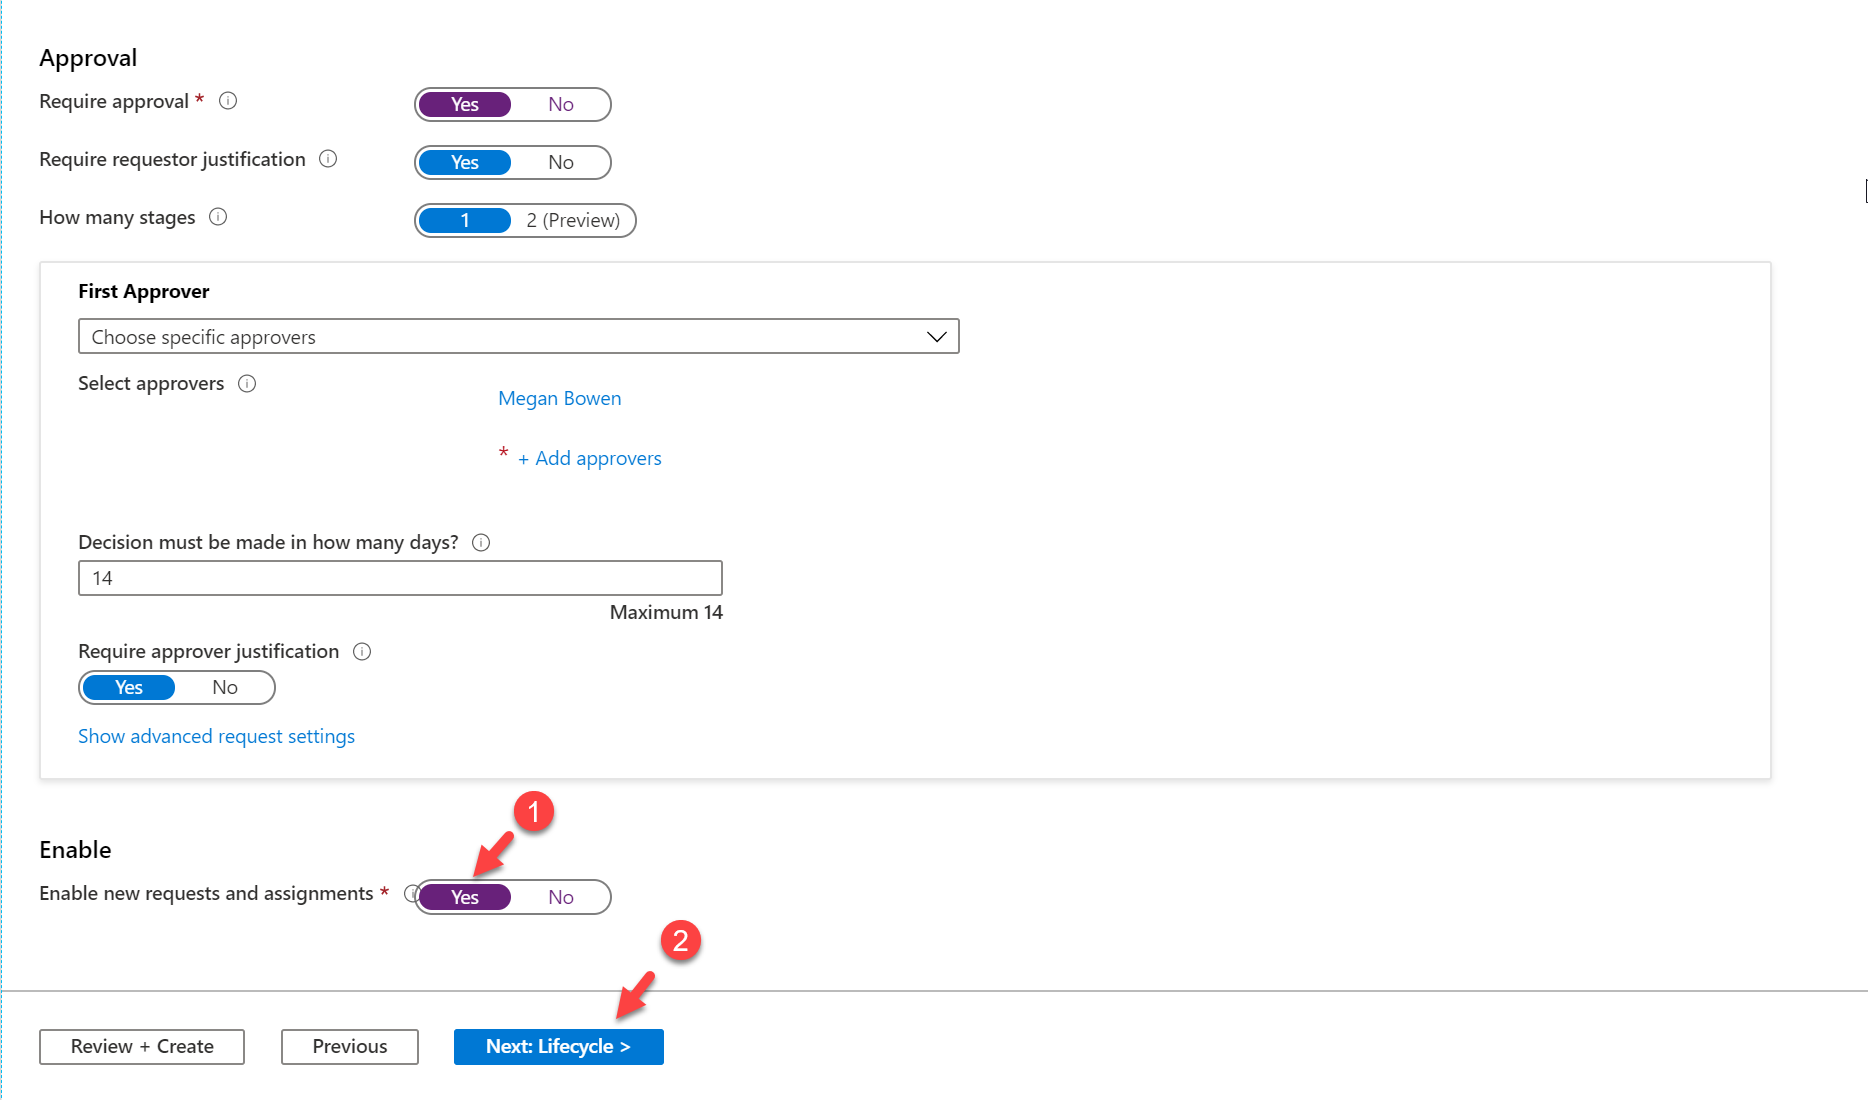
We also need to click on Yes to Enable new requests and assignments option. This will allow users to make new access requests using this policy. Once settings are in click on Next: Lifecycle > to continue
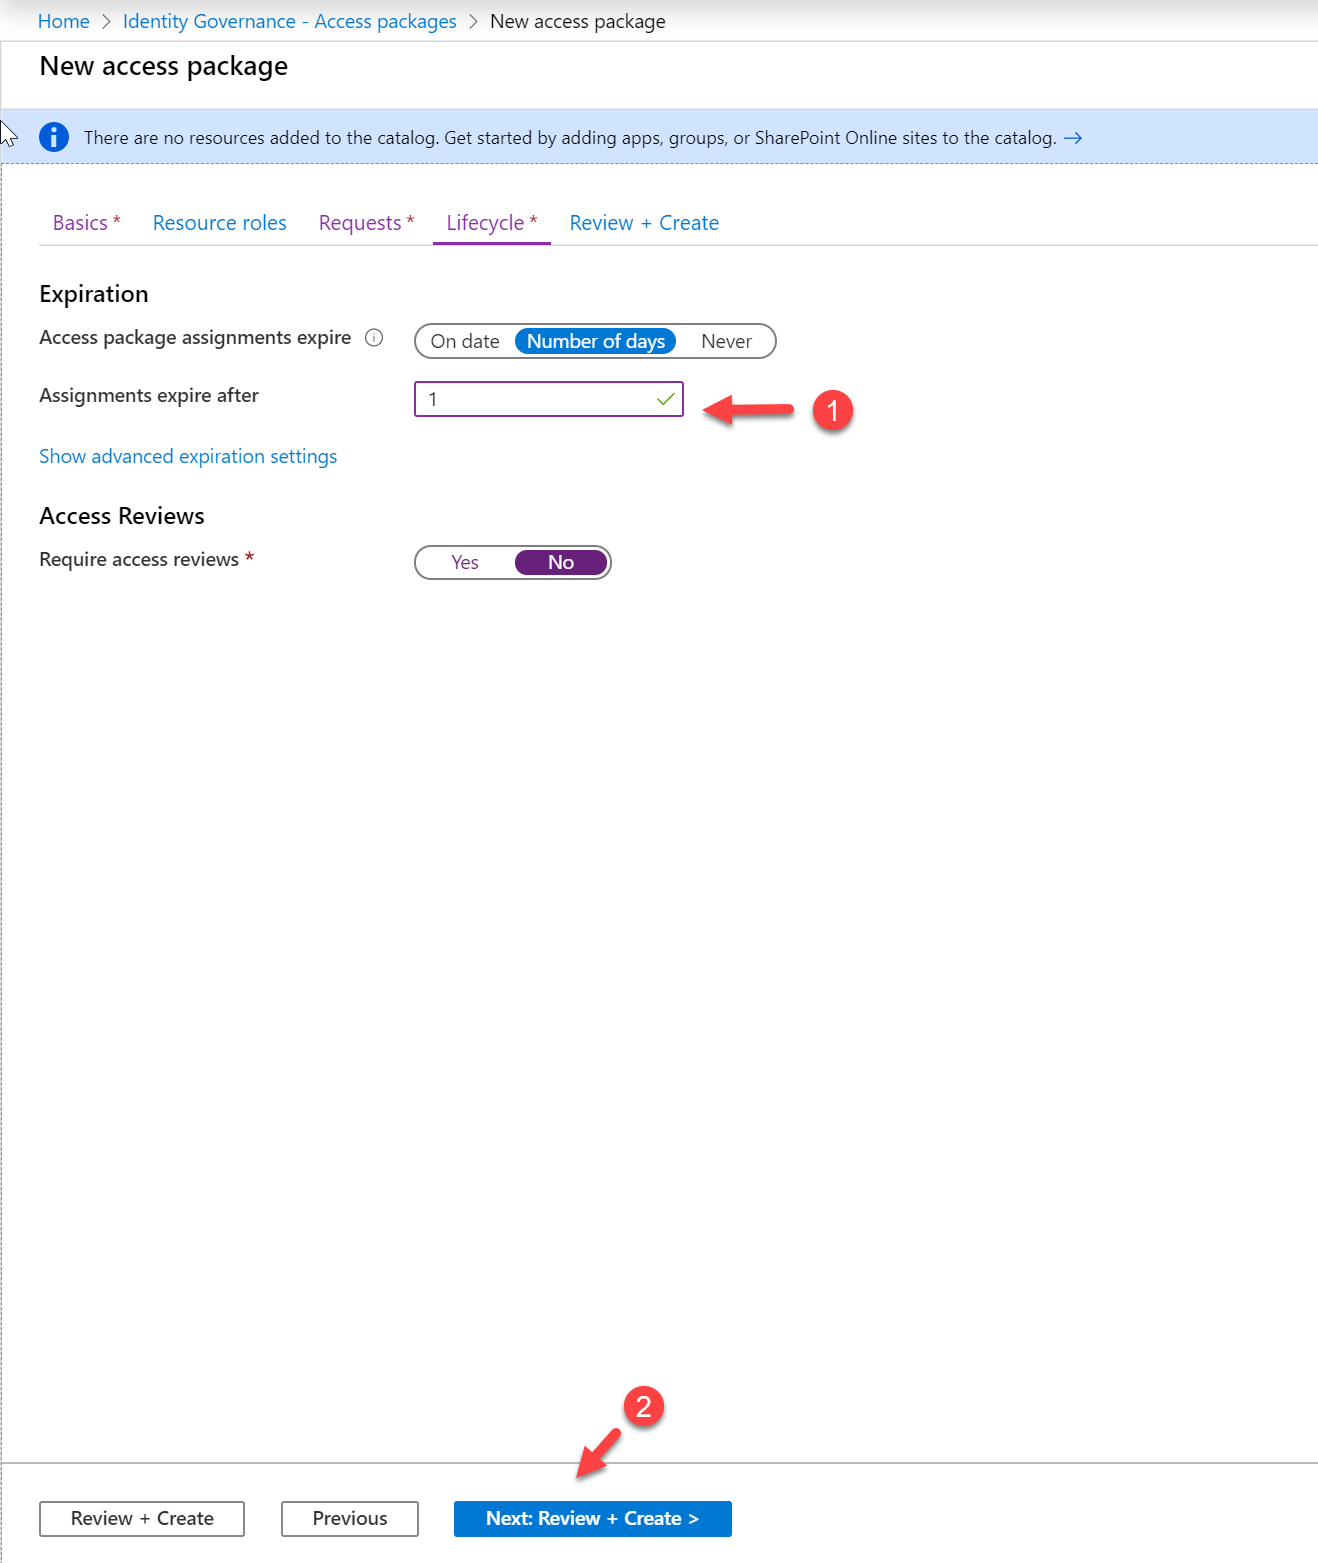
11. On the next page, define the Expiration settings for access assignment. In this demo, I only allow one day. After specifying values, click on Next: Review + Create > to continue.
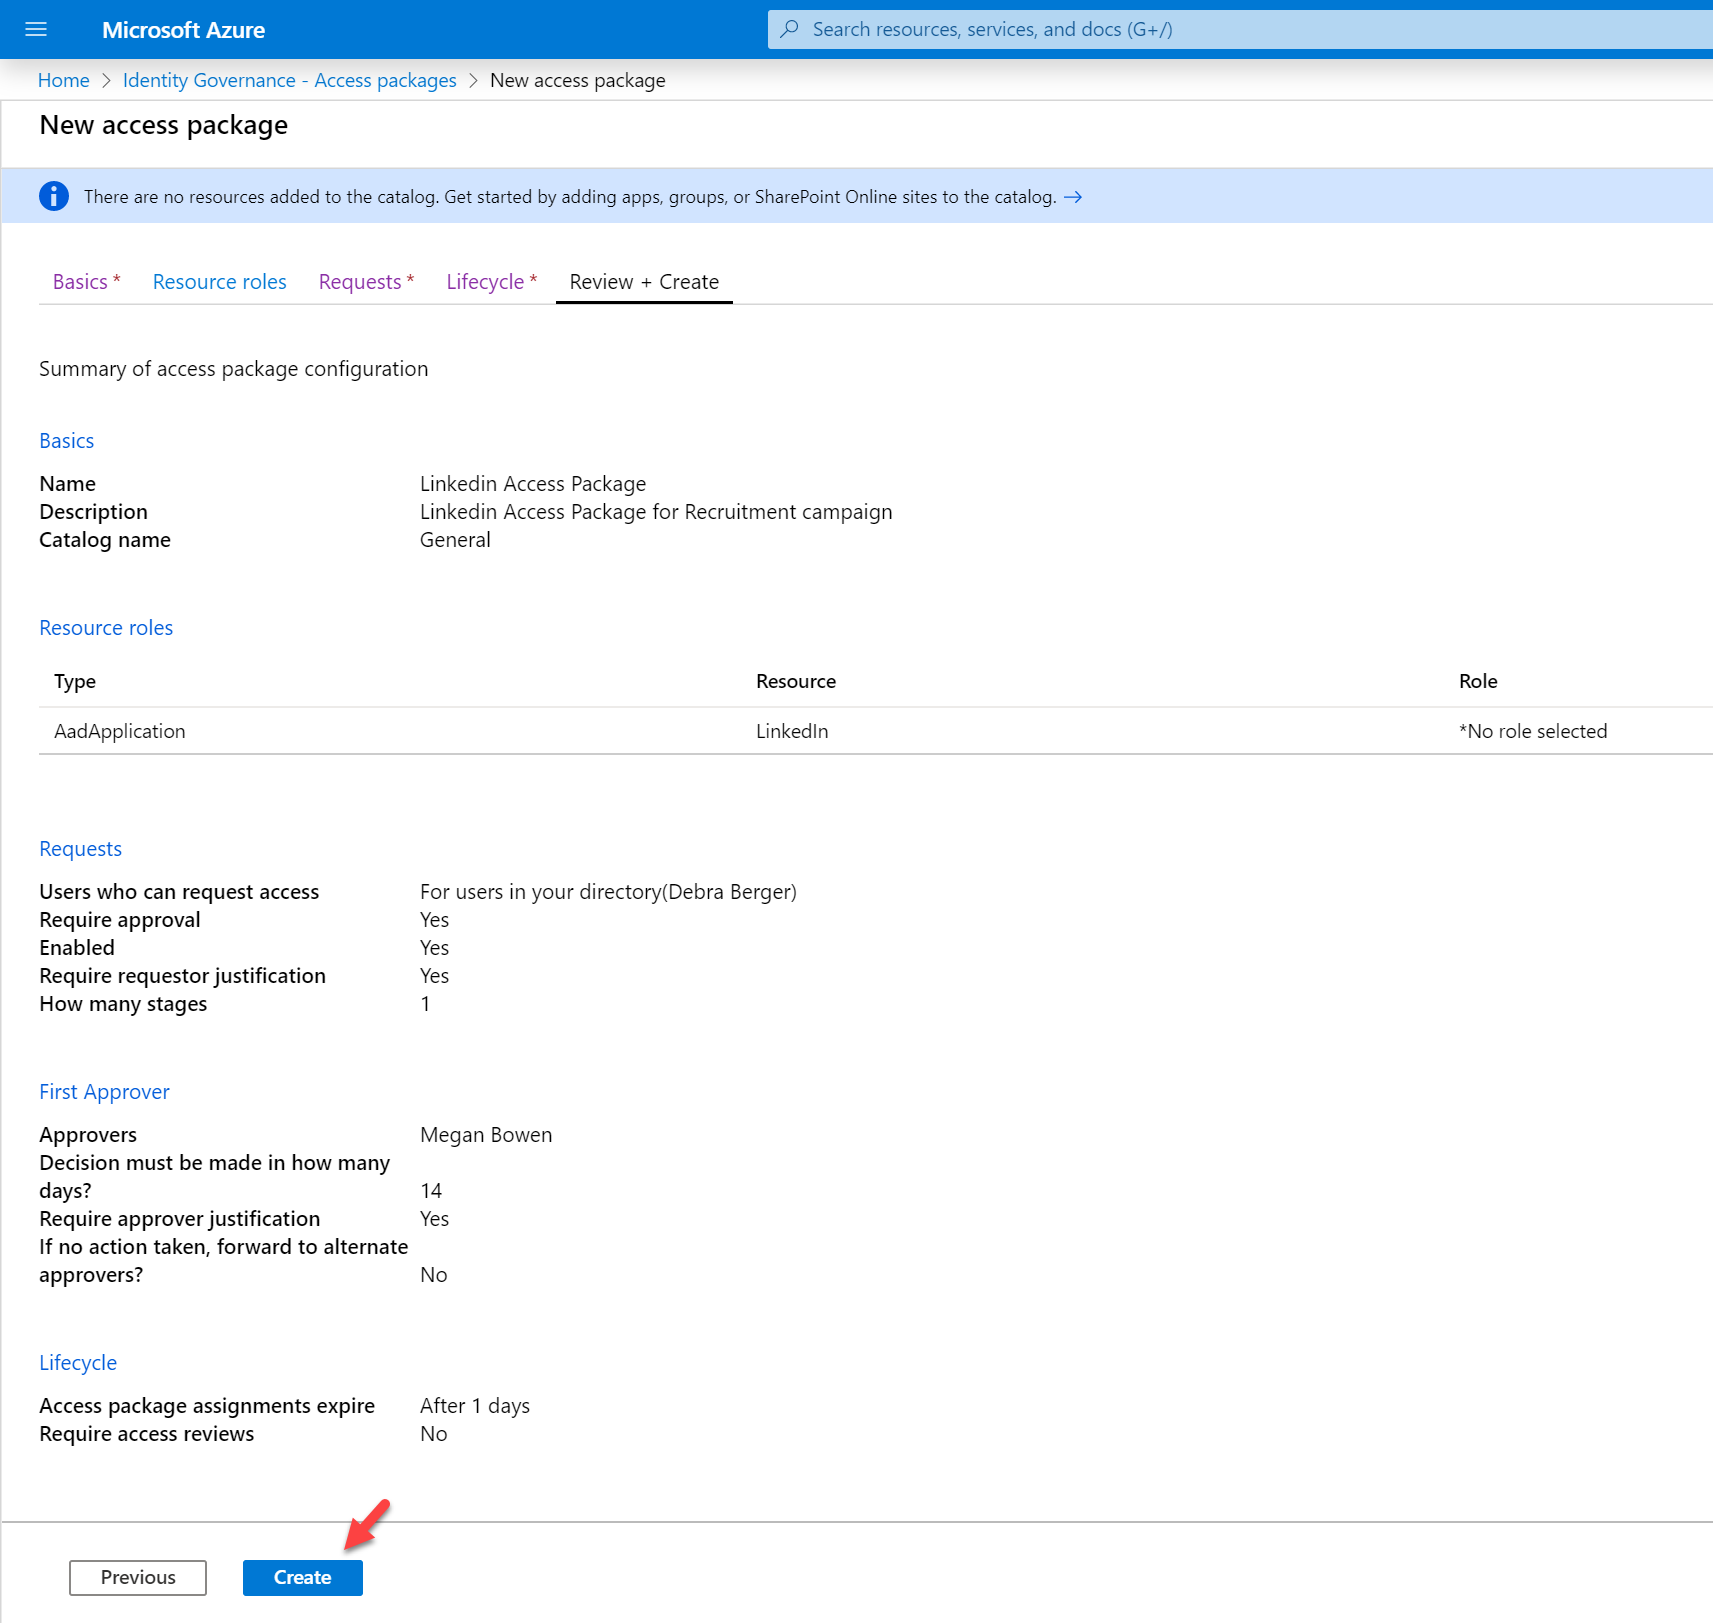
12. In Review + Create page, we can see the summary of the policy. In there click on Create.
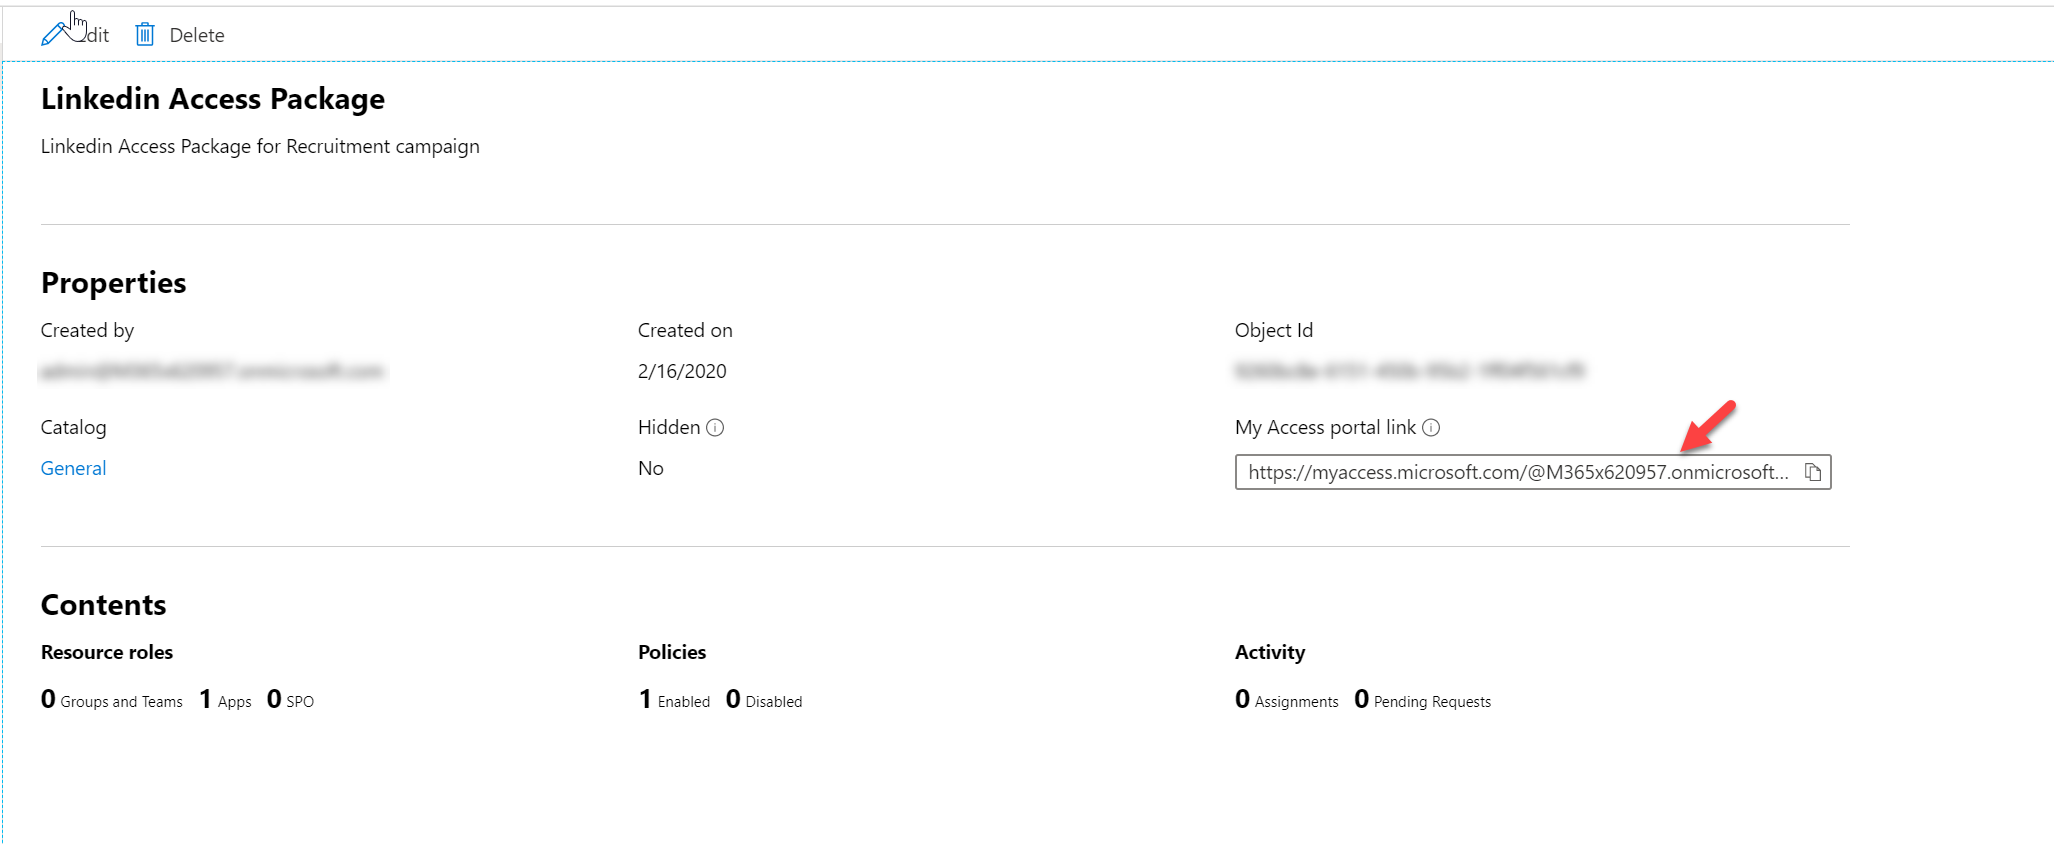
Once the package is created, copy the My Access portal link value as we required it to request access.
Testing
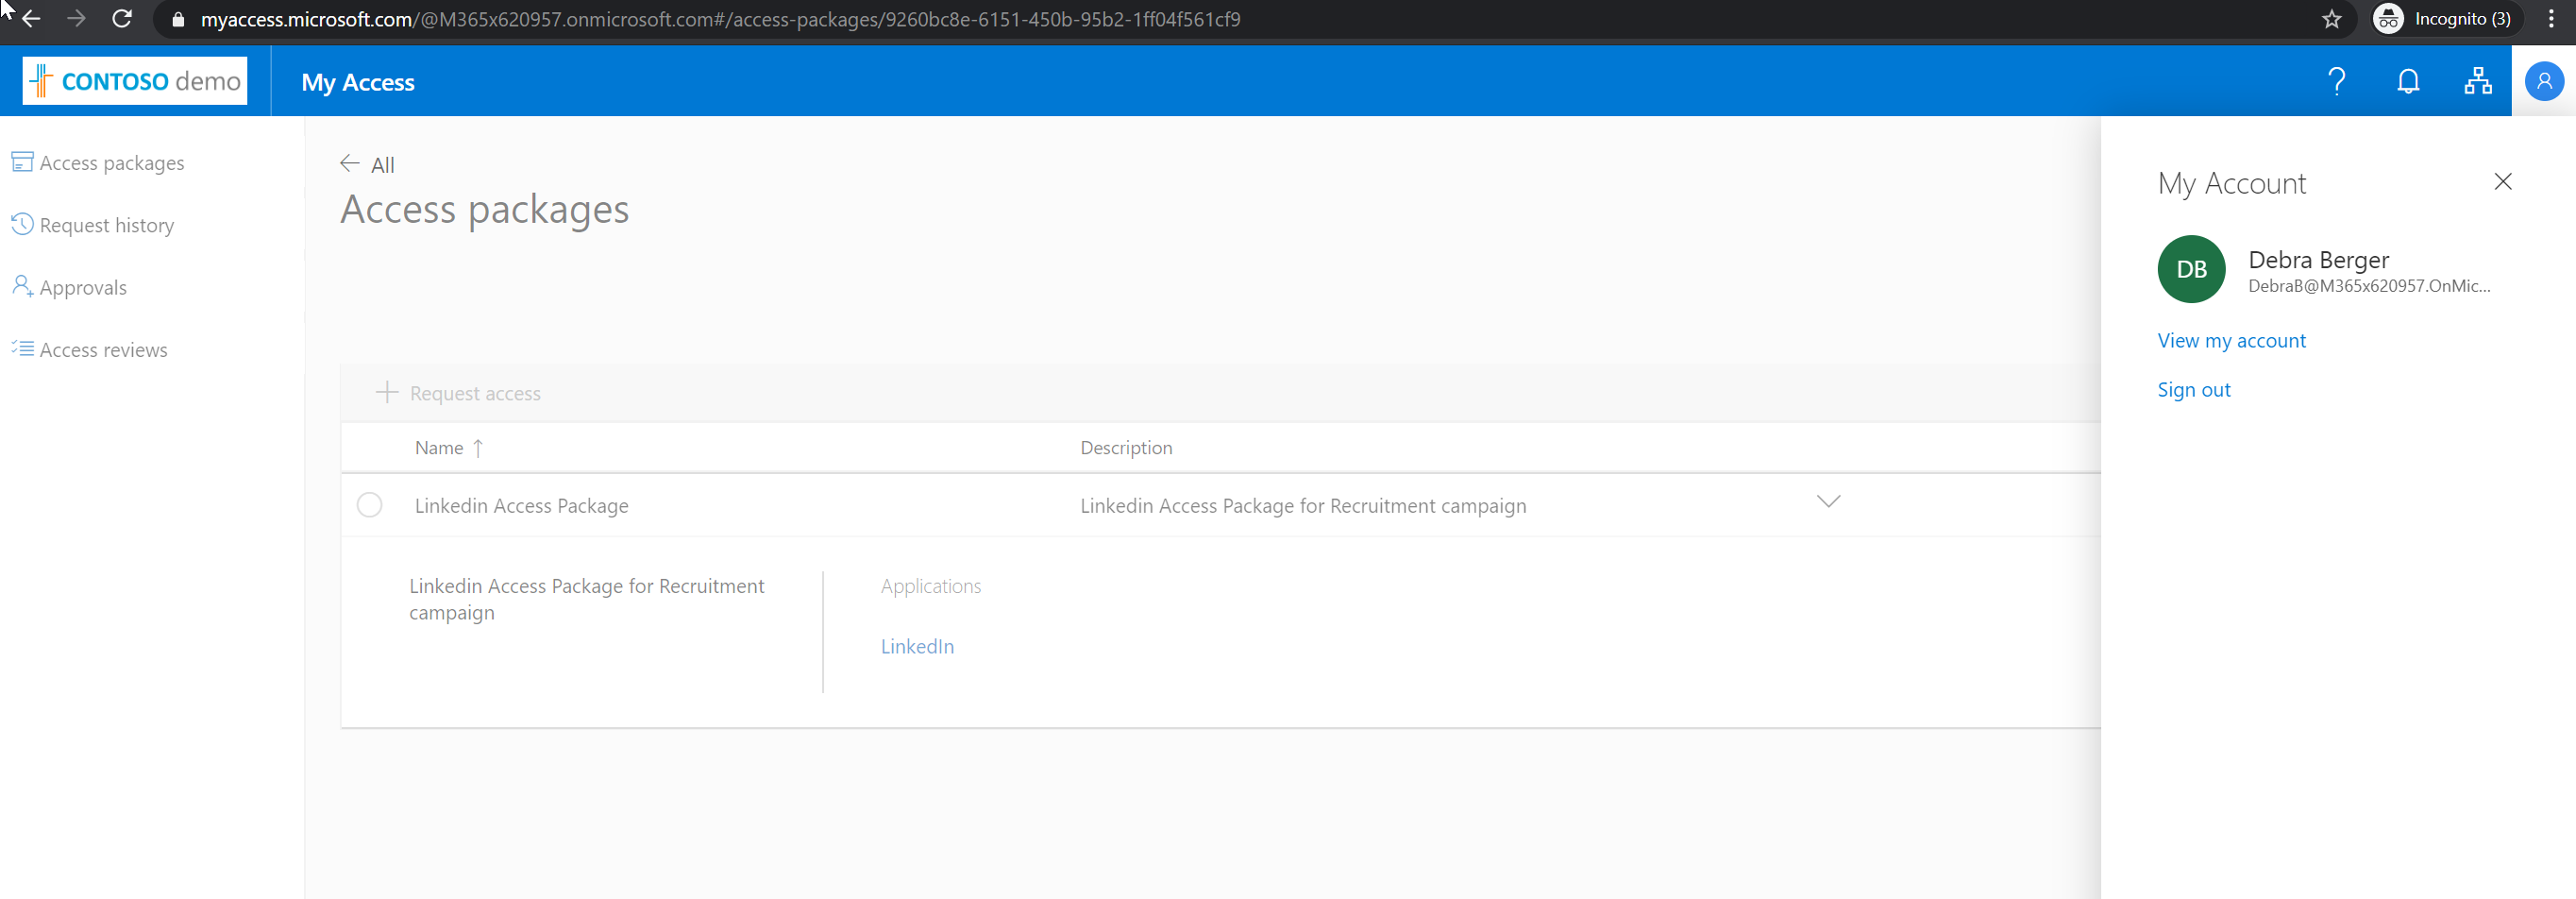
Now we have the access package is ready. Its time for testing. Here I am going to login to access portal link as Debra Berger.
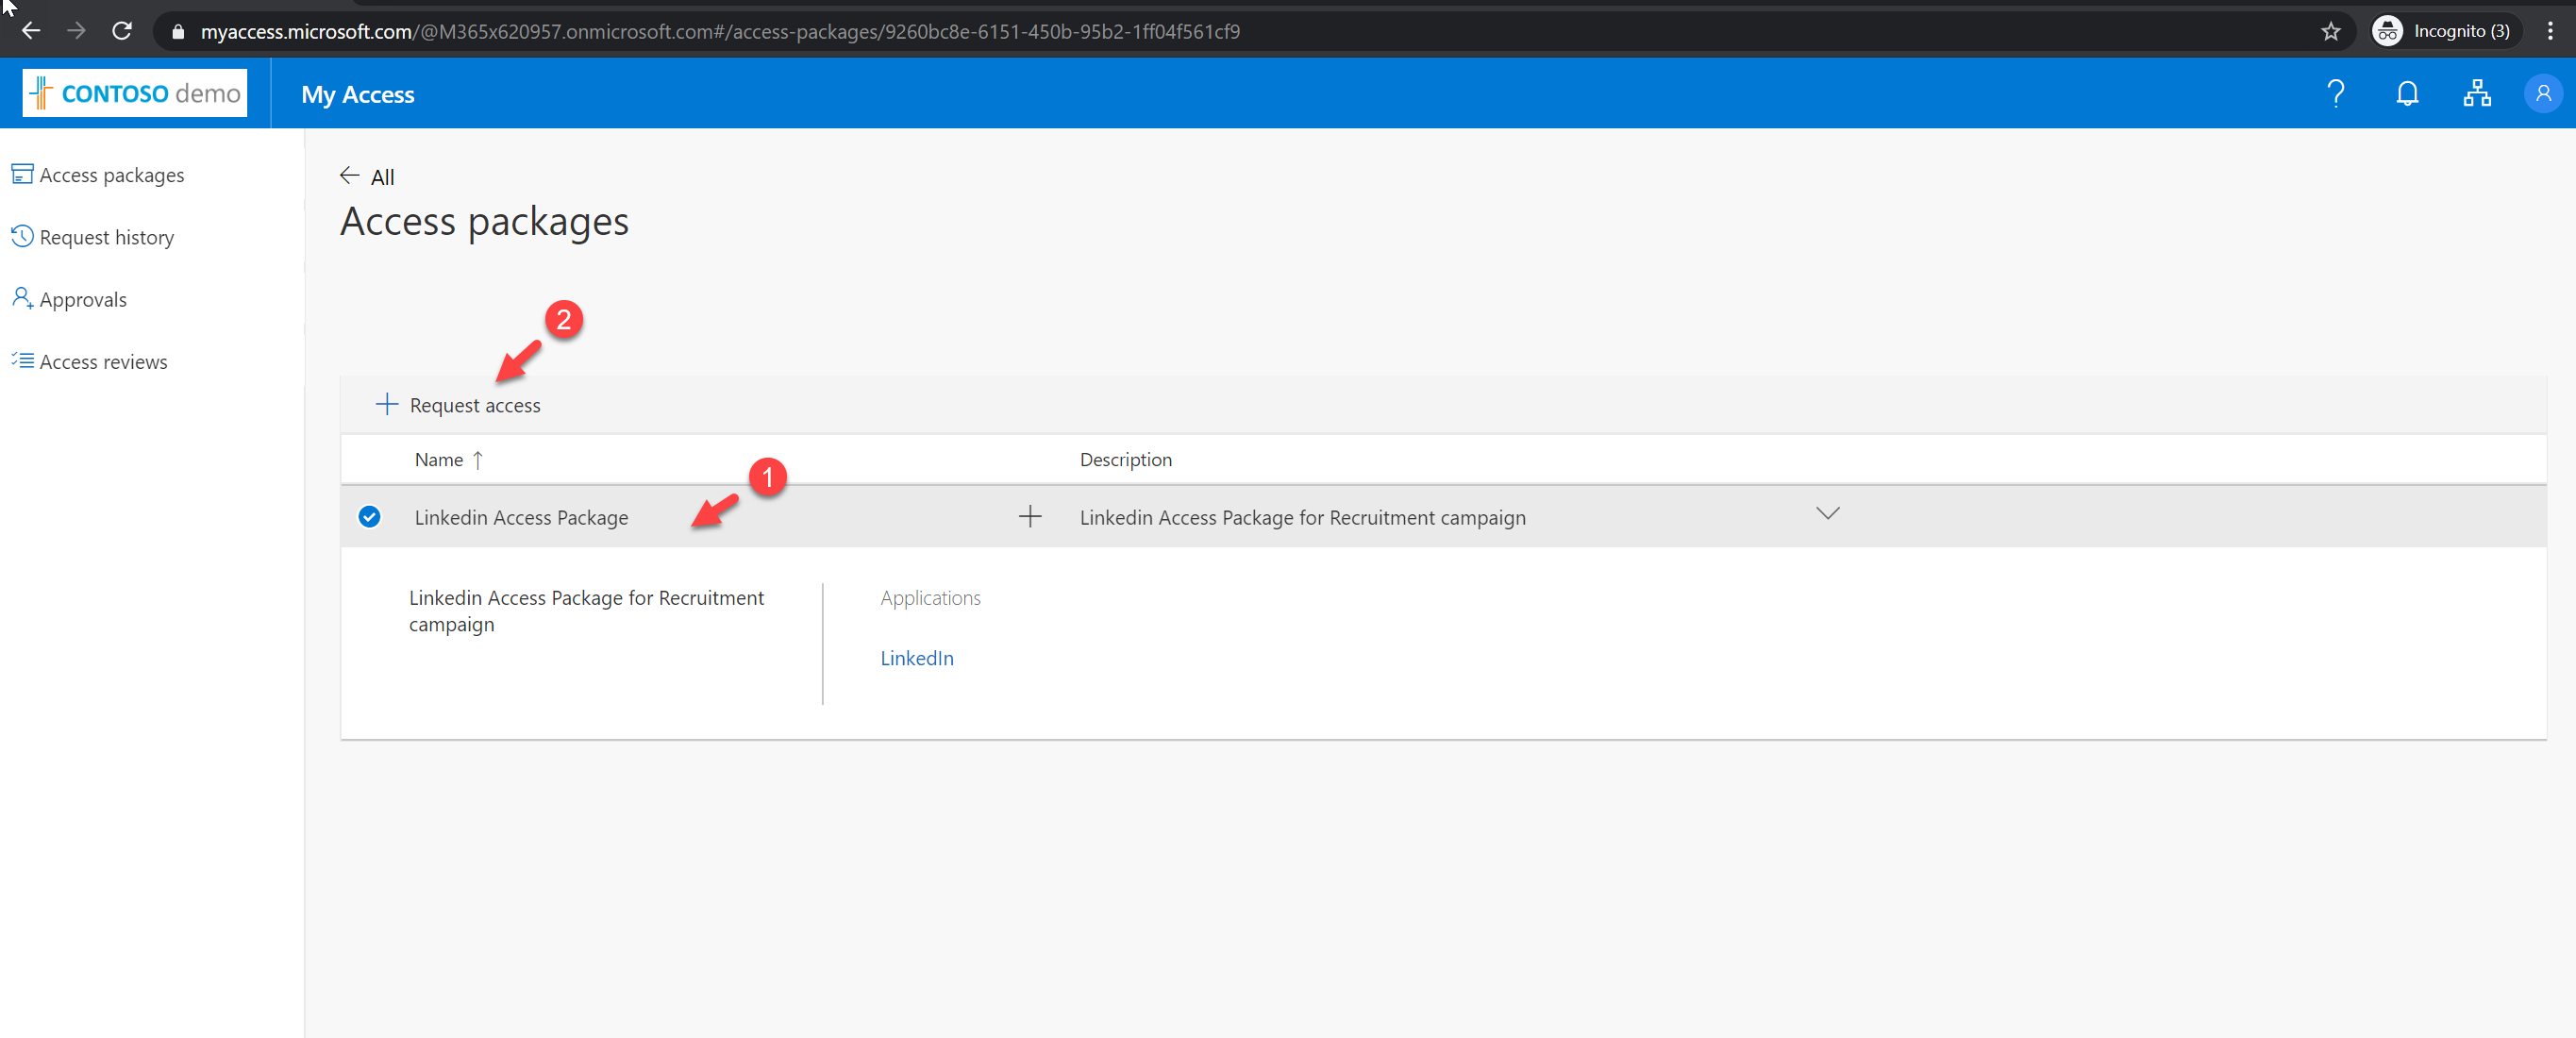
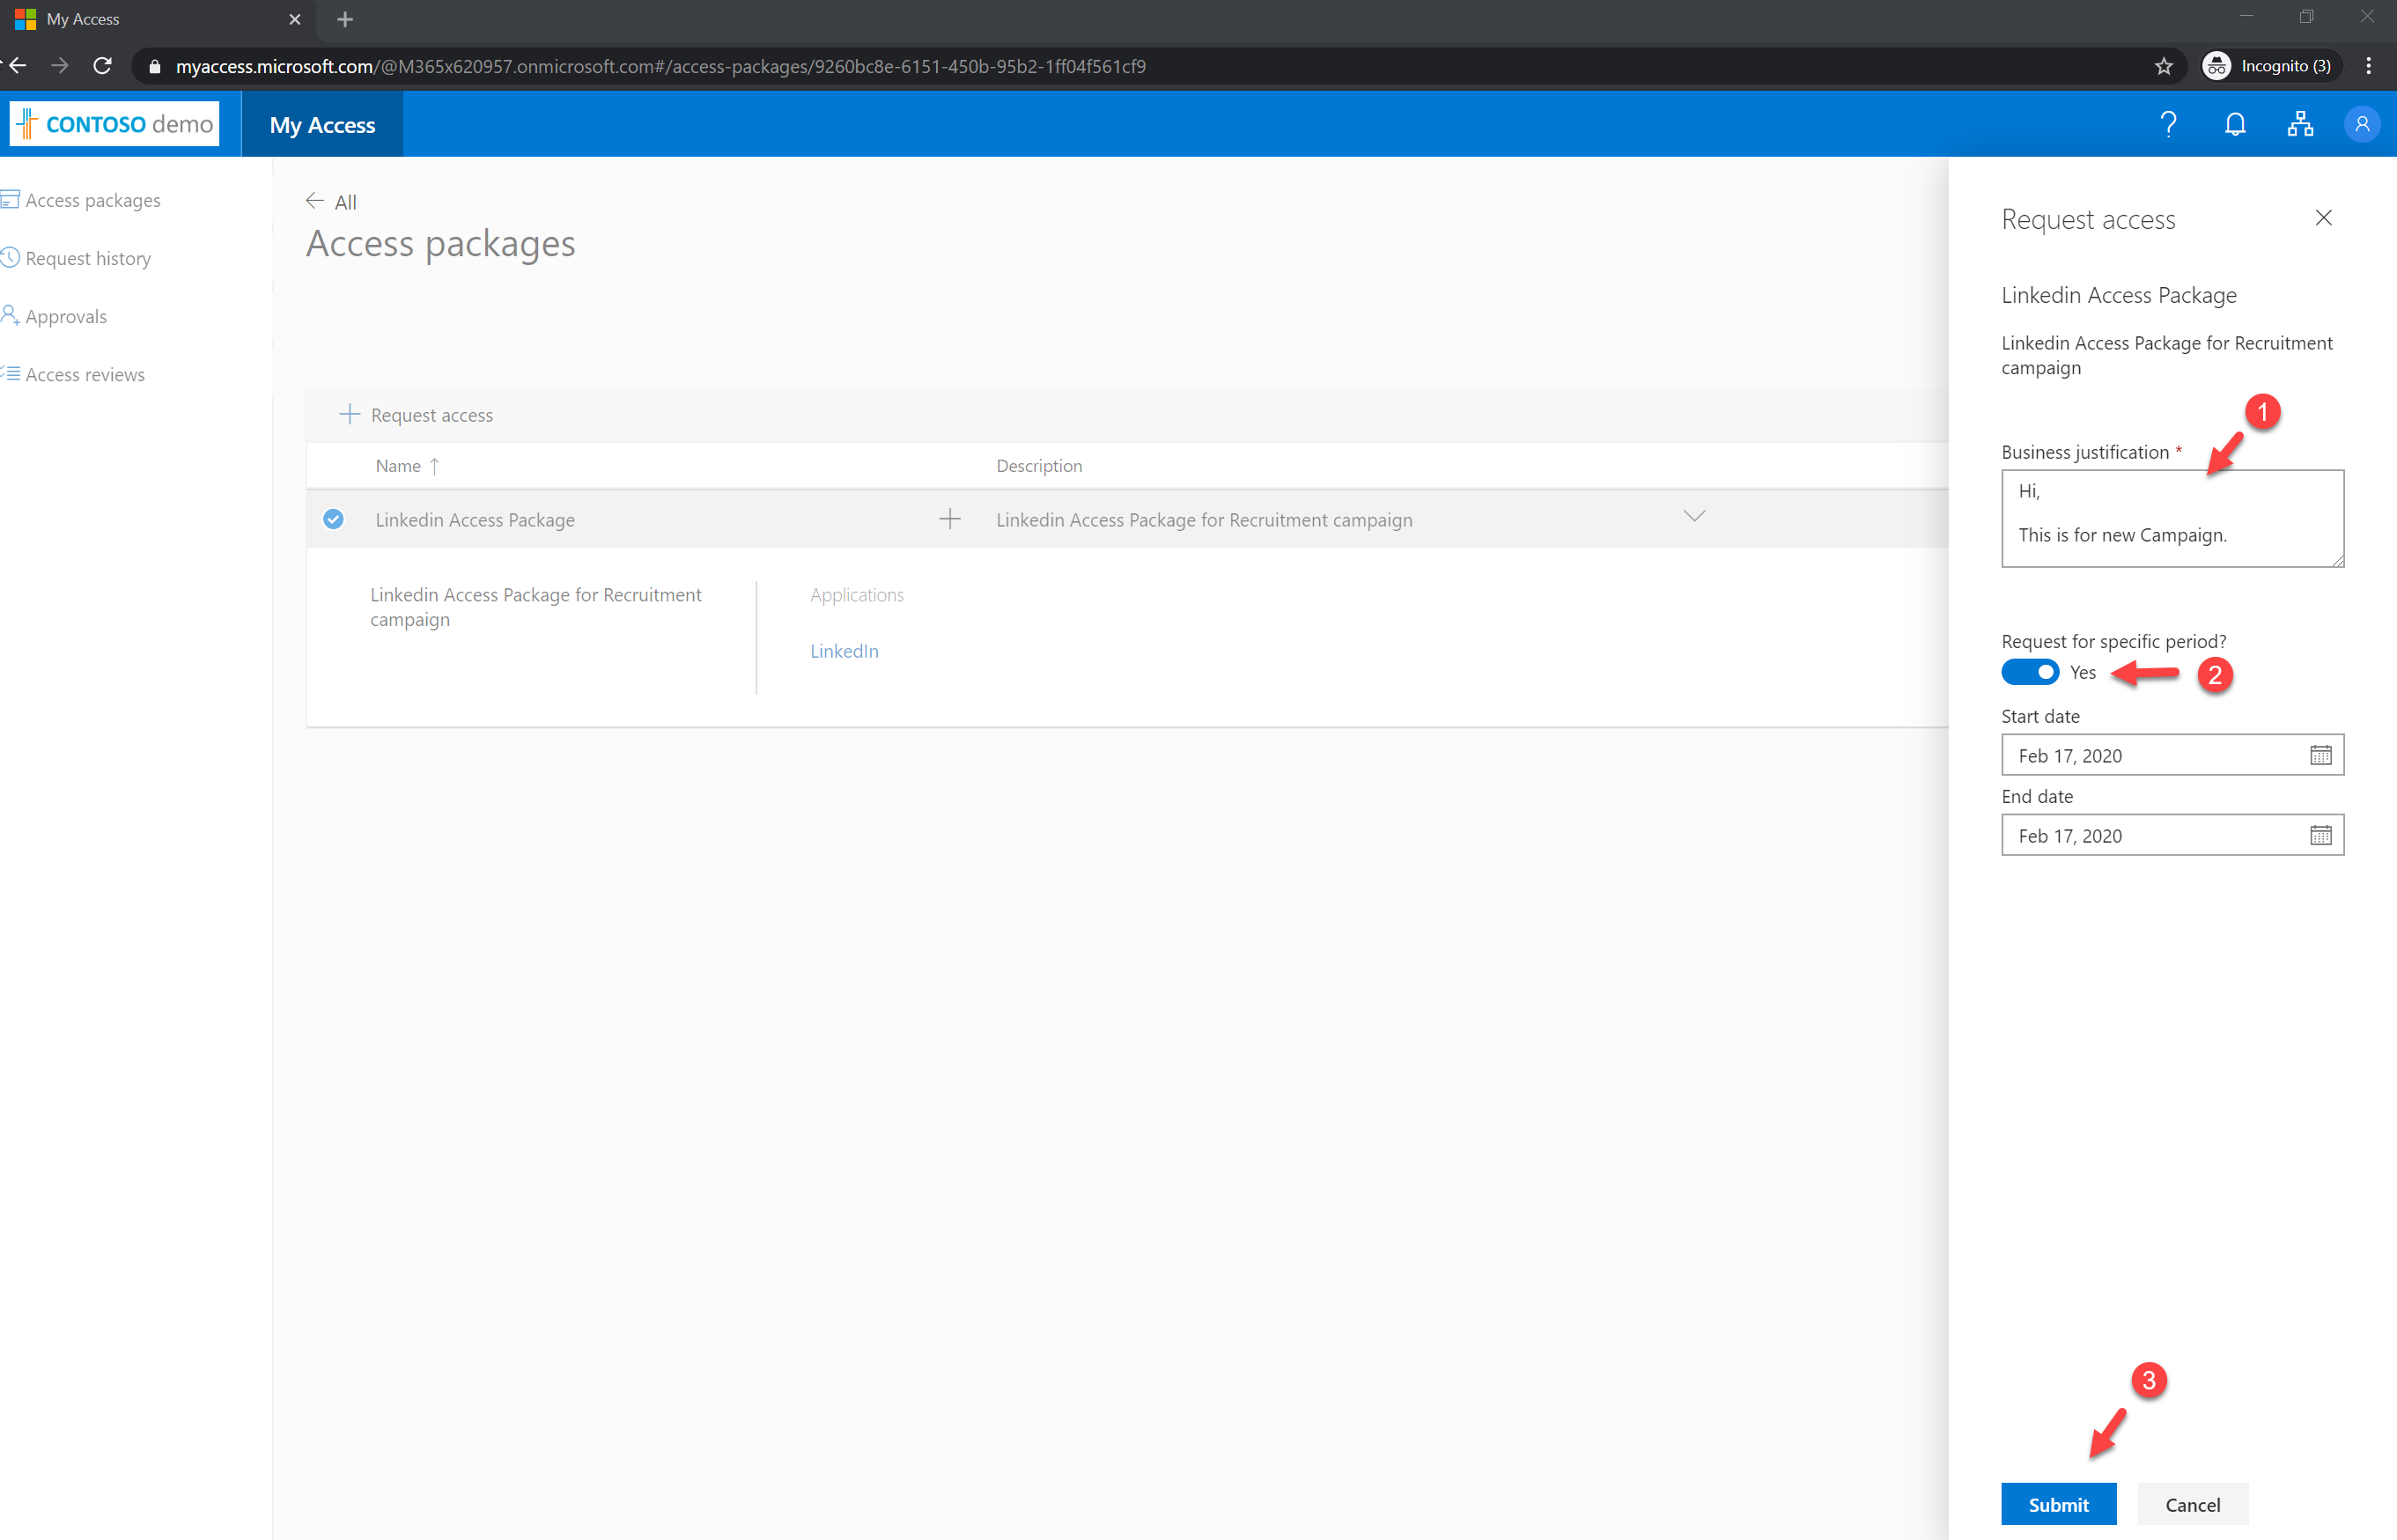
Then from the list, I select the access package we just created and then click on + Request access
It opens up a new form. In there I type a message for justification and defined date for access. Once settings are in, click Submit to proceed.
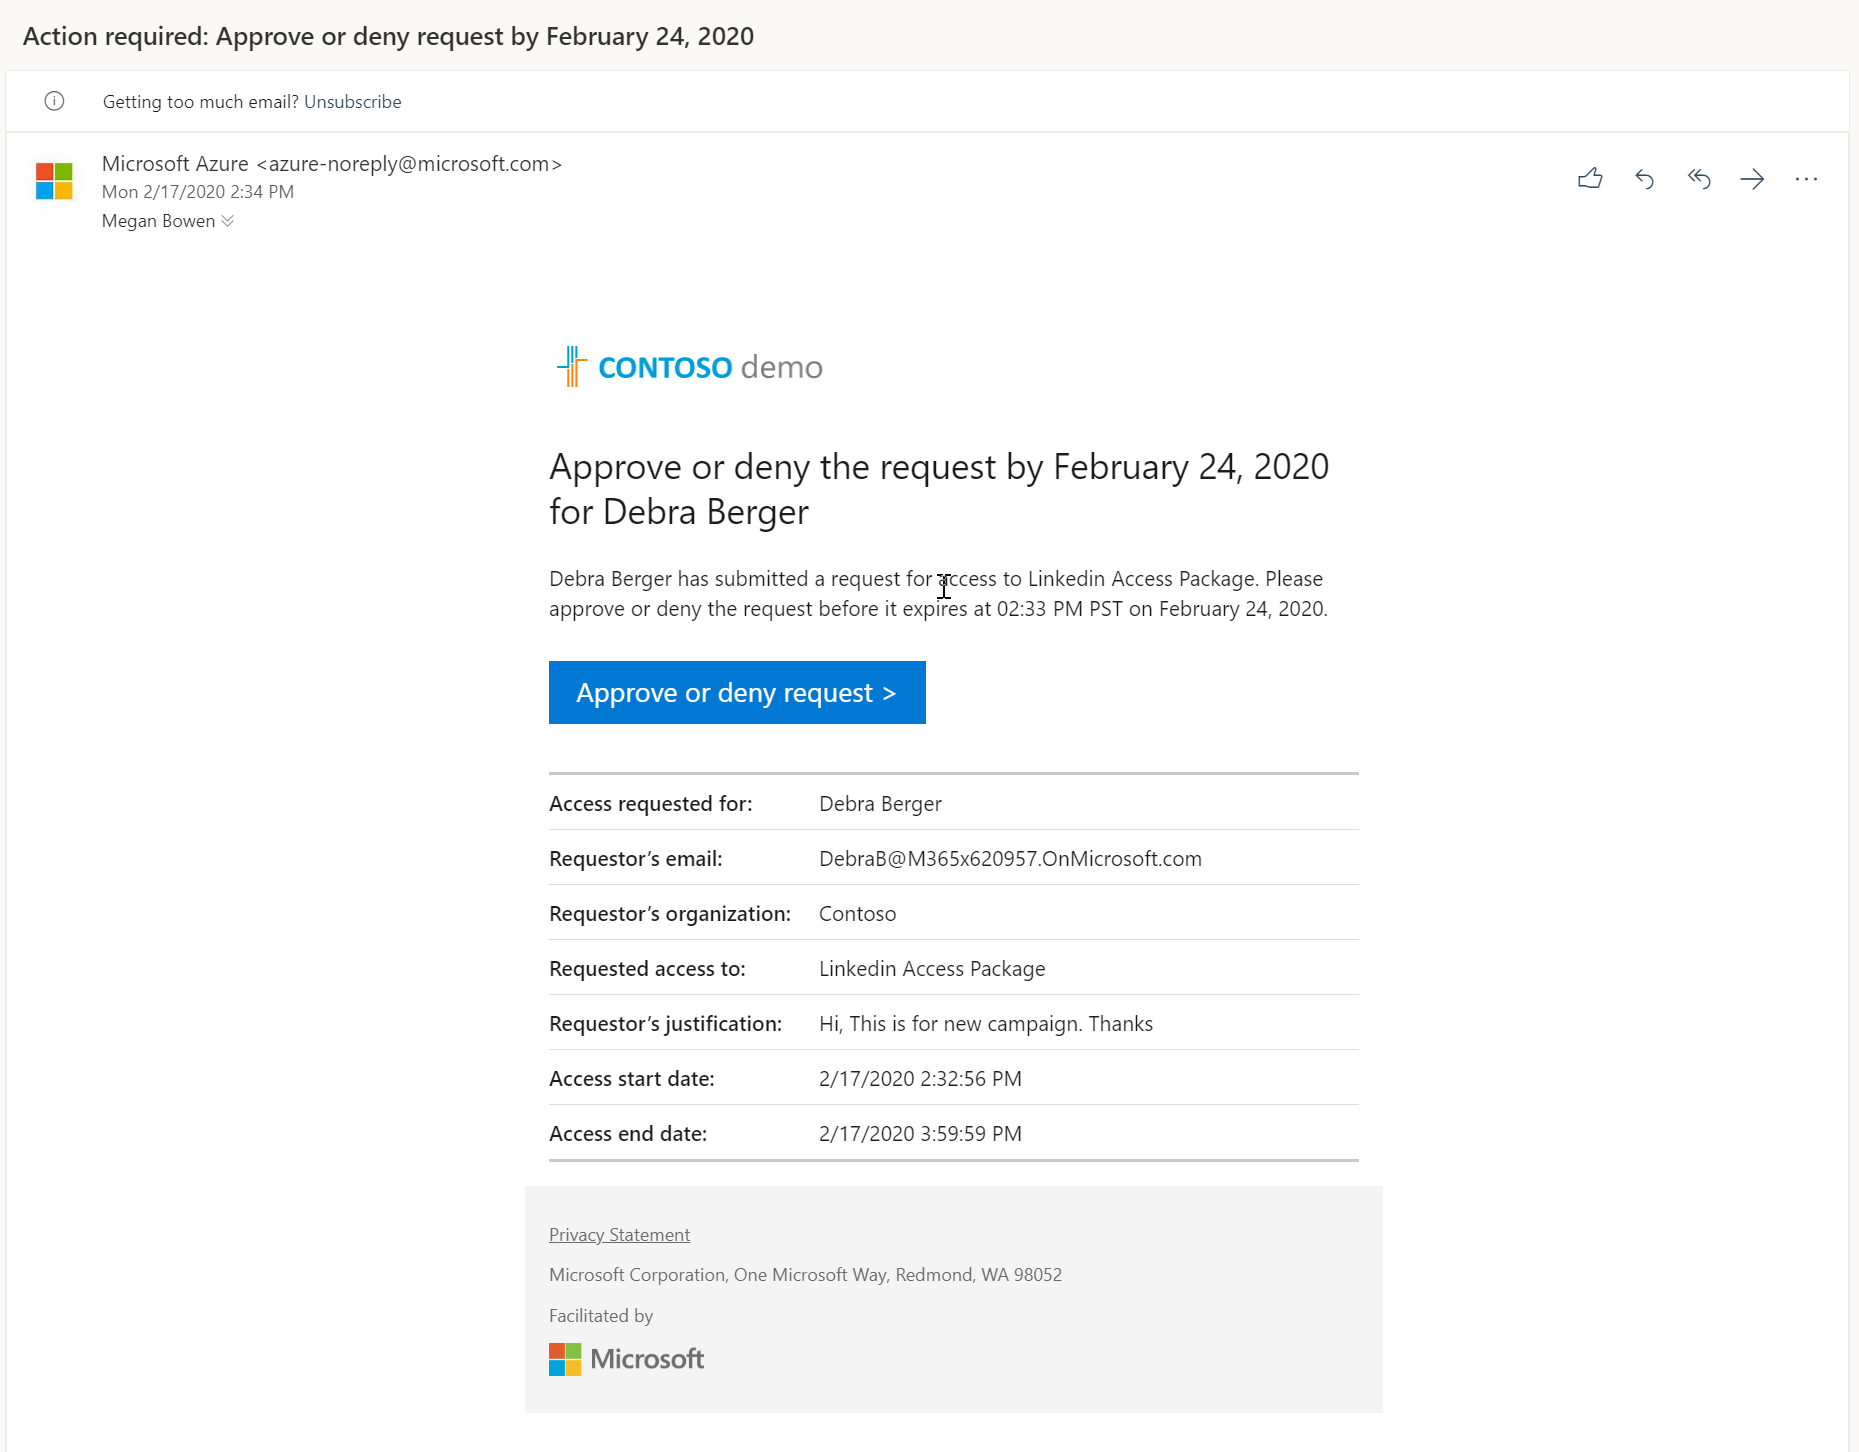
Once the request is submitted, approver gets an email notification with details.
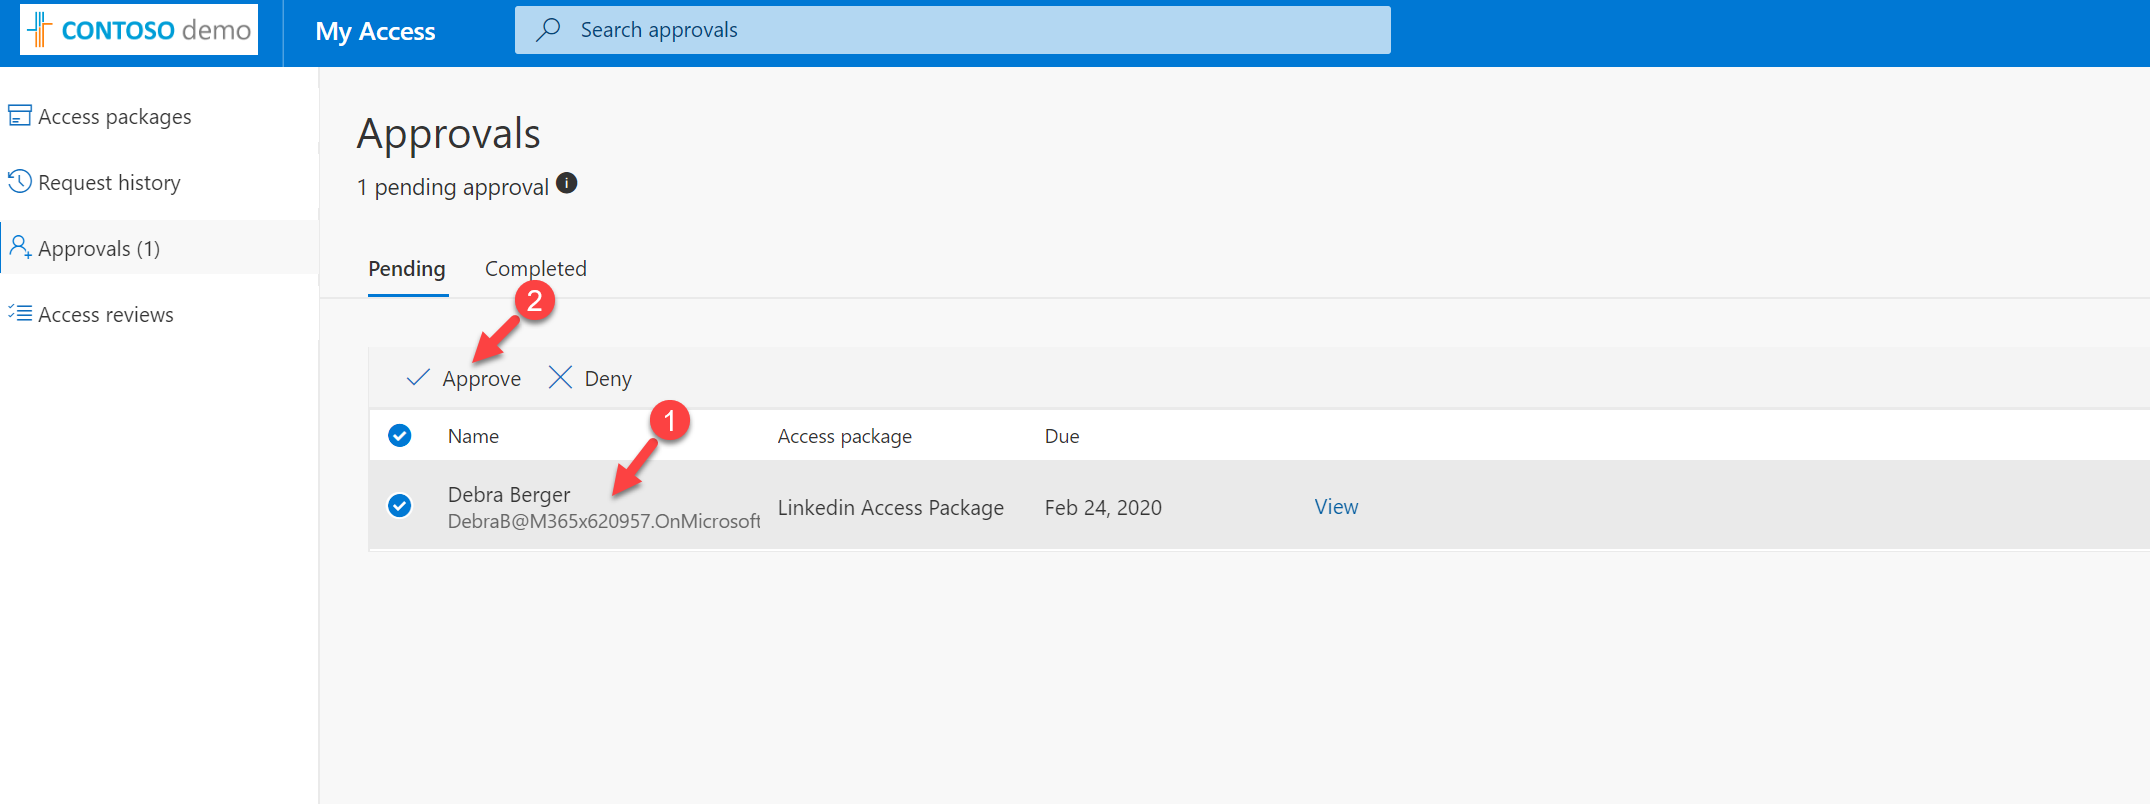
Then I am login to the access portal as Megan Bowen (approver). When login I can see the access request from Debra. To approve, select the access request and then click on Approve.
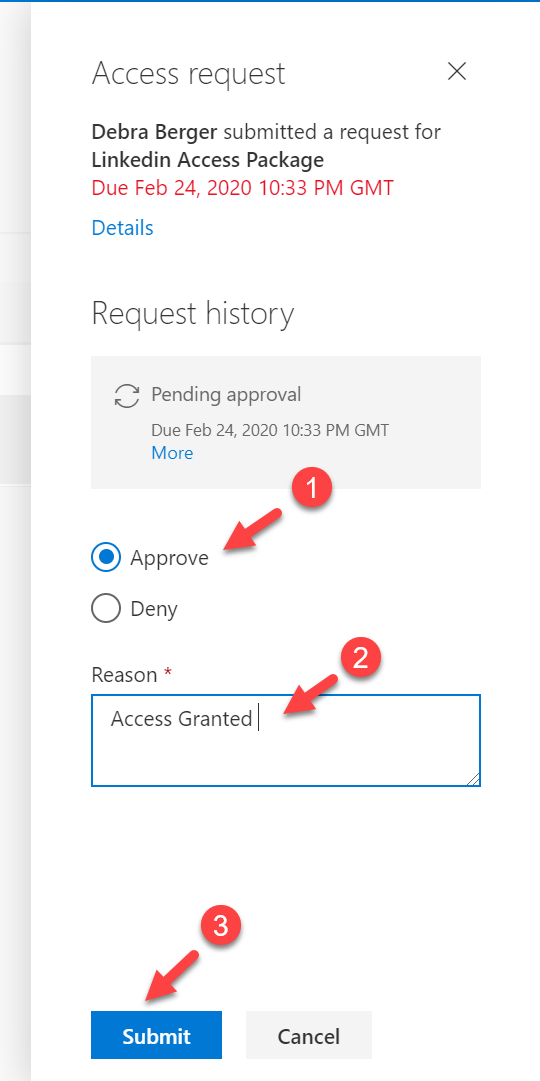
In the new window, select the action as Approve. After defining the reason, click on Submit.
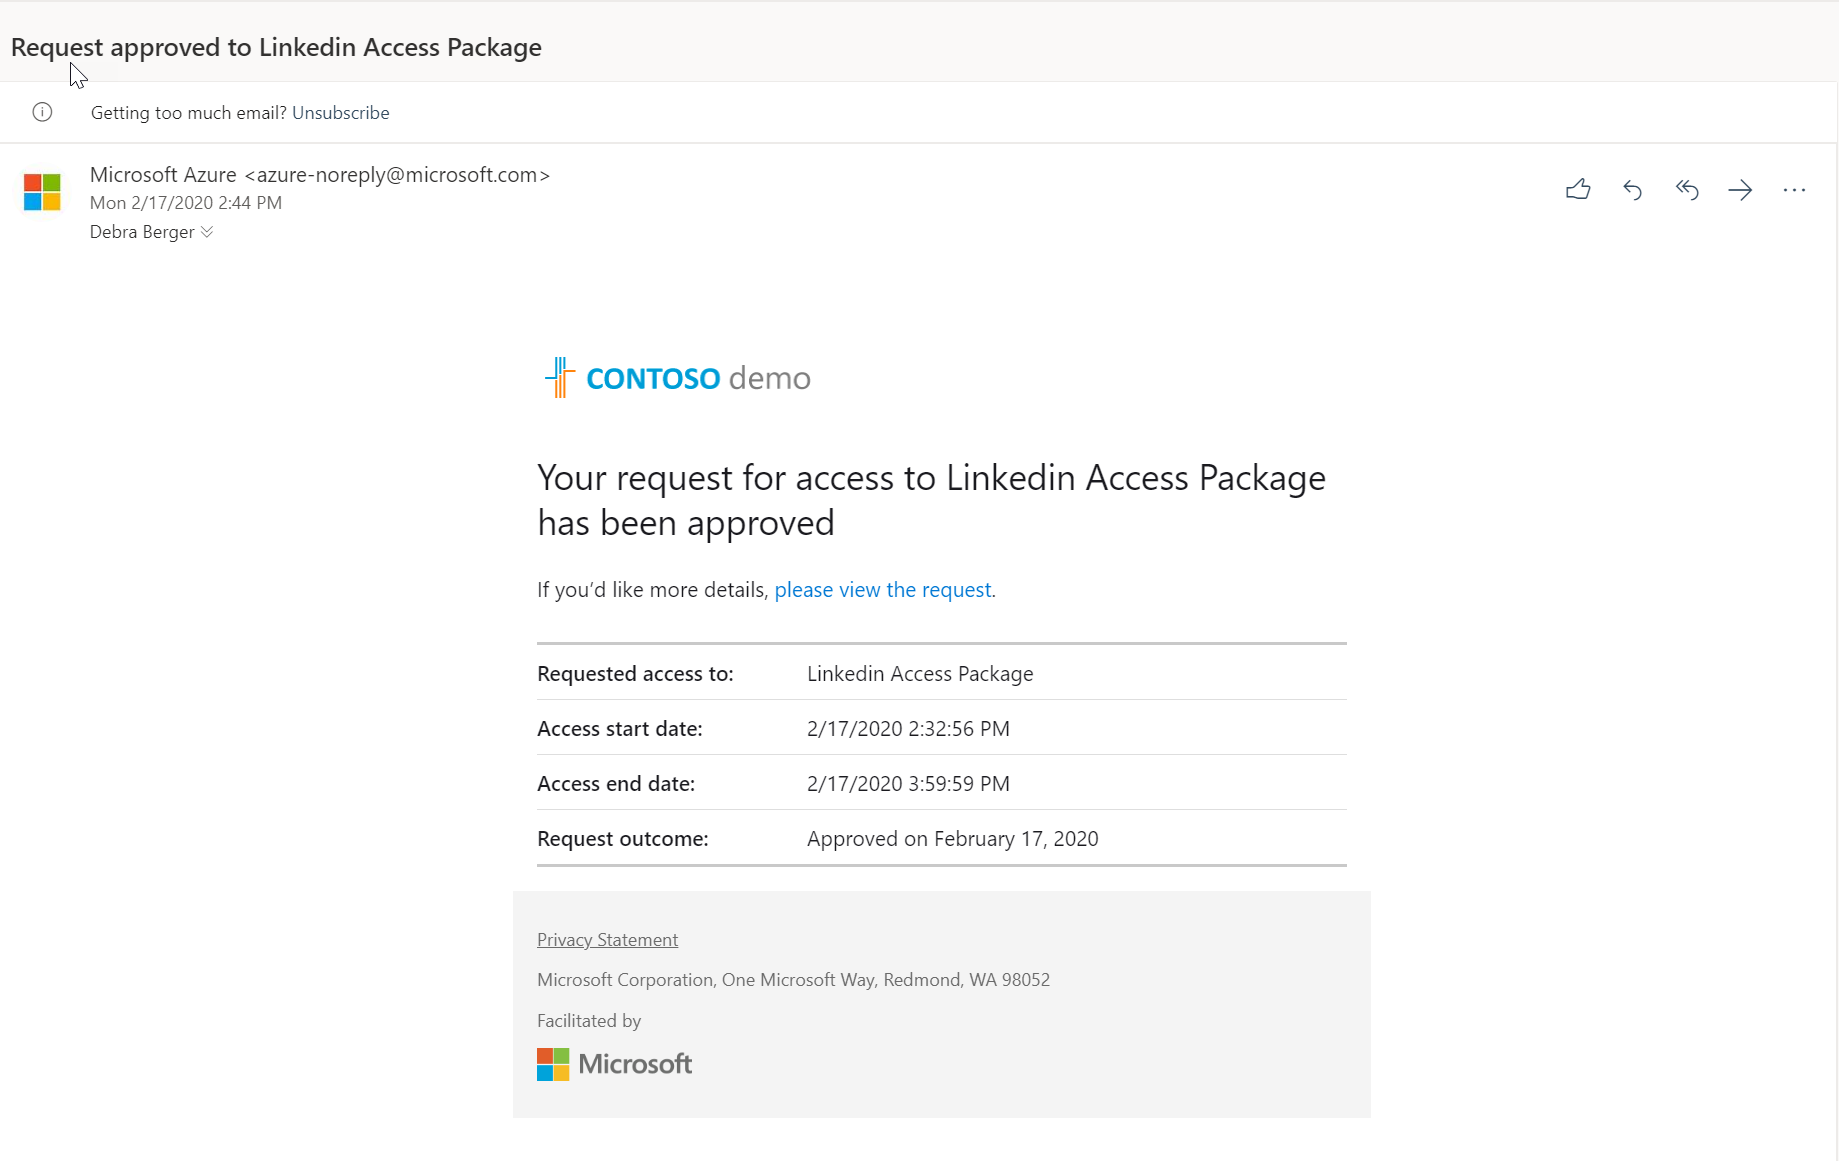
Then Debra received an email saying the access is granted.
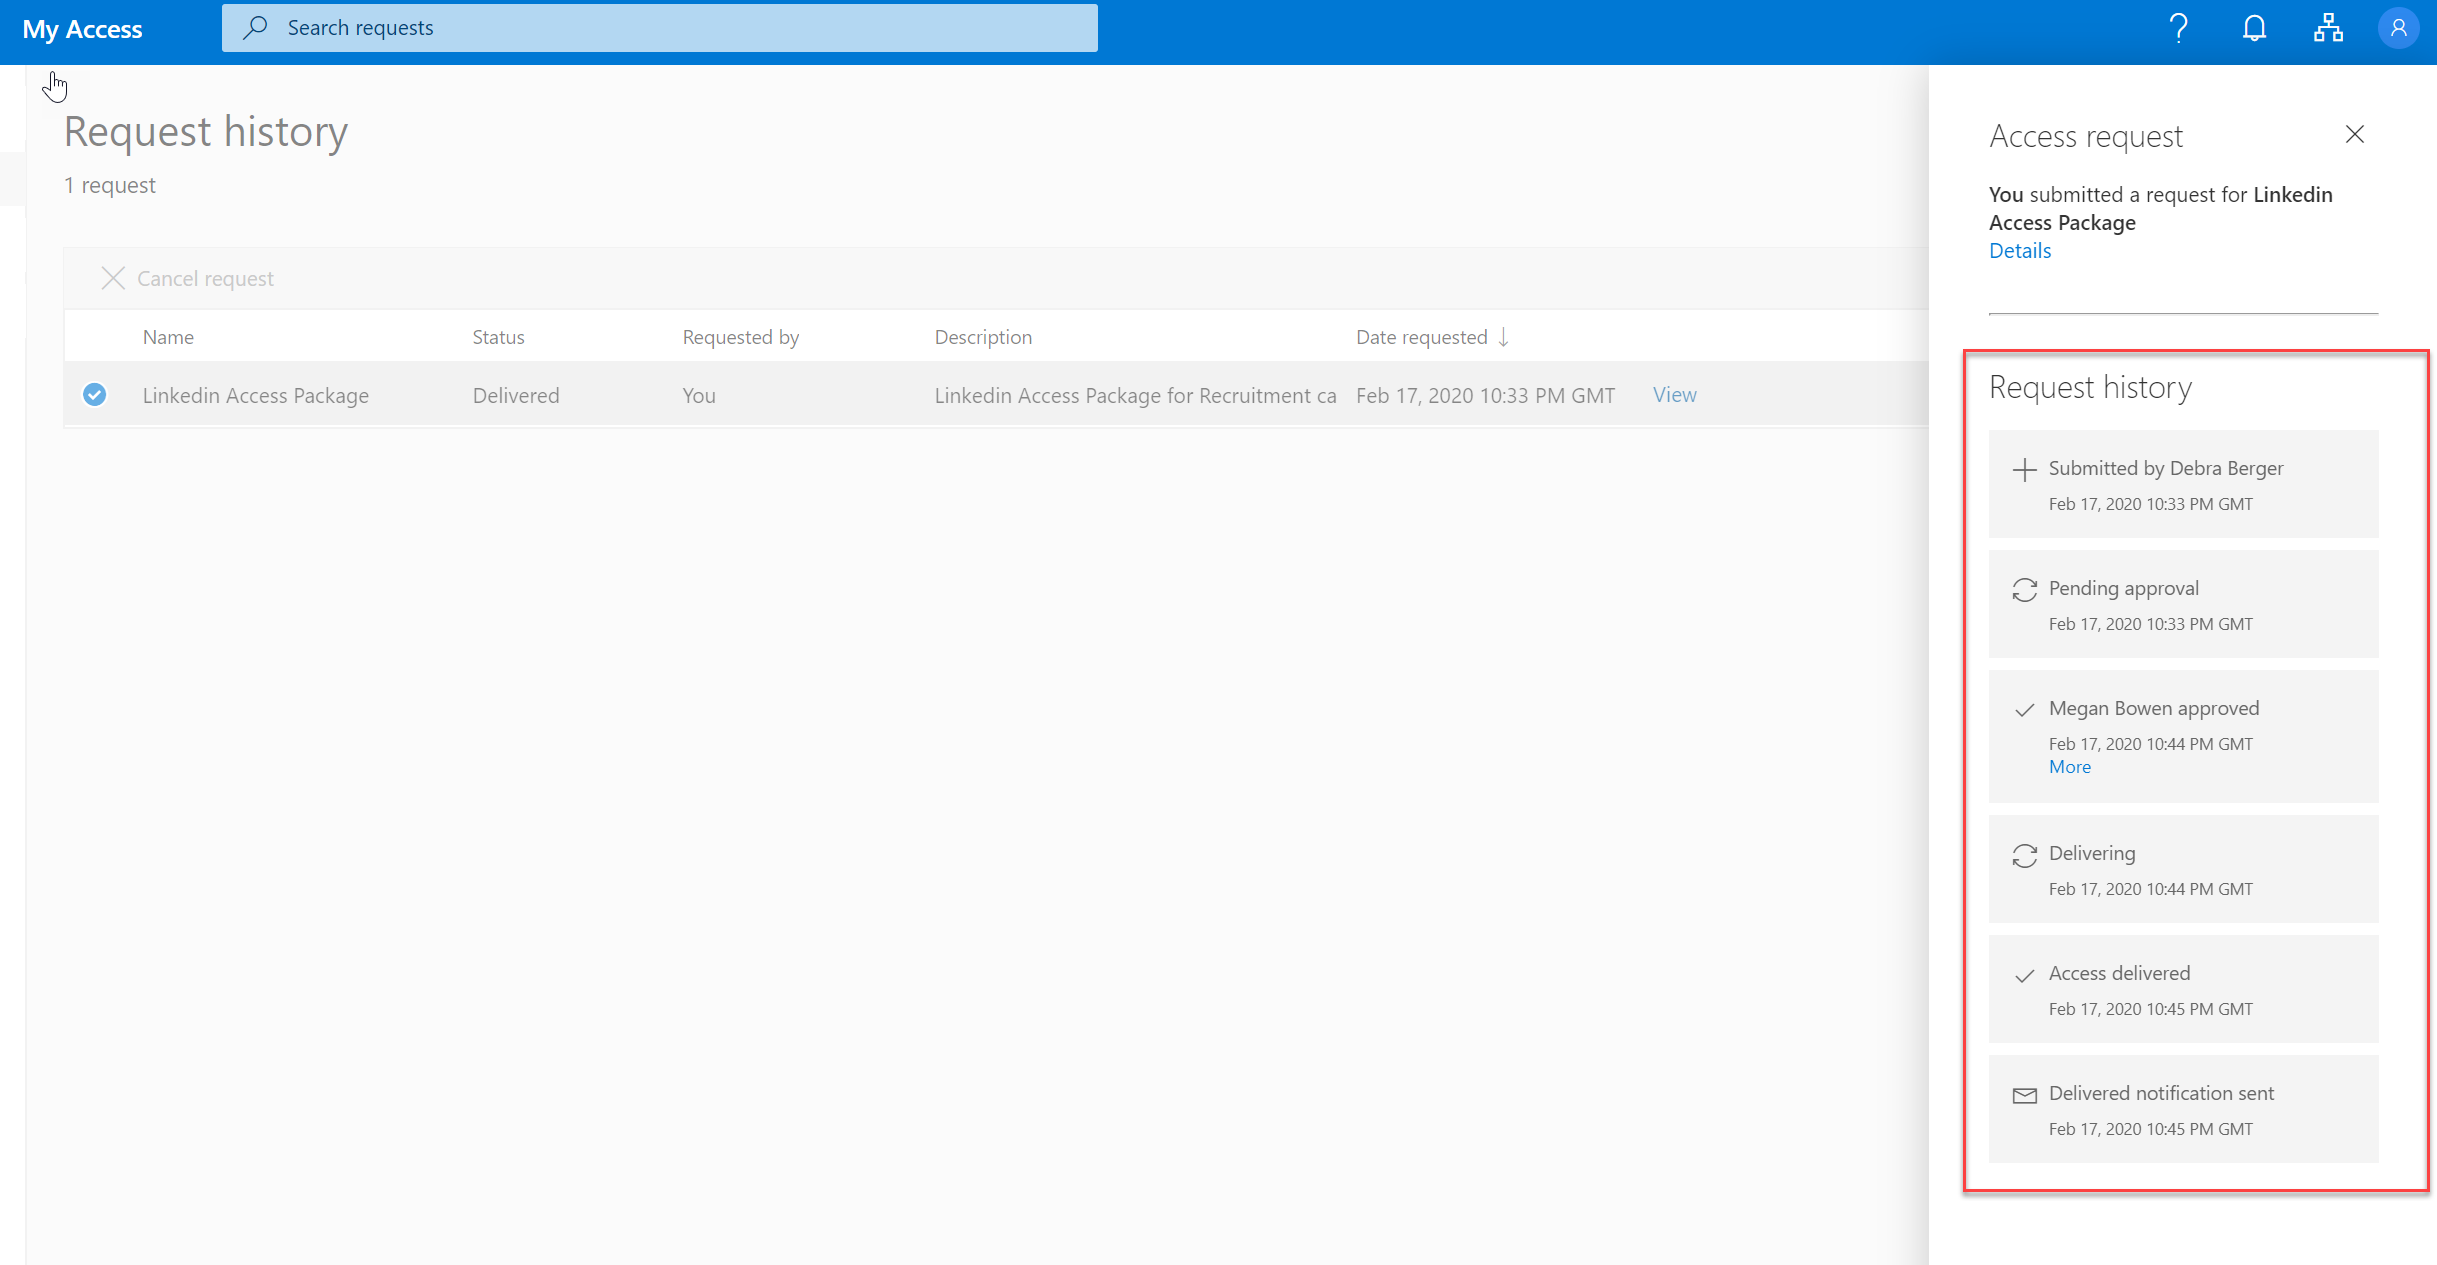
When Debra logs in to access portal, she can see the access request was delivered.
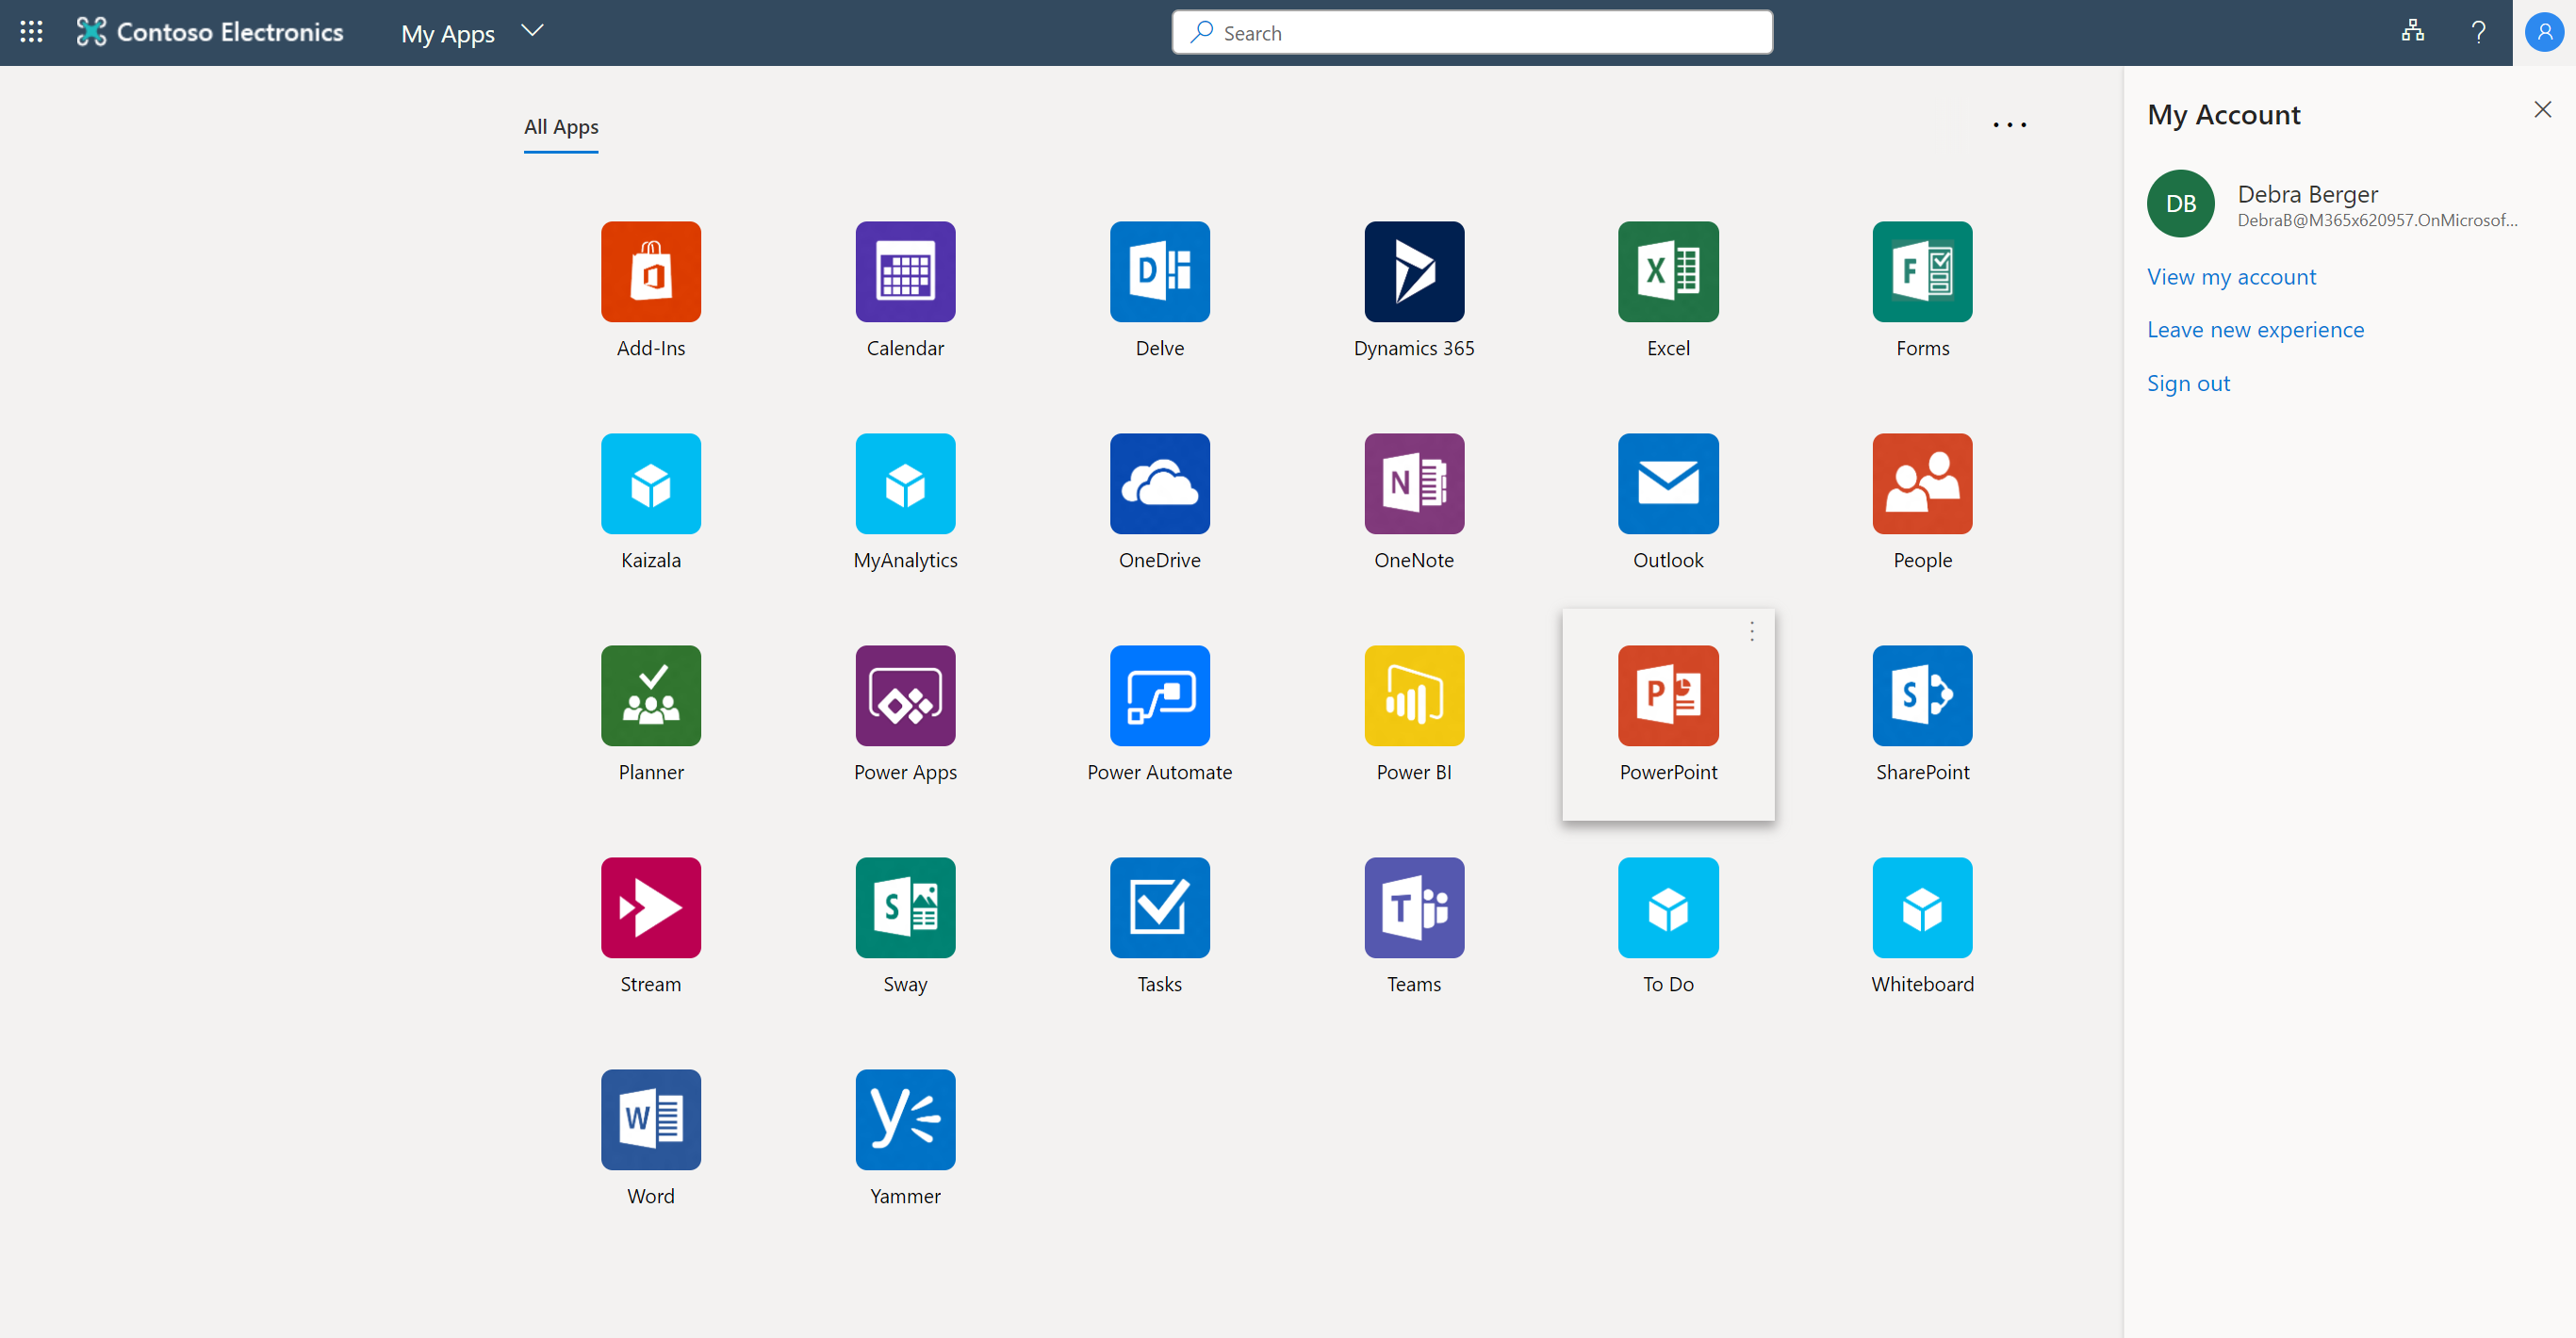
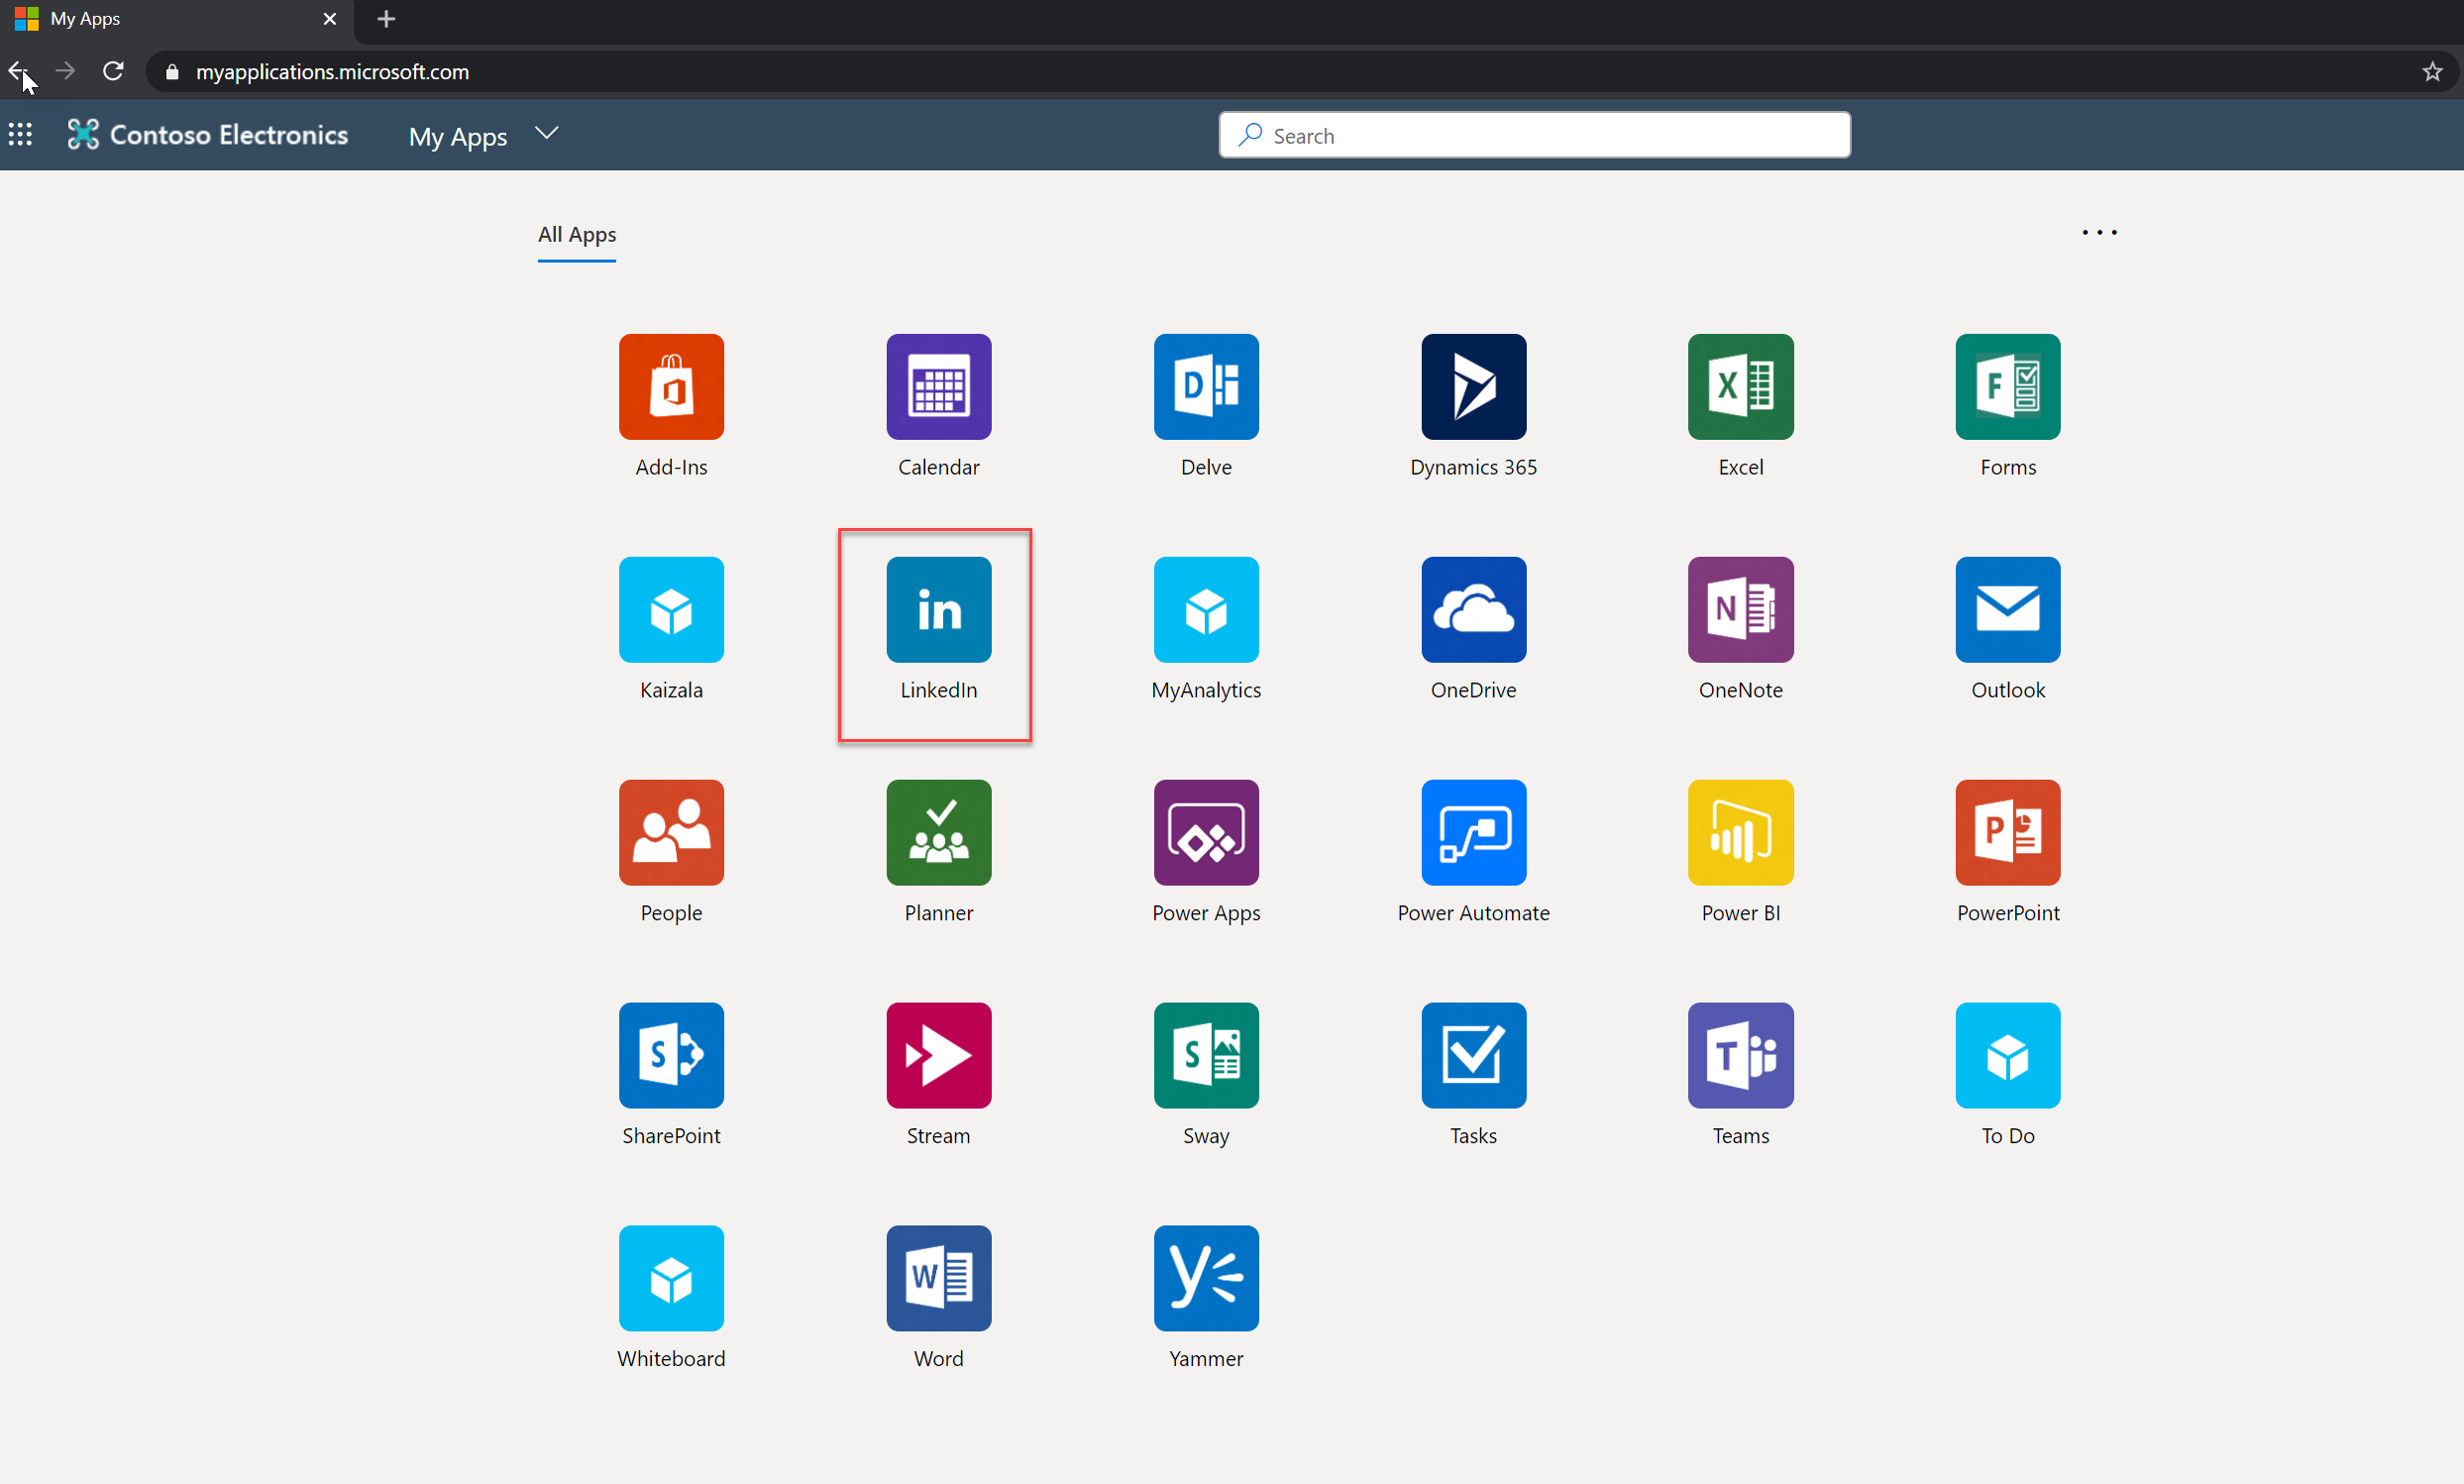
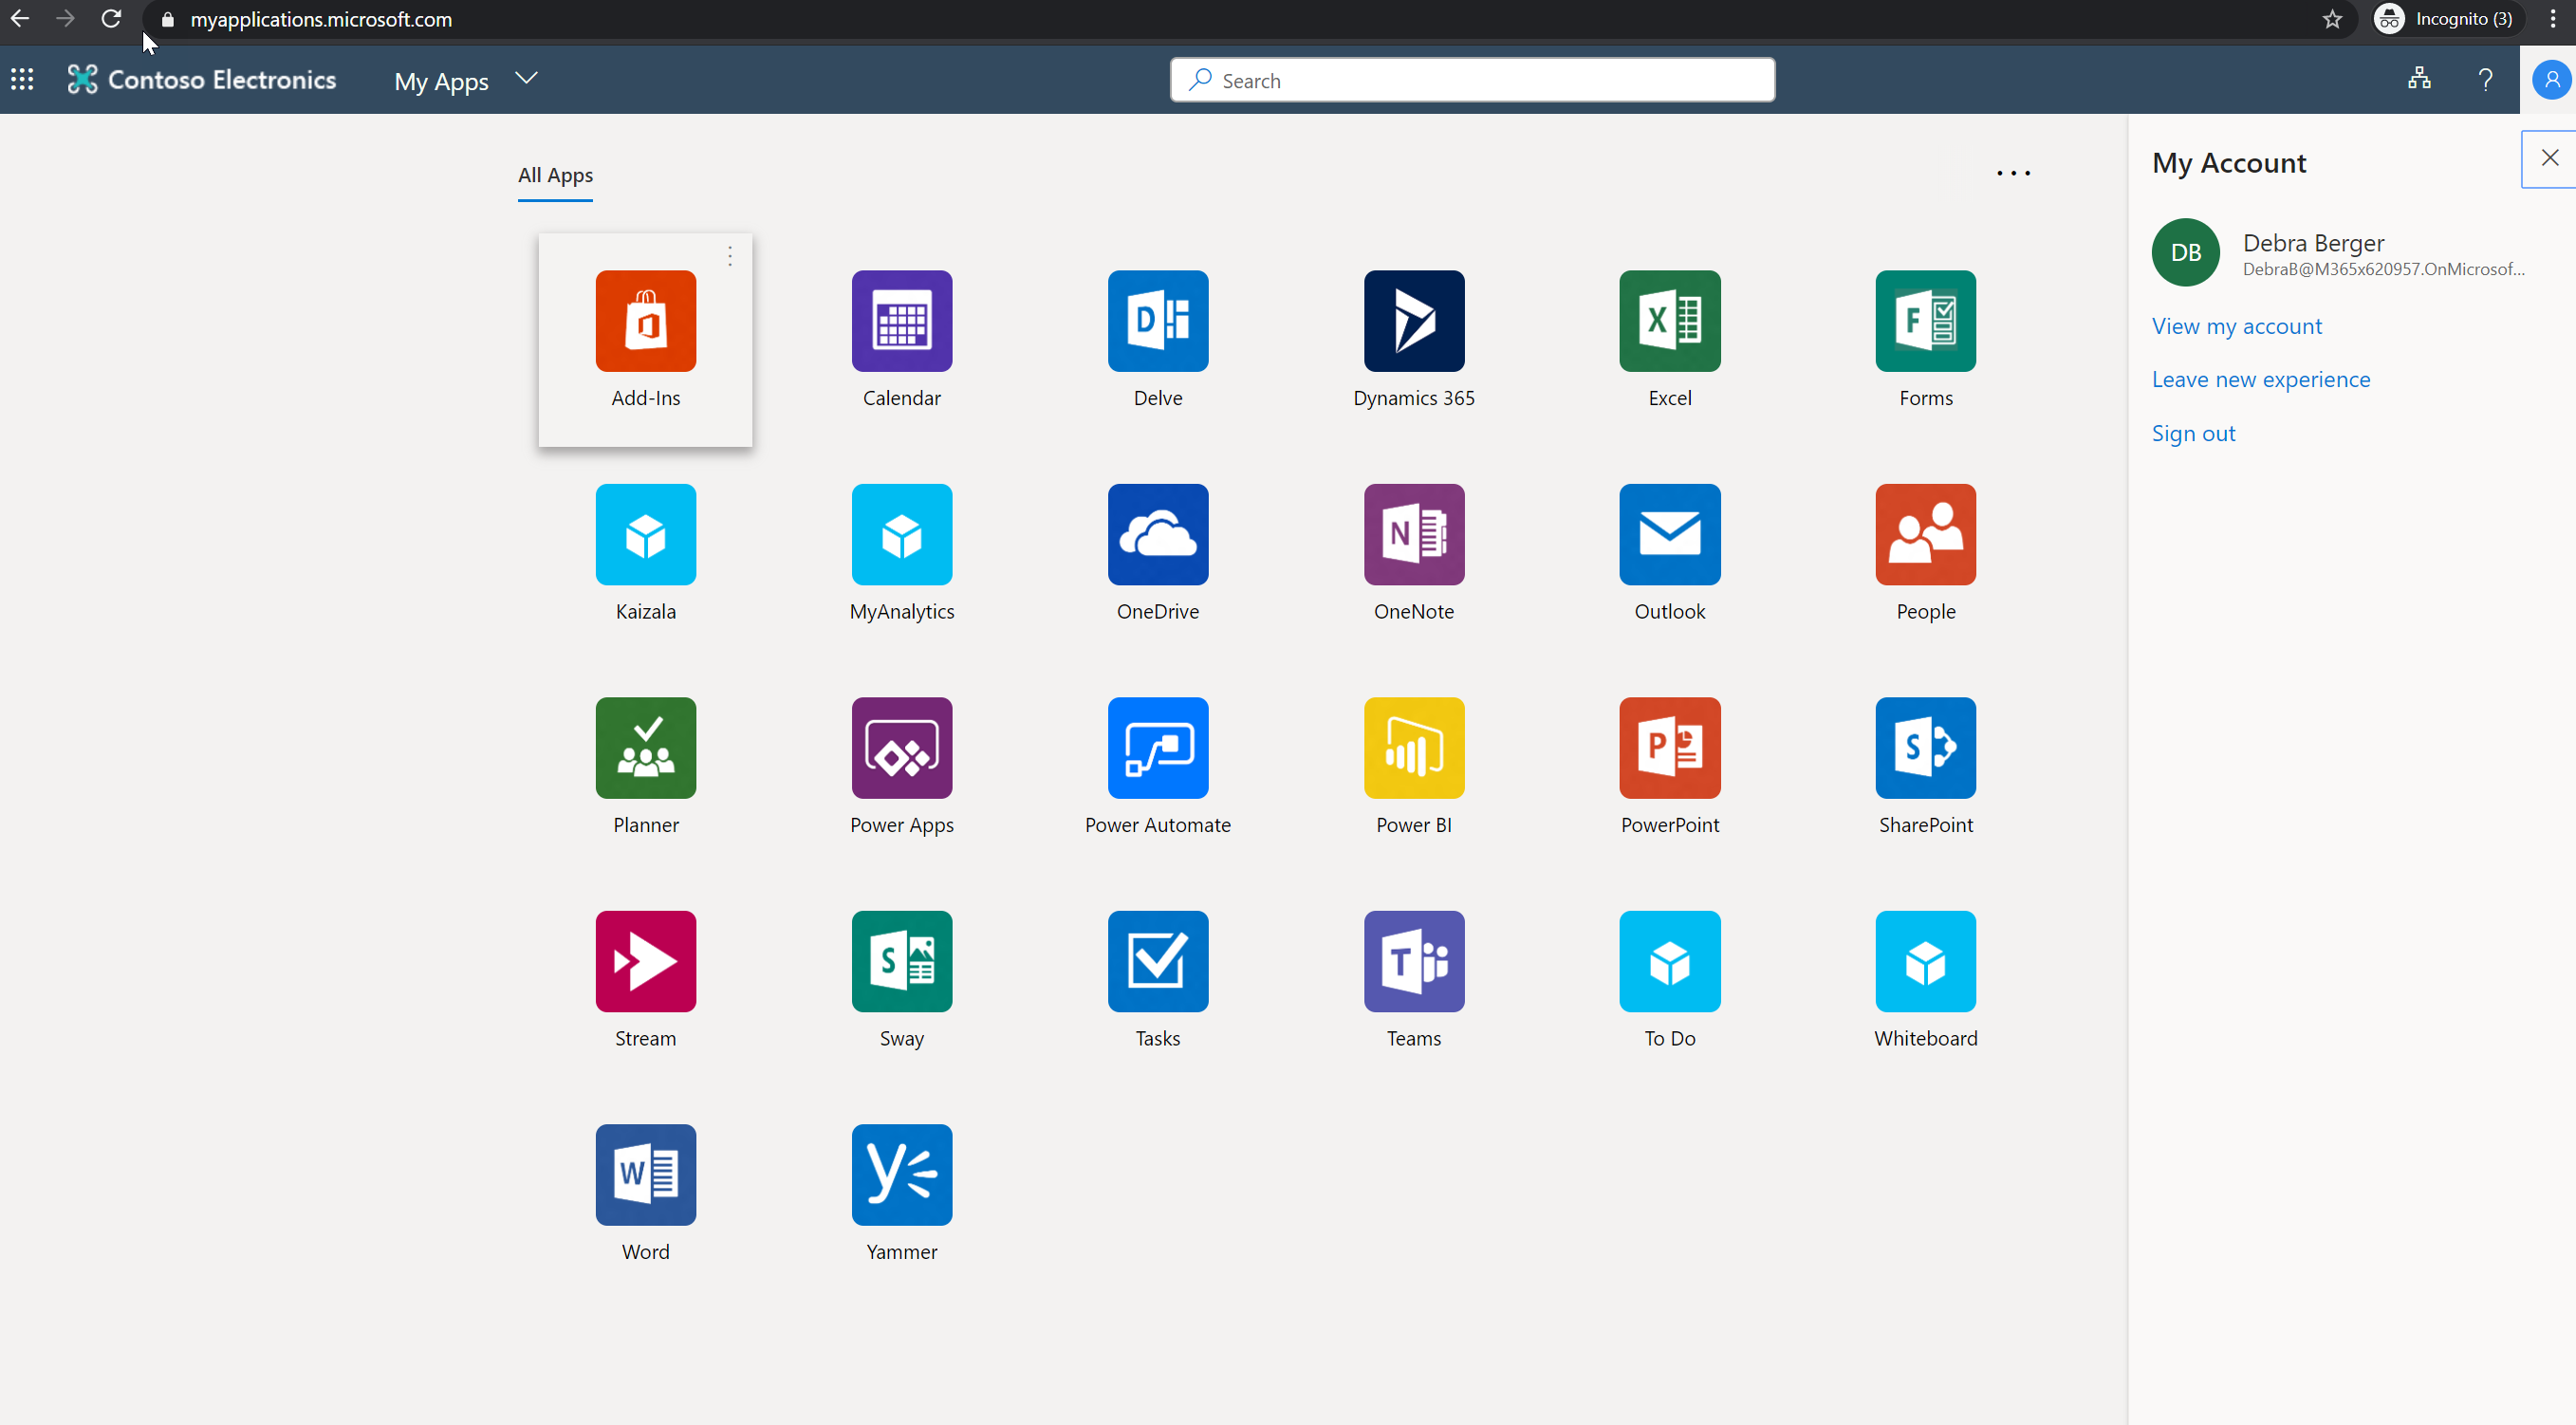
Then Debra logs in to https://myapplications.microsoft.com/ and she can see LinkedIn App as expected.
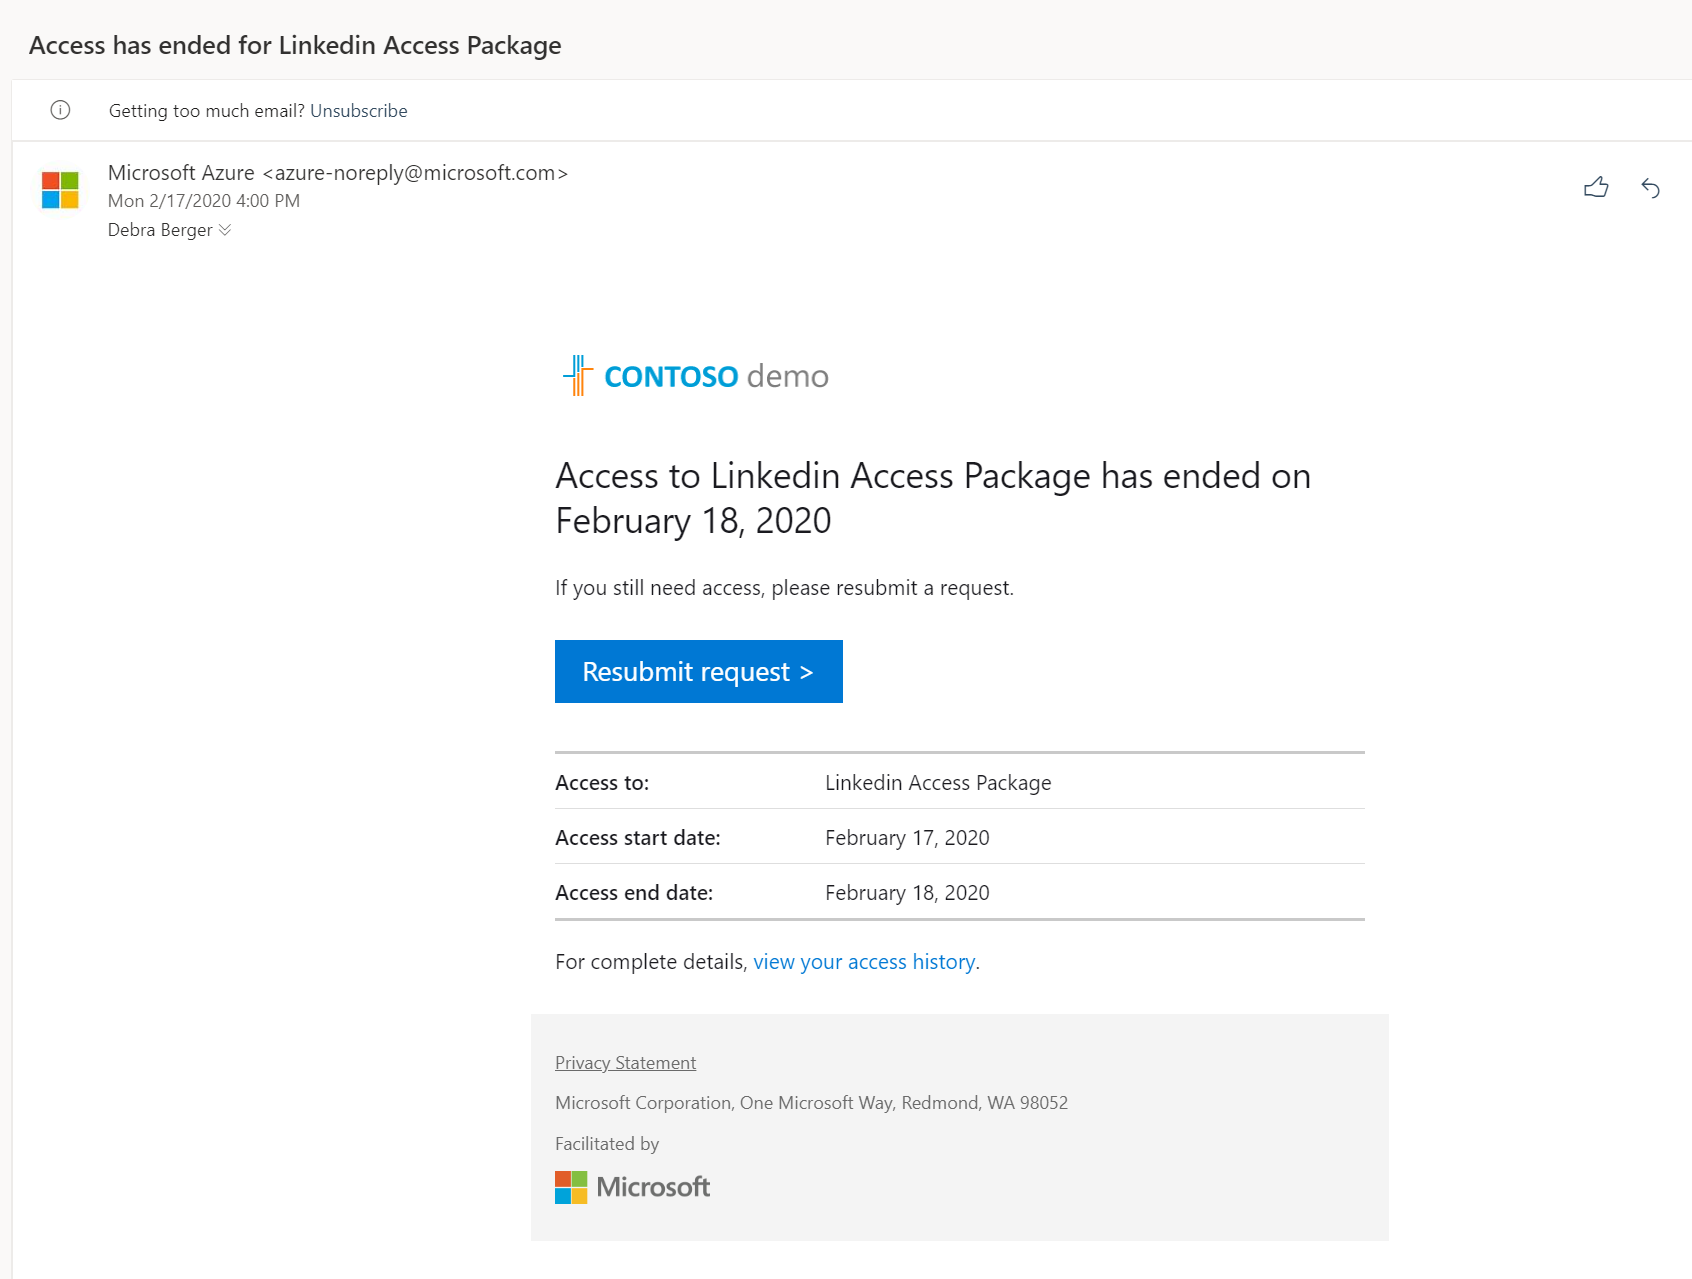
According to the access policy, this will only valid for 24 hours. After 24 hours user, Debra received an email saying access has ended.
Also, when login to https://myapplications.microsoft.com/ users no longer can see the LinkedIn app.
This confirms the access package is working as expected. I hope now you have a better understanding of how we can use Azure AD access packages to manage access permissions. This marks the end of this blog post. If you have any further questions about this feel free to contact me on rebeladm@live.com also follow me on twitter @rebeladm to get updates about new blog posts.




2 Comments