If you worked with SCCM or VDI solutions you may already know that creating & managing system images is a painful task. If you are using Microsoft Intune as your MDM solution, we can use Intune & Windows autopilot feature to enroll & prepare device for the production use without worrying about re-build or applying custom operating system images. Windows autopilot is a windows 10 feature which can use to pre-configure, reset, repurpose, recover devices. In this demo I am going to demonstrate how to prepare & enroll windows 10 device in to Microsoft Intune using Windows autopilot.
Prerequisites
1. Windows 10 version 1703 or higher must be used. Supported editions are:
• Pro
• Pro Education
• Pro for Workstations
• Enterprise
• Education
2. One of the Azure Active Directory (automatic MDM enrollment and company branding features) and MDM subscription:
• Microsoft 365 Business subscriptions
• Microsoft 365 F1 subscriptions
• Microsoft 365 Enterprise E3 or E5 subscriptions, which include all Windows 10, Office 365, and EM+S features (Azure AD and Intune)
• Enterprise Mobility + Security E3 or E5 subscriptions, which include all needed Azure AD and Intune features
• Azure Active Directory Premium P1 or P2 and Intune subscriptions (or an alternative MDM service)
In my demo environment, I have windows 10 enterprise virtual machine with latest windows updates. Let’s see how we can enroll it to Azure Intune with Autopilot.
1. Log in to Azure Portal as Global Administrator
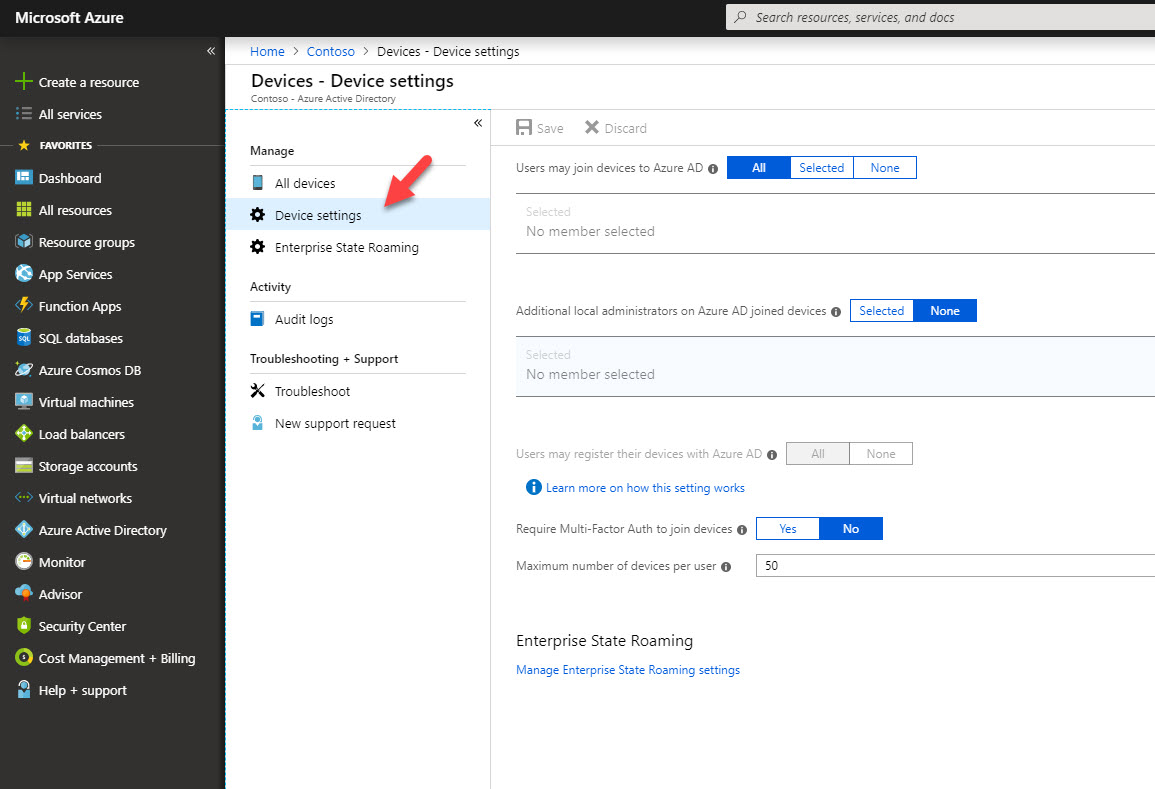
2. Go to Azure Active Directory | Devices | Device Settings
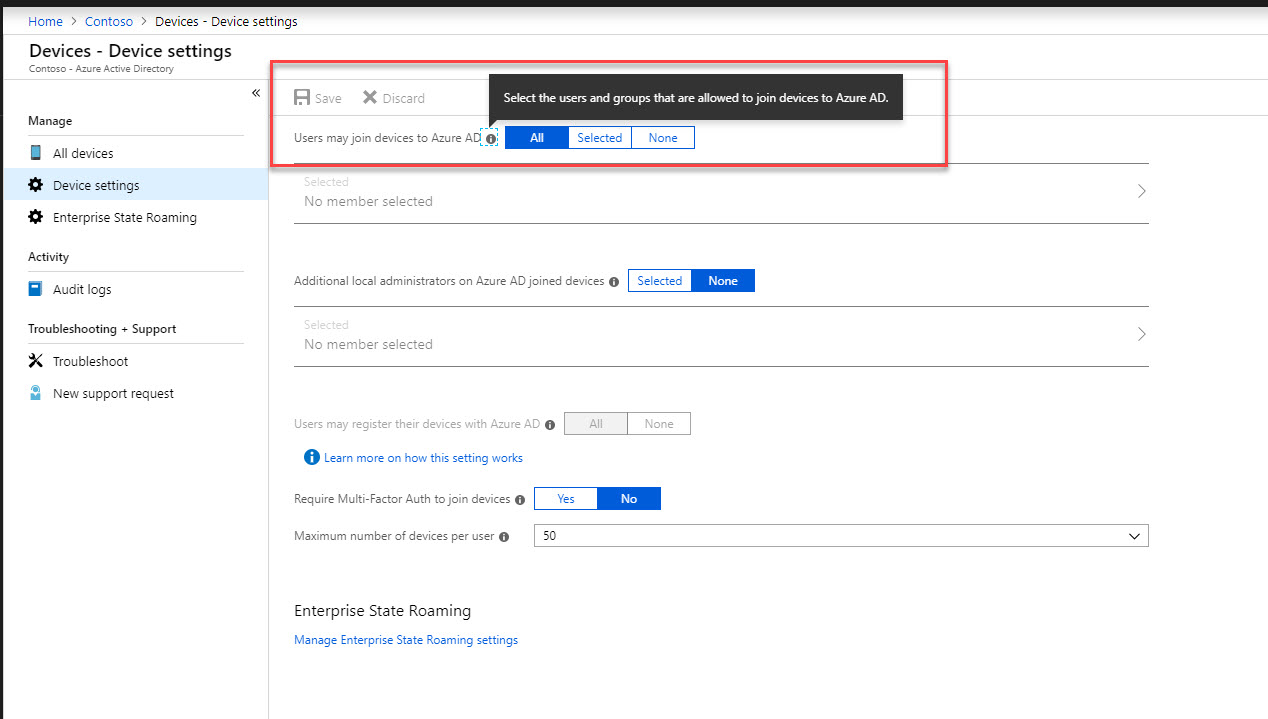
3. Check settings under Users may join devices to Azure AD, if you have selected users or group, make sure you going to use those accounts for the enrollment process. in my environment I allow All.
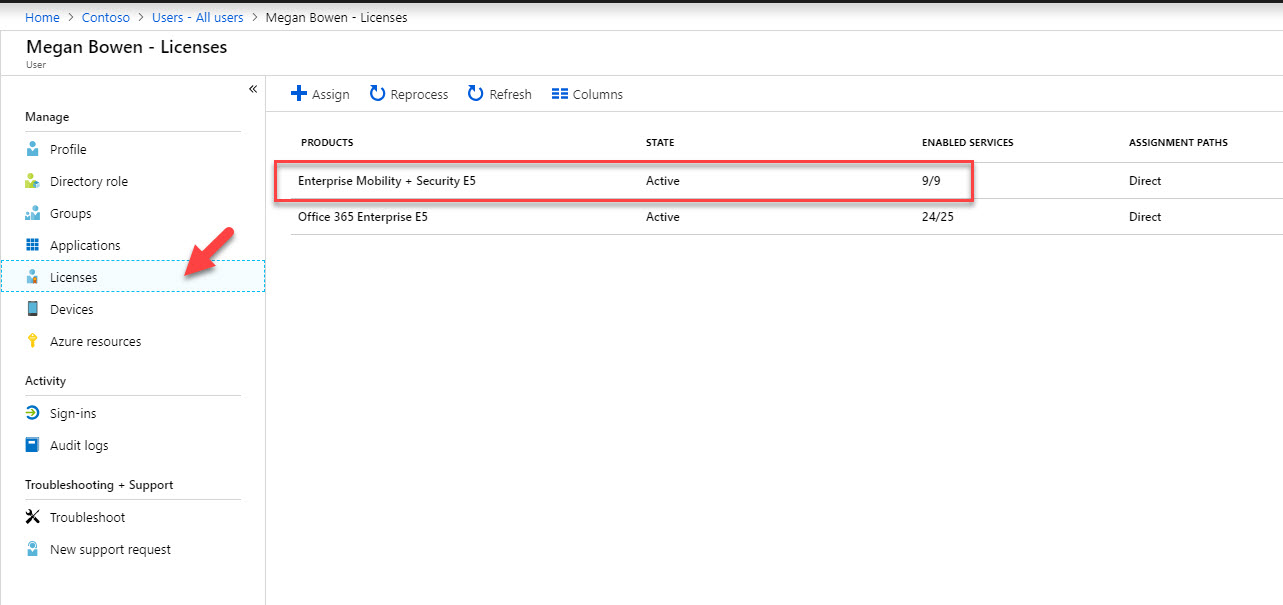
4. Then go to Azure Active Directory | Users. Then go to the user you going to use for the enrollment and verify relevant licenses are assigned.
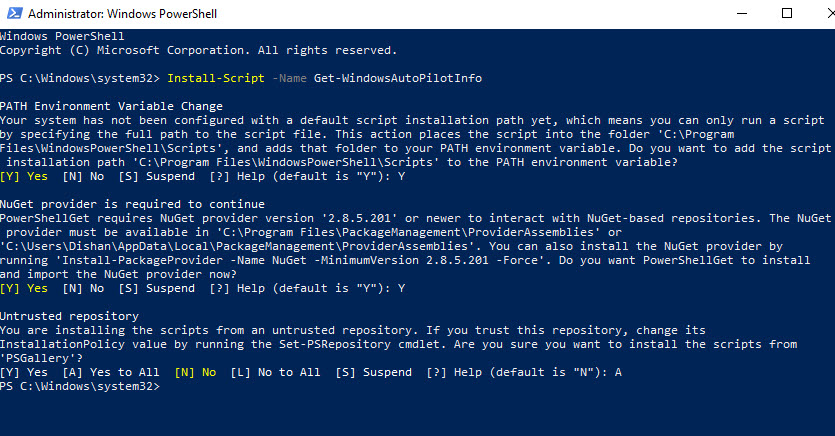
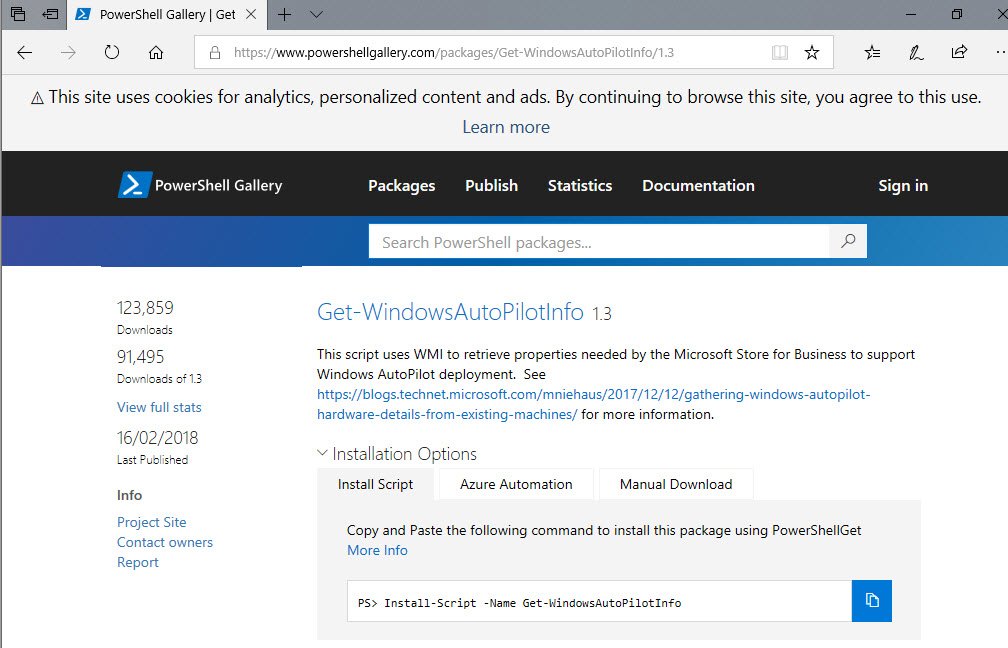
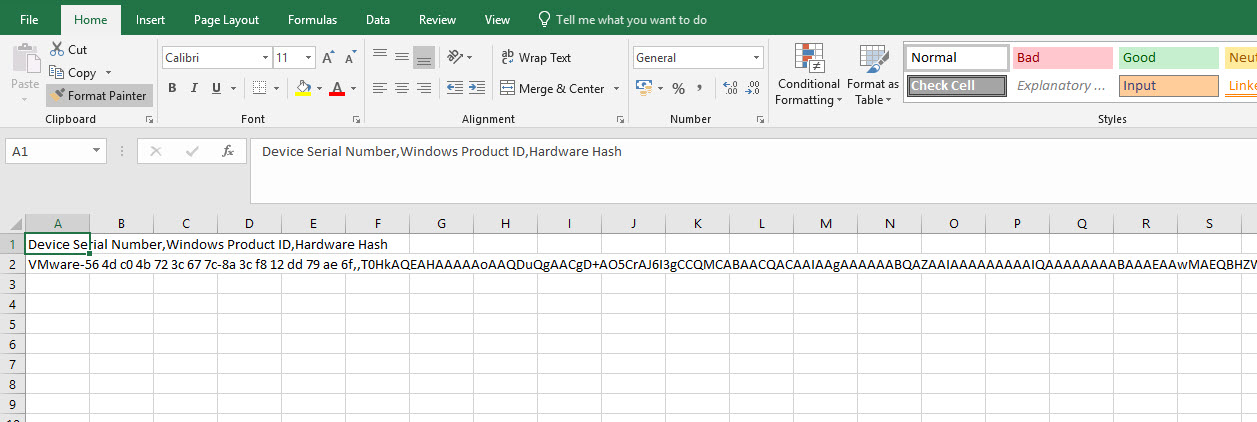
5. In order to import devices, we need find out serial numbers, Windows product IDs & hardware hashes. To do that log in to your windows 10 machine and install following script. Then we can create CSV with relevant info.
Install-Script -Name Get-WindowsAutoPilotInfo
You also can download script from https://aka.ms/Autopilotshell and install manually.
6. Then run script Get-WindowsAutoPilotInfo.ps1 -Outputfile C:\hardware.csv and export the relevant data in to CSV file.
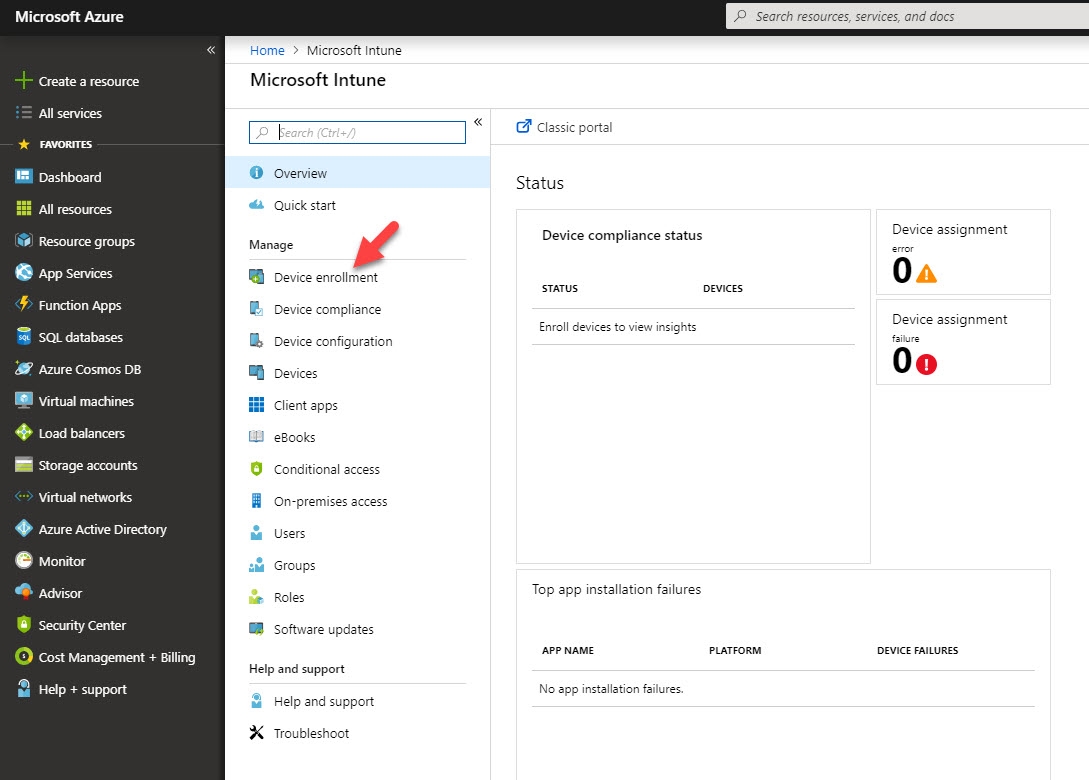
7. Go to Azure portal | All services | Intune | Device Enrollment
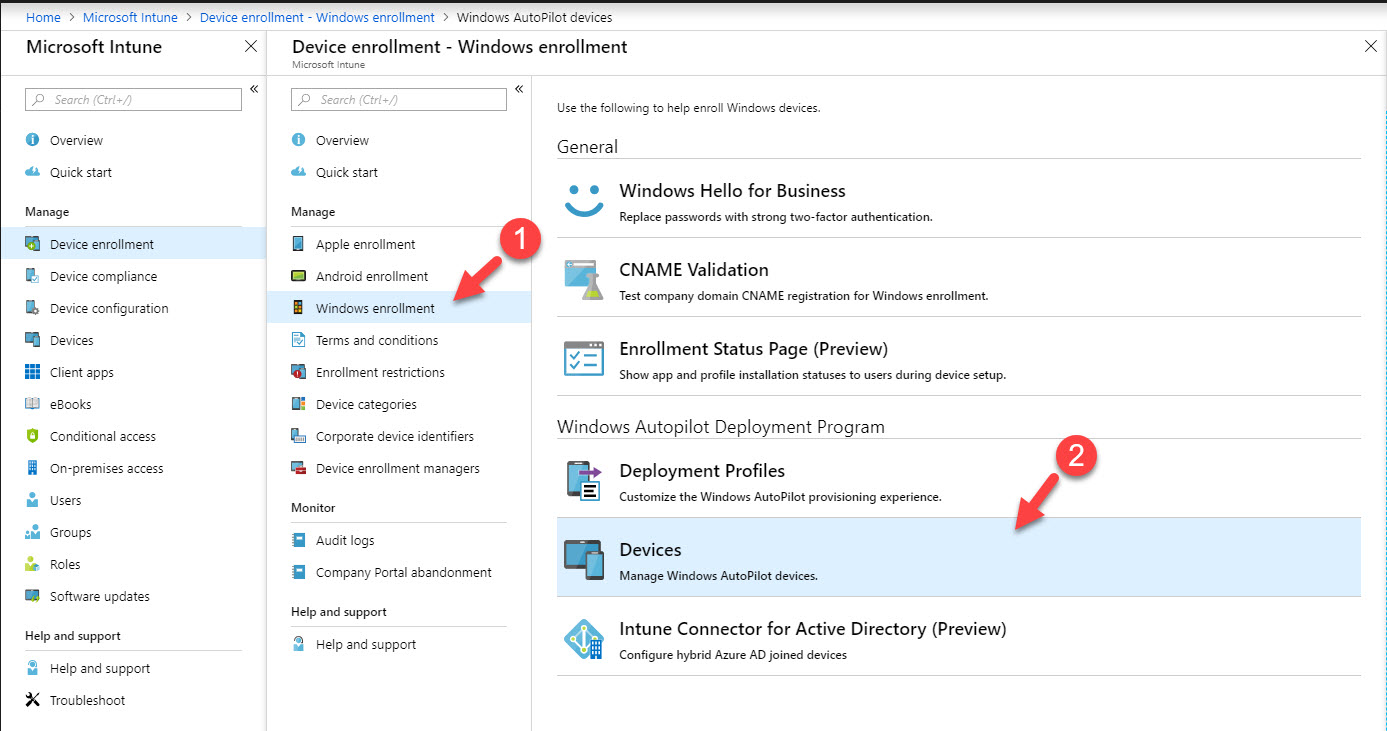
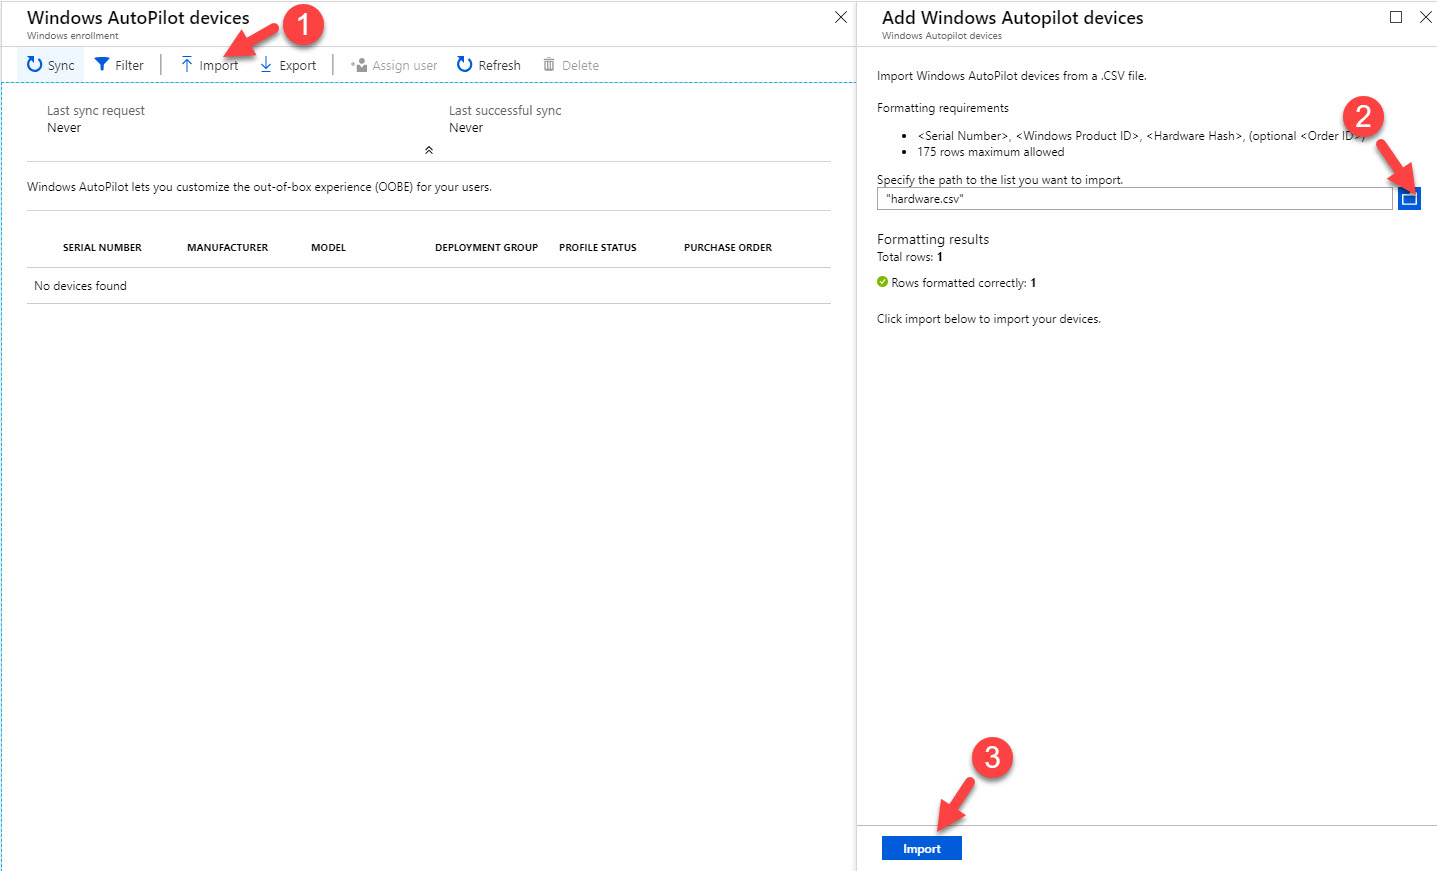
8. Then click on Windows enrollment | Devices
9. Click on Import & select the CSV file we generated. Then click on Import to proceed.
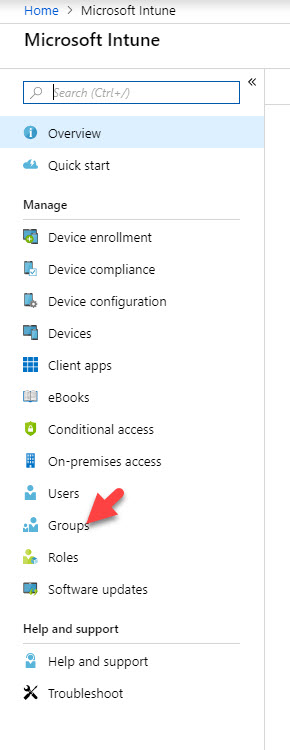
10. Once process is completed, go back to intune home page and click on Groups
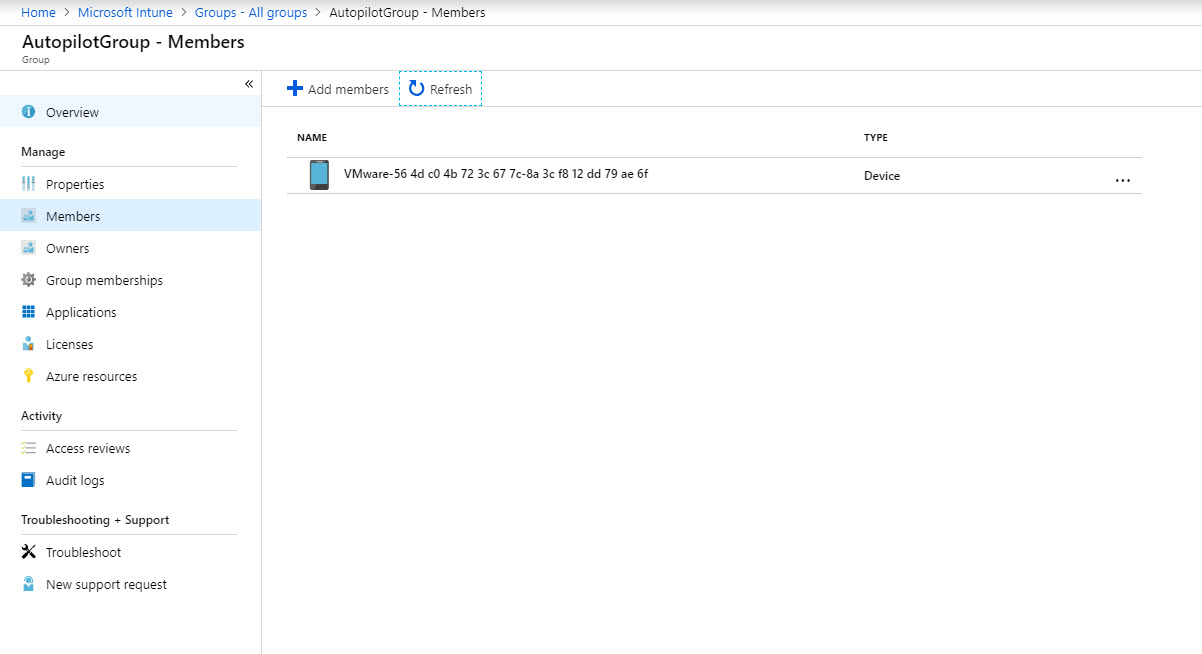
11. Then click on New group. in here I create a new group and assigned a device, which I am going to use with autopilot demo.
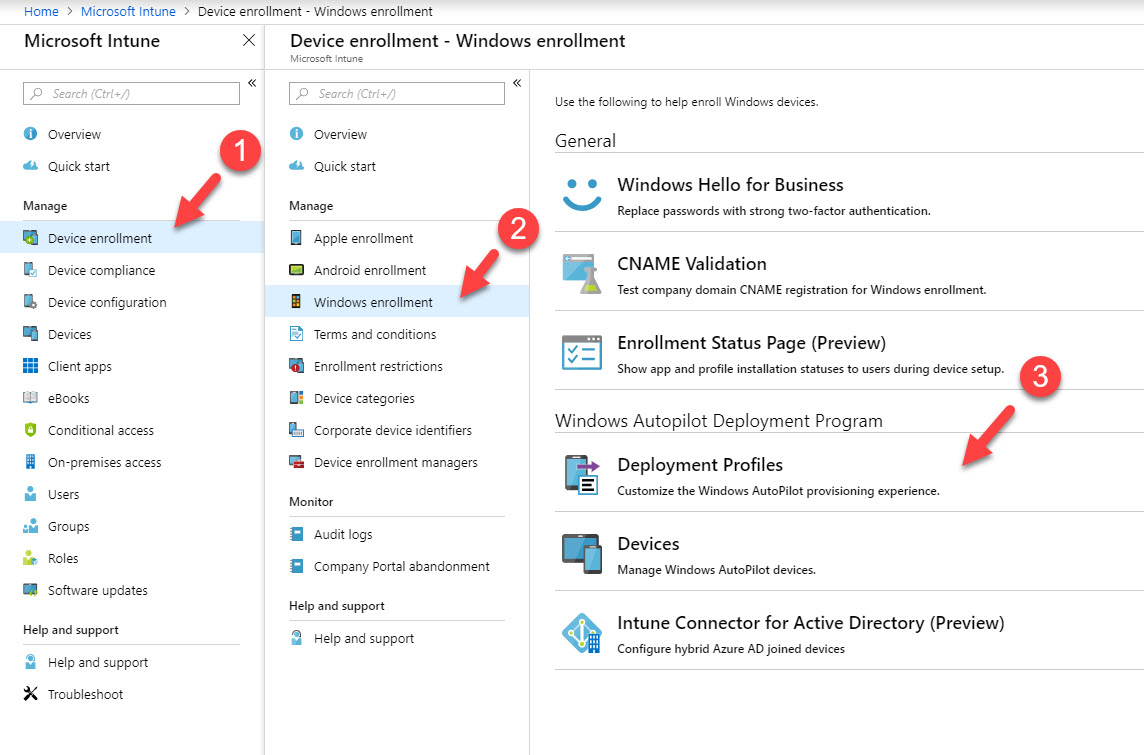
12. As next step we need to create deployment profile. To do that go to Intune | Device enrollment | Windows enrollment | Deployment Profiles
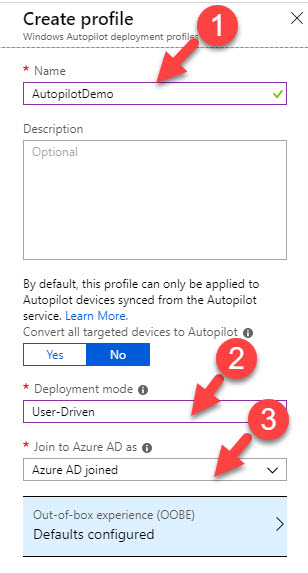
13. Then click on Create Profile
14. In next window, we can define the profile settings. In here I am using User-Driven mode as Deployment mode. When this mode in use, it will ask user credentials to register the device. It is also can set to self-deploying method but it is still in preview. If you use this method you need to have latest Windows 10 inside preview installed.
These devices also will be Azure AD Join device.
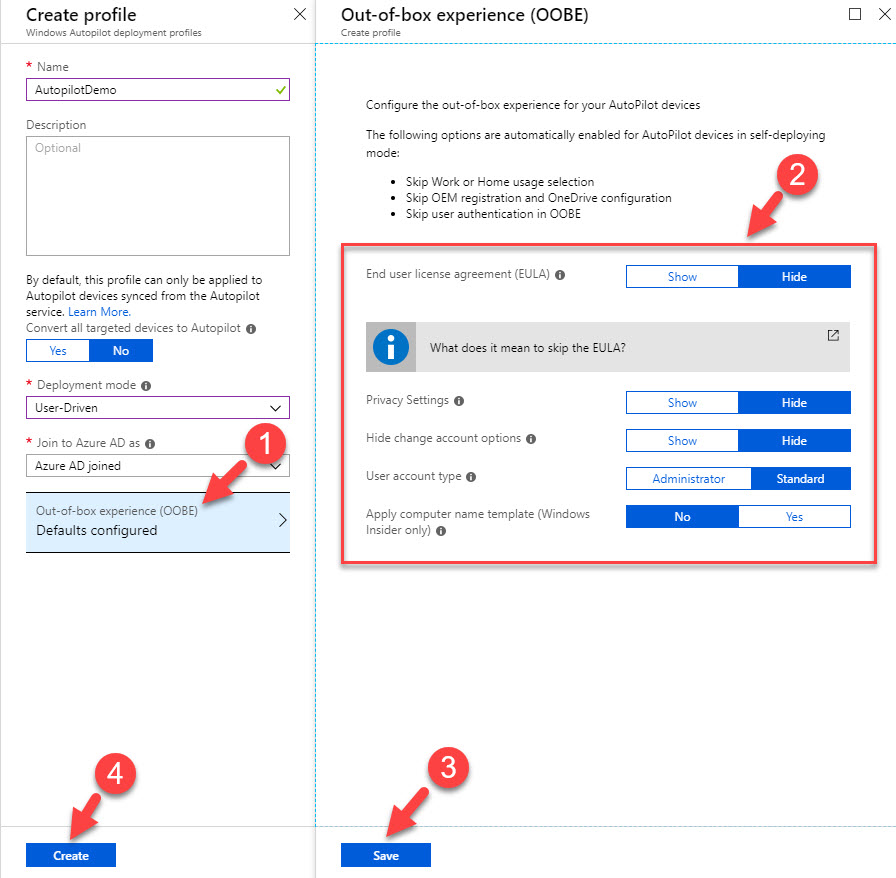
15. In order to change OOBE experience, click on OOBE option. There you can keep default settings or modify those. Once done, click on Save & then Create.
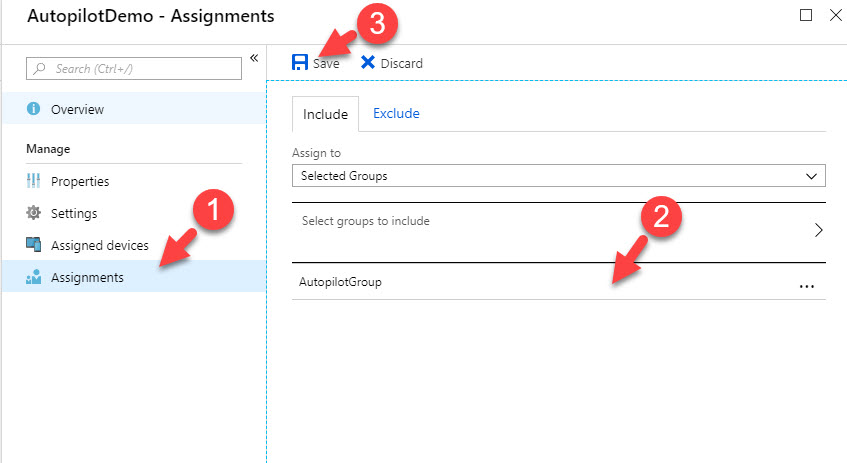
16. Then go back to profile page and click on newly created profile. Go to Assignments and select the new device group we created. Then click on Save to assign the profile to targeted devices.
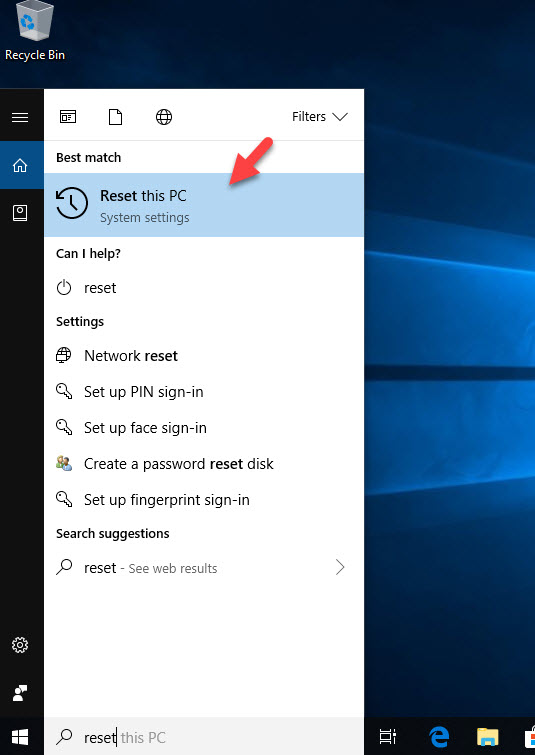
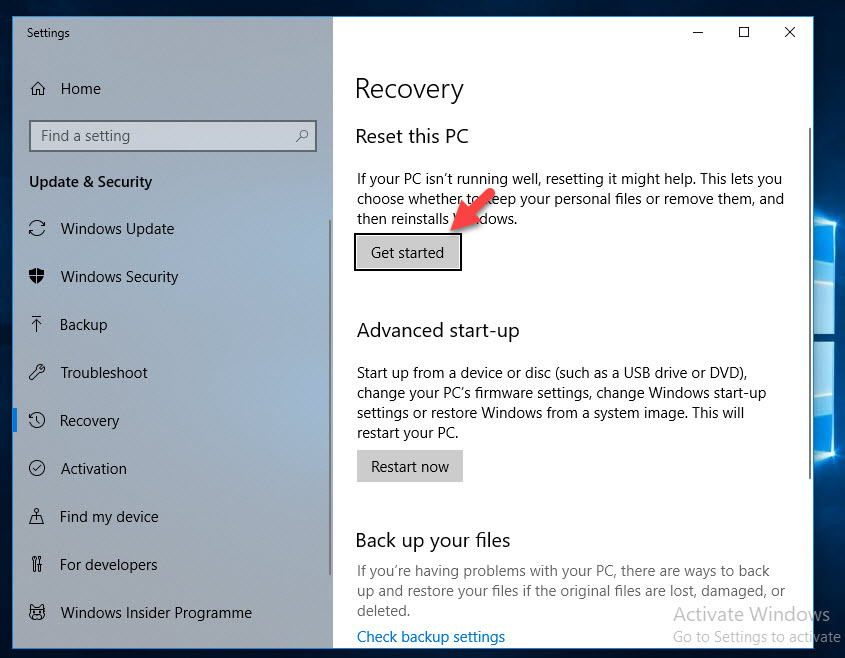
17. Now it is ready for testing. Log back to Windows 10 machine and search for Reset PC setting.
18. Then click on Get started
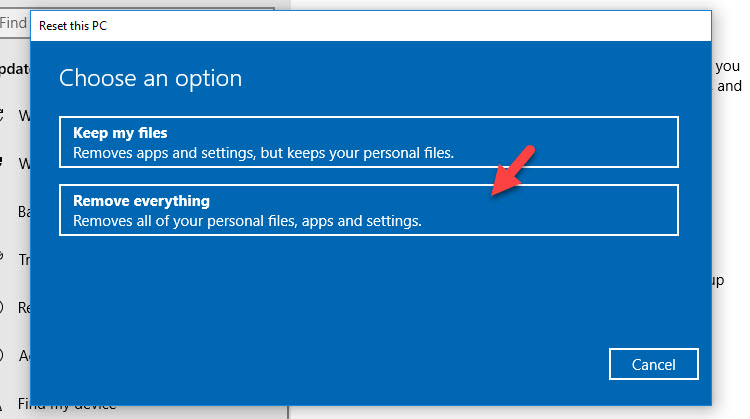
19. In new pop up, click on Remove everything option.
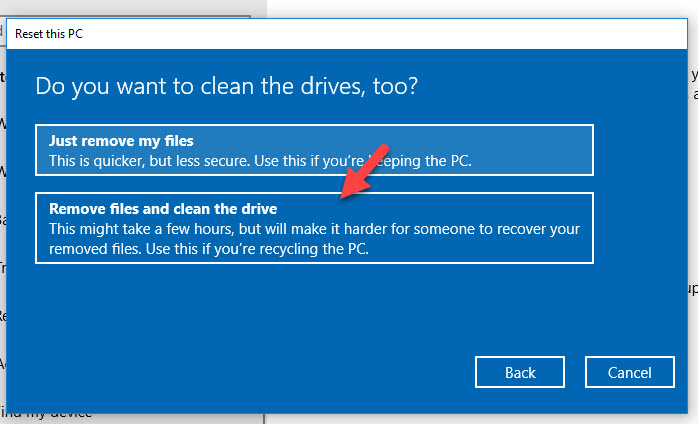
20. In next window, click on Remove files and clean the drive option
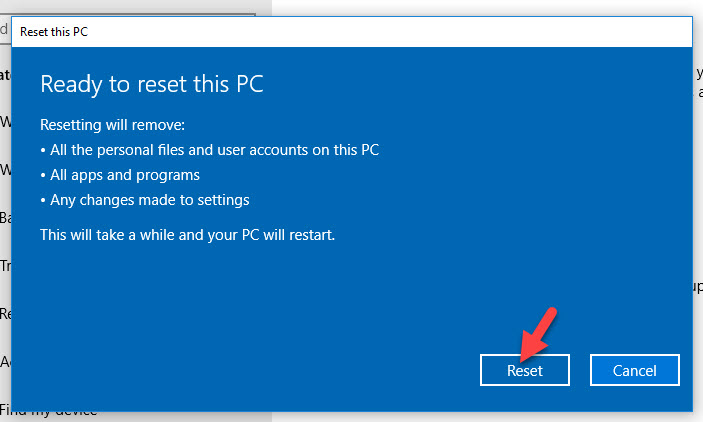
21. Then click on Reset to proceed.
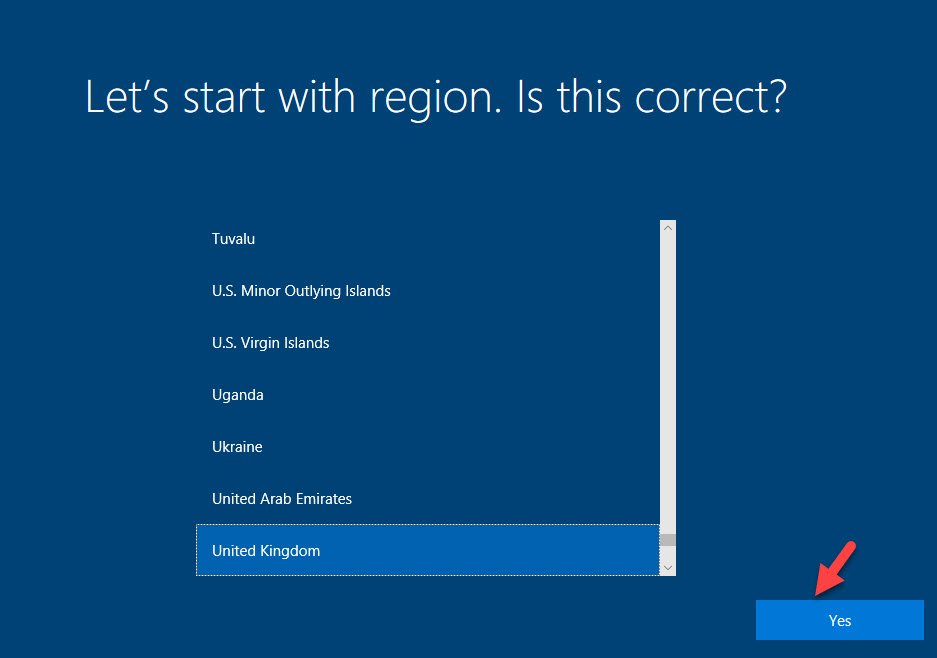
22. System will restart after few minutes. In first screen select the region and click on yes
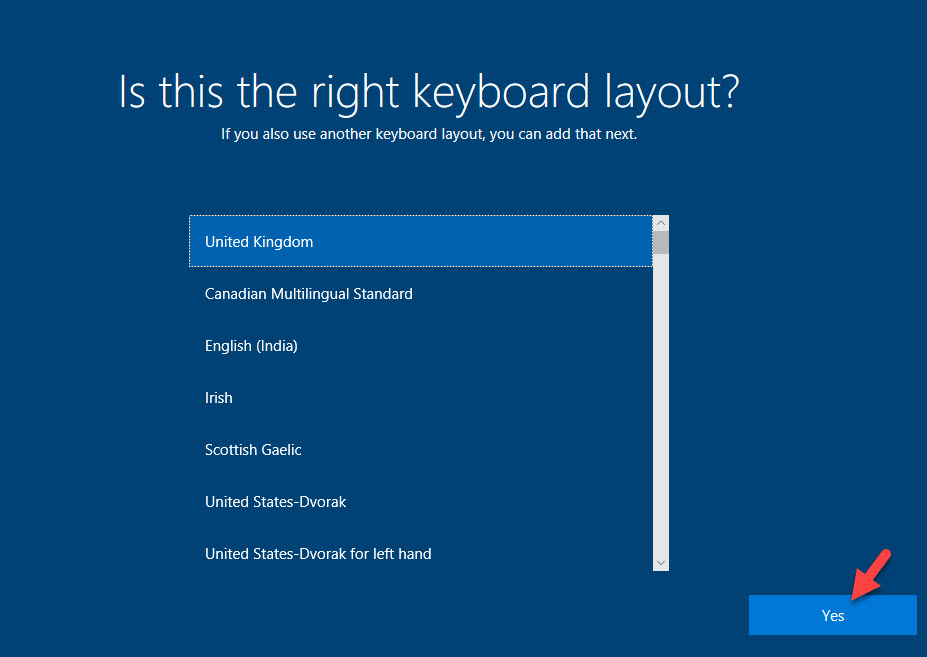
23. In next window, select the keyboard layout
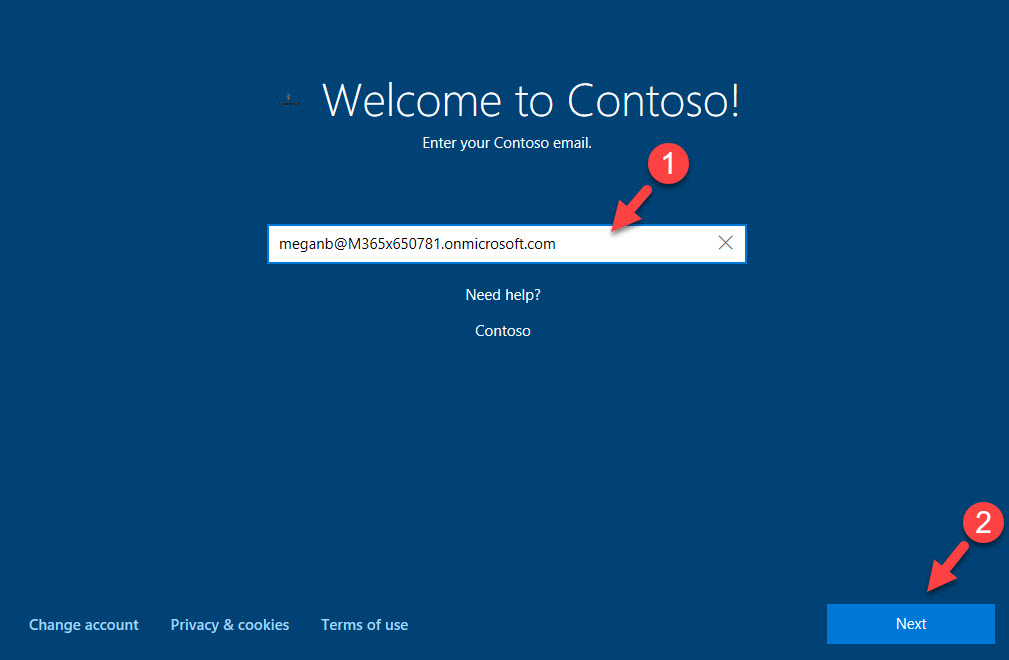
24. Then it goes to the domain register process, type Azure AD account in here.
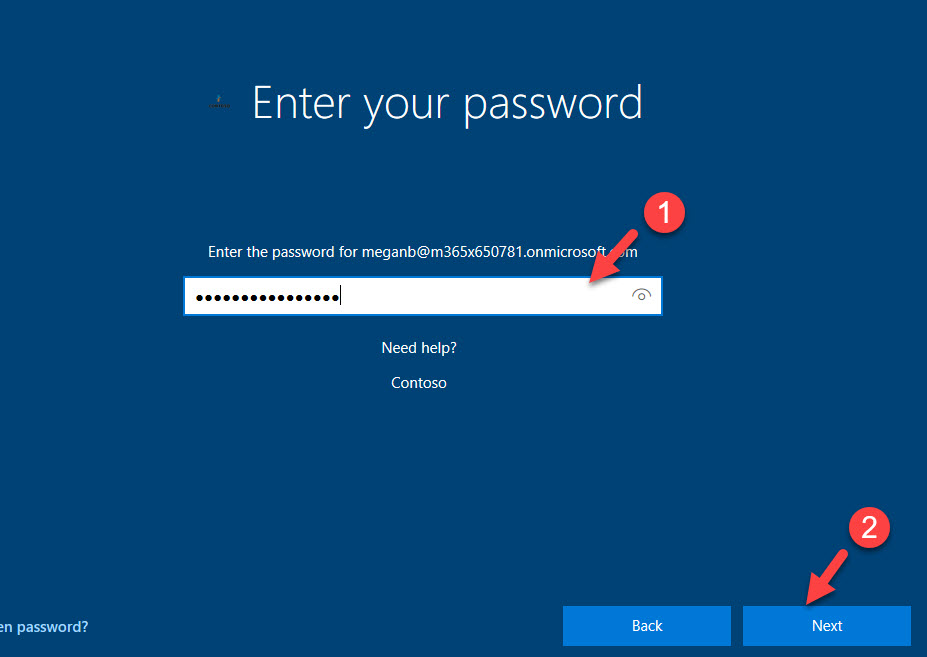
25. In next window type the password.
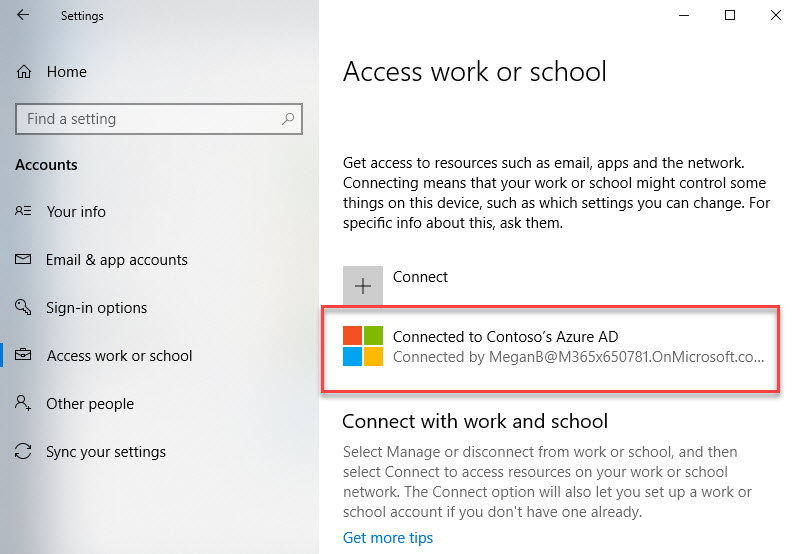
26. After login process completes, we can see the device is joined to Azure AD successfully.
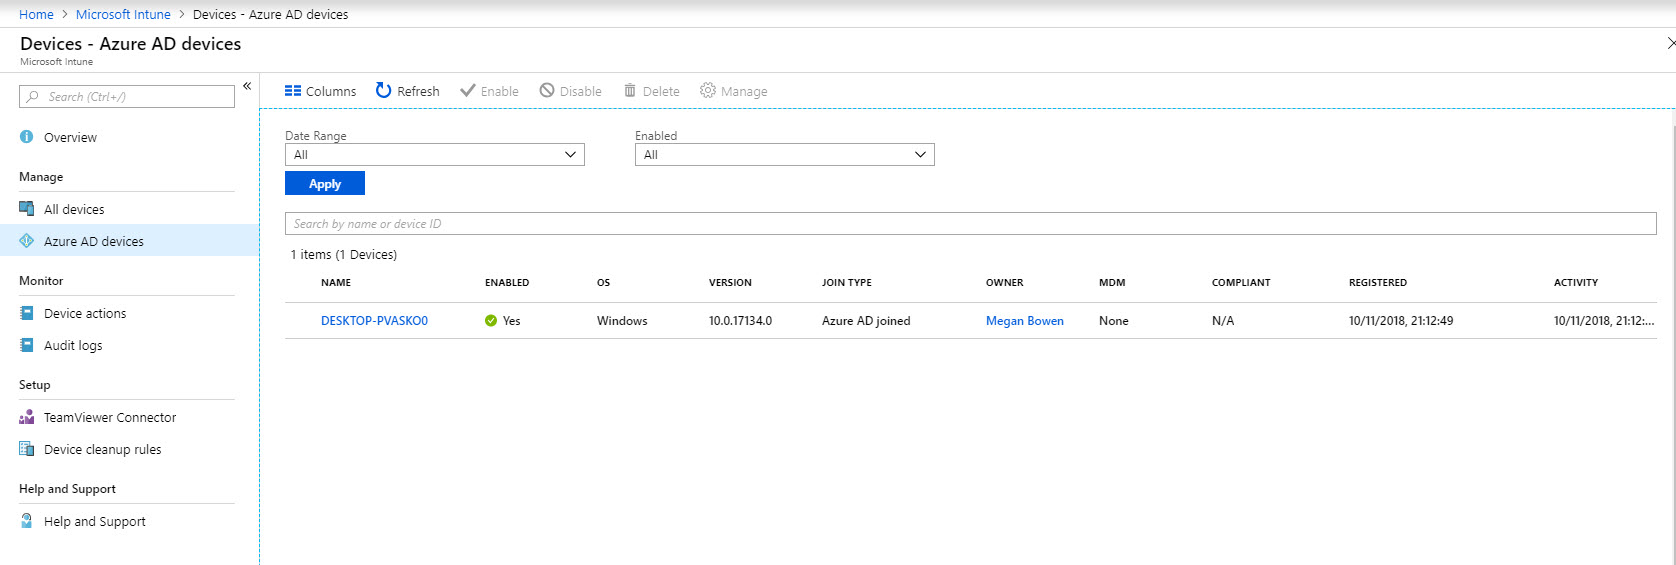
27. We also can see the device under Intune | Devices
As we can see the enrollment process via autopilot method was successful. This marks the end of this blog post. If you have any further questions feel free to contact me on rebeladm@live.com also follow me on twitter @rebeladm to get updates about new blog posts.


