Active DirectoryAzure servicesMicrosoft Technologies

Azure AD now support macOS Conditional Access – Let’s see it in action!

Azure AD conditional access policies allows to provide conditional based access to cloud workloads. 

In one of my previous blog post I explain it in detail what is conditional access policy and how we can configure it. you can find it on http://www.rebeladmin.com/2017/07/conditional-access-policies-azure-active-directory/ . I highly recommend to read it before we continue on this post. 

In Condition Access Policy, there are two main section.

Assignments –  This is where we can define conditions applying to user environment such as users and groups, applications, device platform, login locations etc.

Access Control –  This is to control access for the users and groups when they comply with the conditions specified in the “assignments” section. it can be either allow access or deny access. 

Under Assignment section we can define device platforms involves in the condition. Before when I wrote my previous post it was only supporting for following platforms.

• Android

• iOS

• Windows Phone

• Windows

From November 14th 2017, Azure AD add macOS to the list. With this update following OS versions, applications, and browsers are supported on macOS for conditional access:

Operating Systems

macOS 10.11+

Applications

Microsoft Office 2016 for macOS v15.34 and later

Microsoft Teams

Web applications (via Application Proxy)

Browsers

Safari

Chrome

In original documentation, it didn’t say anything about web apps but in this demo, I am going to use conditional access with on-premises web app which is publish to internet using Azure Application Proxy. I wrote article about application proxy while ago and it can access via http://www.rebeladmin.com/2017/06/azure-active-directory-application-proxy-part-02/ 

Before start configuration, let me explain little bit about my environment. I have on-premises domain environment with therebeladmin.com. I integrated it with Azure AD Premium and I have healthy sync. I have on-premises webapp and I have published it to internet using Azure Application Proxy so I can use Azure AD authentication with it. webapp can access via https://webapp-myrebeladmin.msappproxy.net/webapp/ 

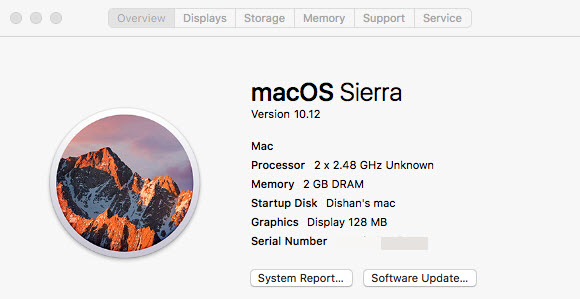
I have a mac with sierra running. In this demo, I am going to setup a conditional access policy to block access to webapp if the request coming from a mac environment. 

mac01

In order to configure this, 
1) Log on to Azure as global admin
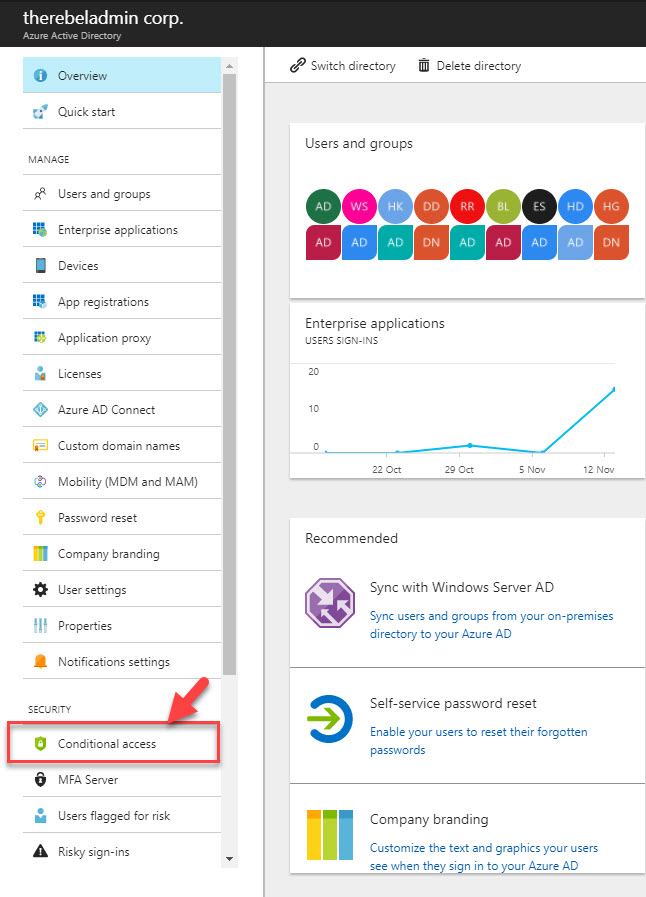
2) Click on Azure Active Directory from left menu.
 
mac2
 
3) Then in Azure Active Directory panel, click on Conditional Access under security section. 
 
mac3
 
4) It will load up the conditional access window. Click on + New Policy to create new policy. 
 
mac4
 
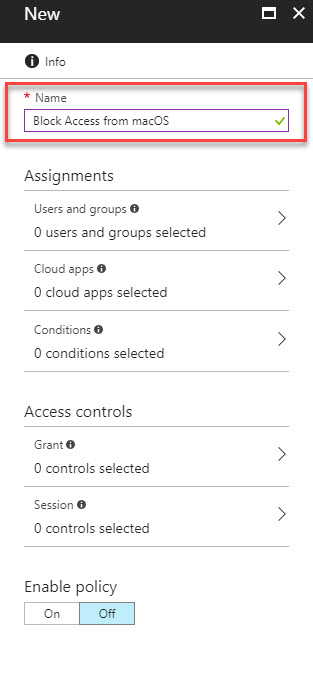
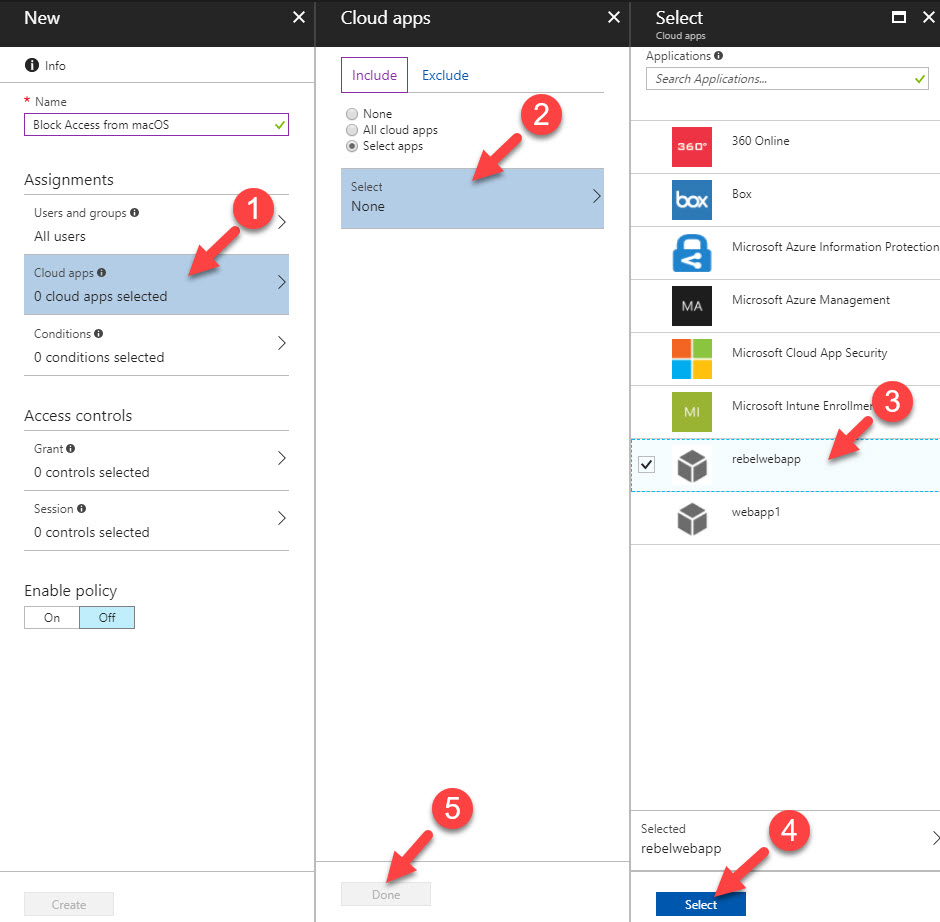
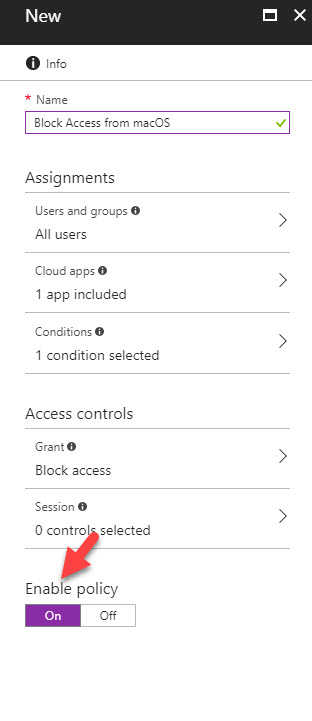
5) It will open up policy window where we can define policy settings. First thing first, provide a name for policy. in my case I will use “Block access from macOS
 
mac5
 
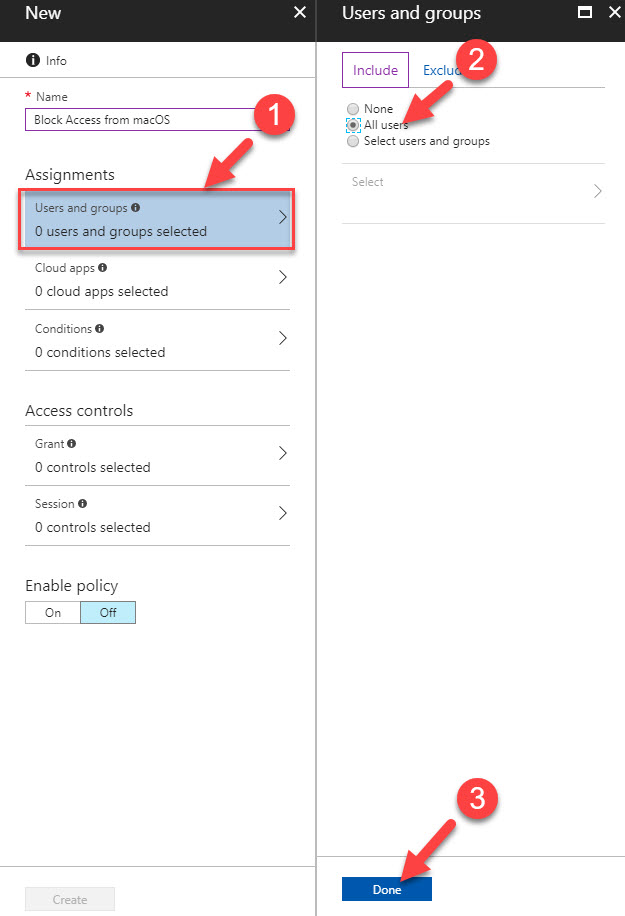
6) Then click on User and groups to define target users for the policy. in this demo, I am going to target All users. once selection is done click on Done
 
mac6
 
7) Then Click on Clouds Apps to select application for the policy. in my policy, I am going to target rebelwebapp. Once selection is done click on Select and the Done to complete the process. 
 
mac7
 
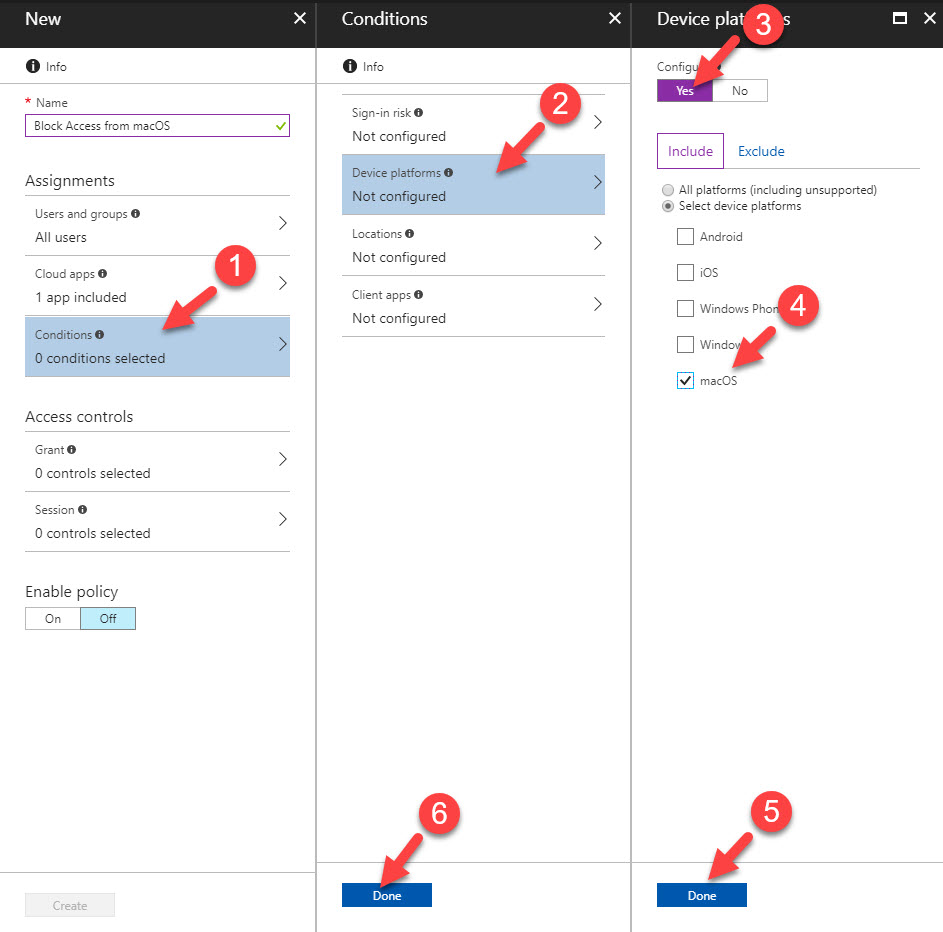
8) Next step is to define the conditions. In order to do that click on Conditions option. In here I am only worrying about device platforms. To select platforms, click on option Device Platforms. Then to enable the condition click on Yes under configure and then under include tab select macOS. After that click on Done in both windows to complete the process. 
 
mac8
 
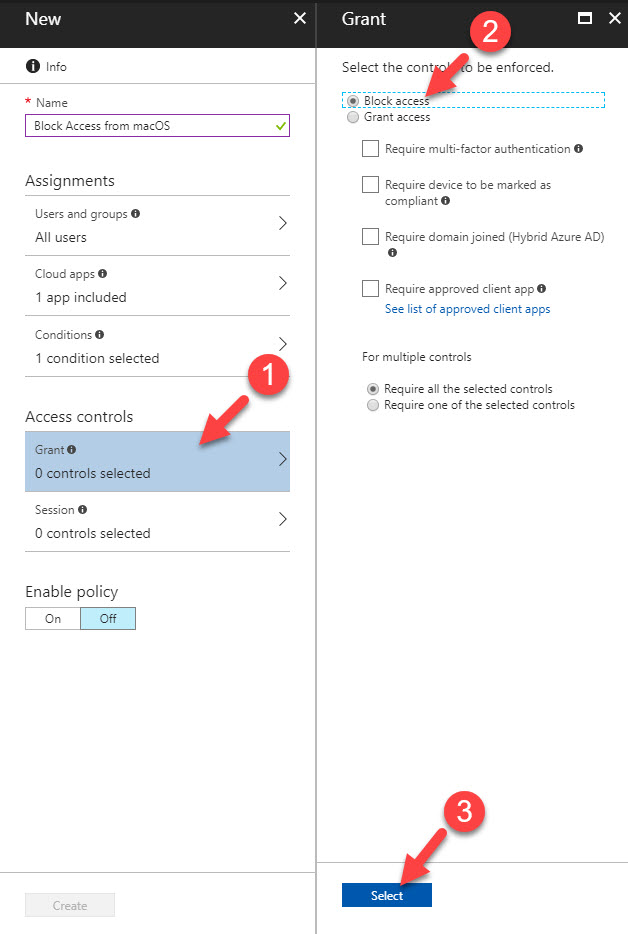
9) Next step to define access control rules. To do that click on Grant under access controls section. in my demo, I am going to block access to app. So, I am selecting block access option. Once selection is done click on select to complete the action. 
 
mac9
 
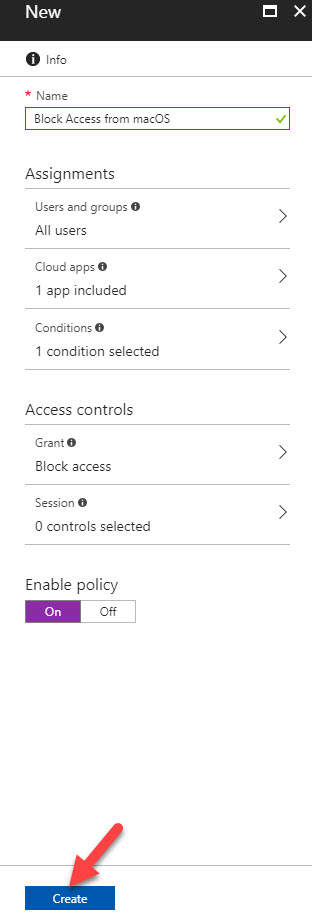
10) Now policy is ready. To enable it click On tab under Enable Policy option. 
 
mac10
 
11) Then to create the policy, click on Create button. 
 
mac11
 
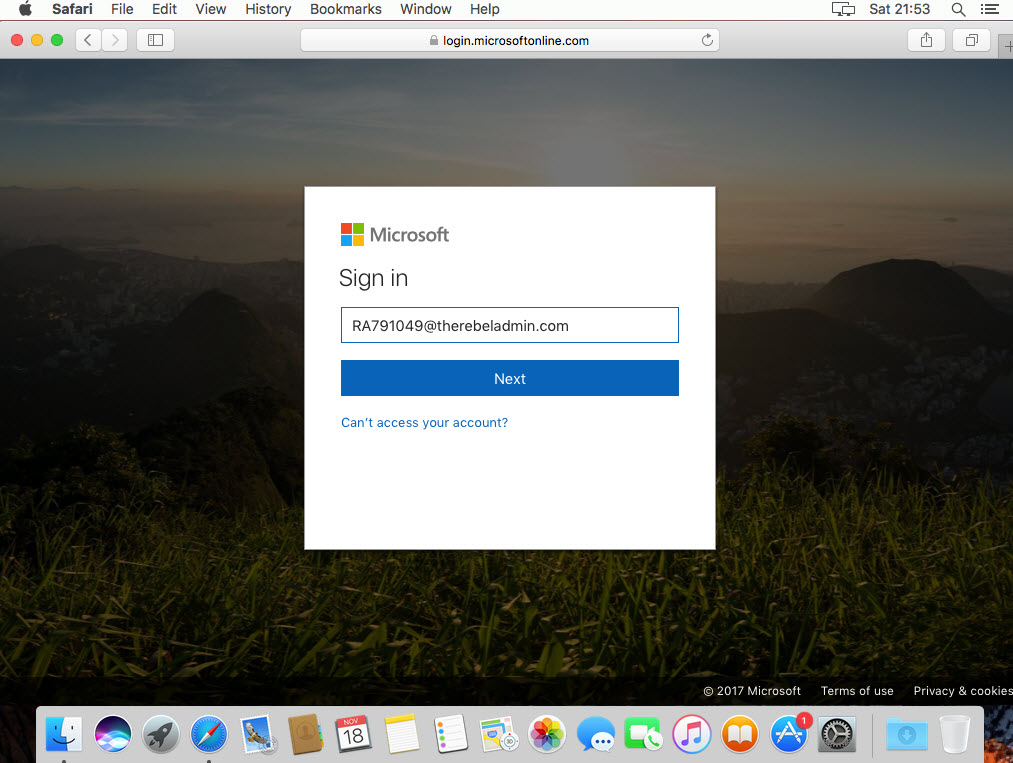
12) Now policy is ready and next step is to test it. in order to do that I am using webapp url via mac. As soon as I access url, it asks for login.
 
mac12
 
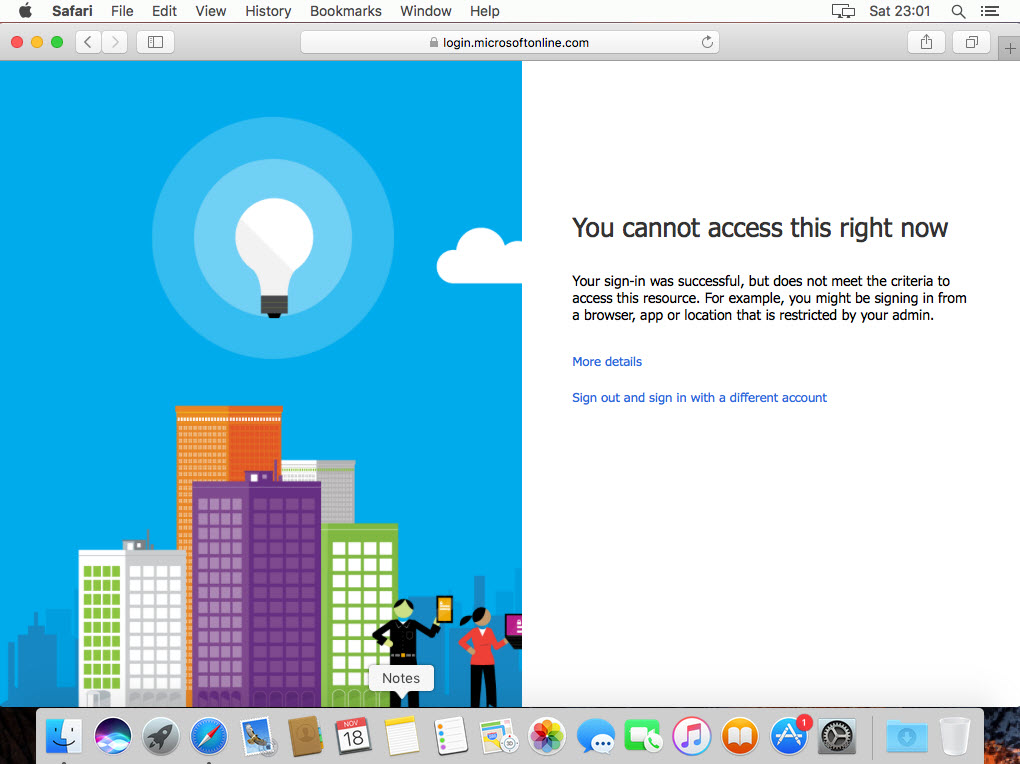
13) As soon as I type user name and password, I get following response saying it is not allowed. 
 
mac13
 
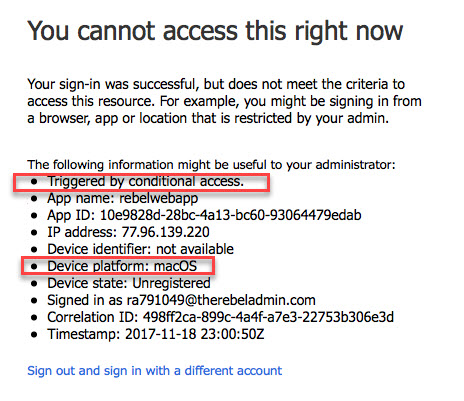
14) If we click on More Details it gives more info about error. As expected it was due to the conditional access policy we set up. Nice ha!!
 
mac14
 
So as expected, conditional access with macOS working fine. This is another good step forward. Well done Microsoft! This marks the end of this blog post. If you have any questions feel free to contact me on rebeladm@live.com also follow me on twitter @rebeladm to get updates about new blog posts.  
Related posts
Azure services

Microsoft Entra Permissions Management – Part 01 – Azure Subscription Onboarding

Today’s rapidly changing digital landscape creates new identity and access challenges. Microsoft…
Read more
Cyber SecurityMicrosoft Entra IDMicrosoft Technologies

Microsoft Entra lifecycle workflows Part 02 - How to synchronize value for employeeHireDate attribute from on-premises Active Directory ?

In my previous blog post, I explained how we can automate JML (Joiners/Movers/Leavers) process by…
Read more
Azure servicesMicrosoft Entra IDMicrosoft Technologies

Step-by-Step Guide : Automate JML(Joiners/Movers/Leavers) process with Microsoft Entra lifecycle workflows

JML (Joiners/Movers/Leavers) process of an organization has a major impact on its security and…
Read more
Newsletter
Become a Trendsetter

Sign up and get the best of RebelAdmin, tailored for you.

Leave a Reply

Your email address will not be published. Required fields are marked *